Learn how to reuse plastic Easter eggs to make this Easter egg candle. I am all about reusing things around the house and figuring out what I create with them.
Table of Contents
Prefer to watch this project instead of reading it?
Some of the links are affiliate links, because I am an associate and I earn a small commission on them.
Easter Egg Candle Ingredients
Wax
This is a free standing candle, by that I mean that it’s not in a container. For candles like this we need to ensure that we are using a wax that is made for candles that do not stay in a container. The wax is harder and has a higher melting point than a regular soy wax. It is normally called Pillar Wax or will state that it is suitable for pillar candles.
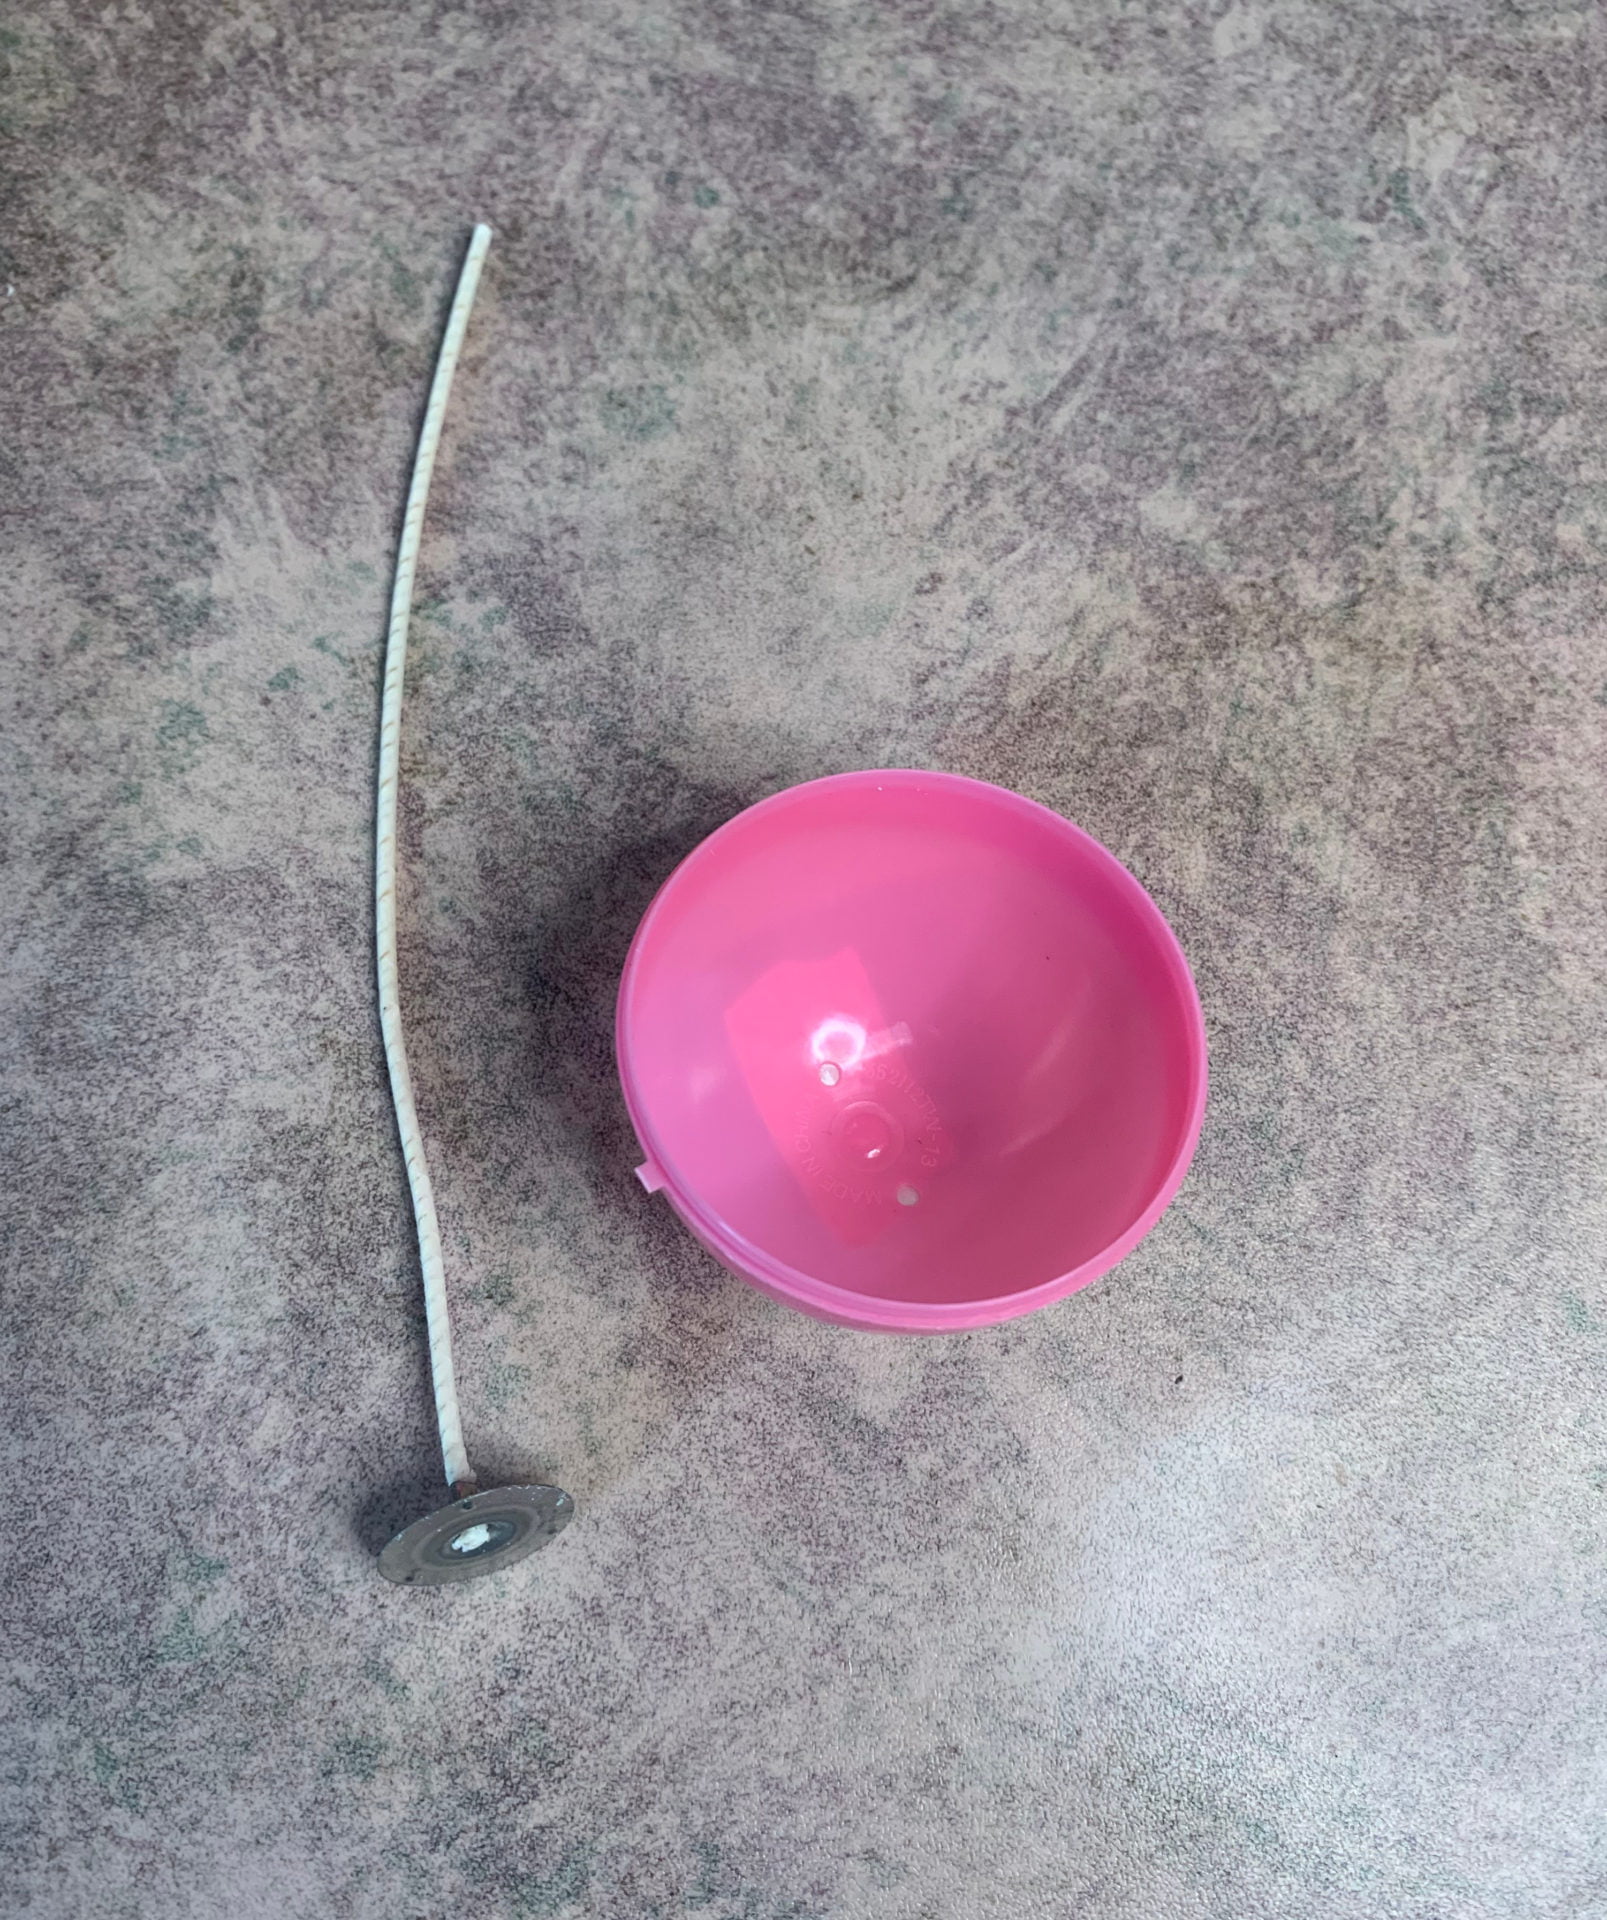
Candle Mold
For the candle mold, I used a regular plastic easter egg.
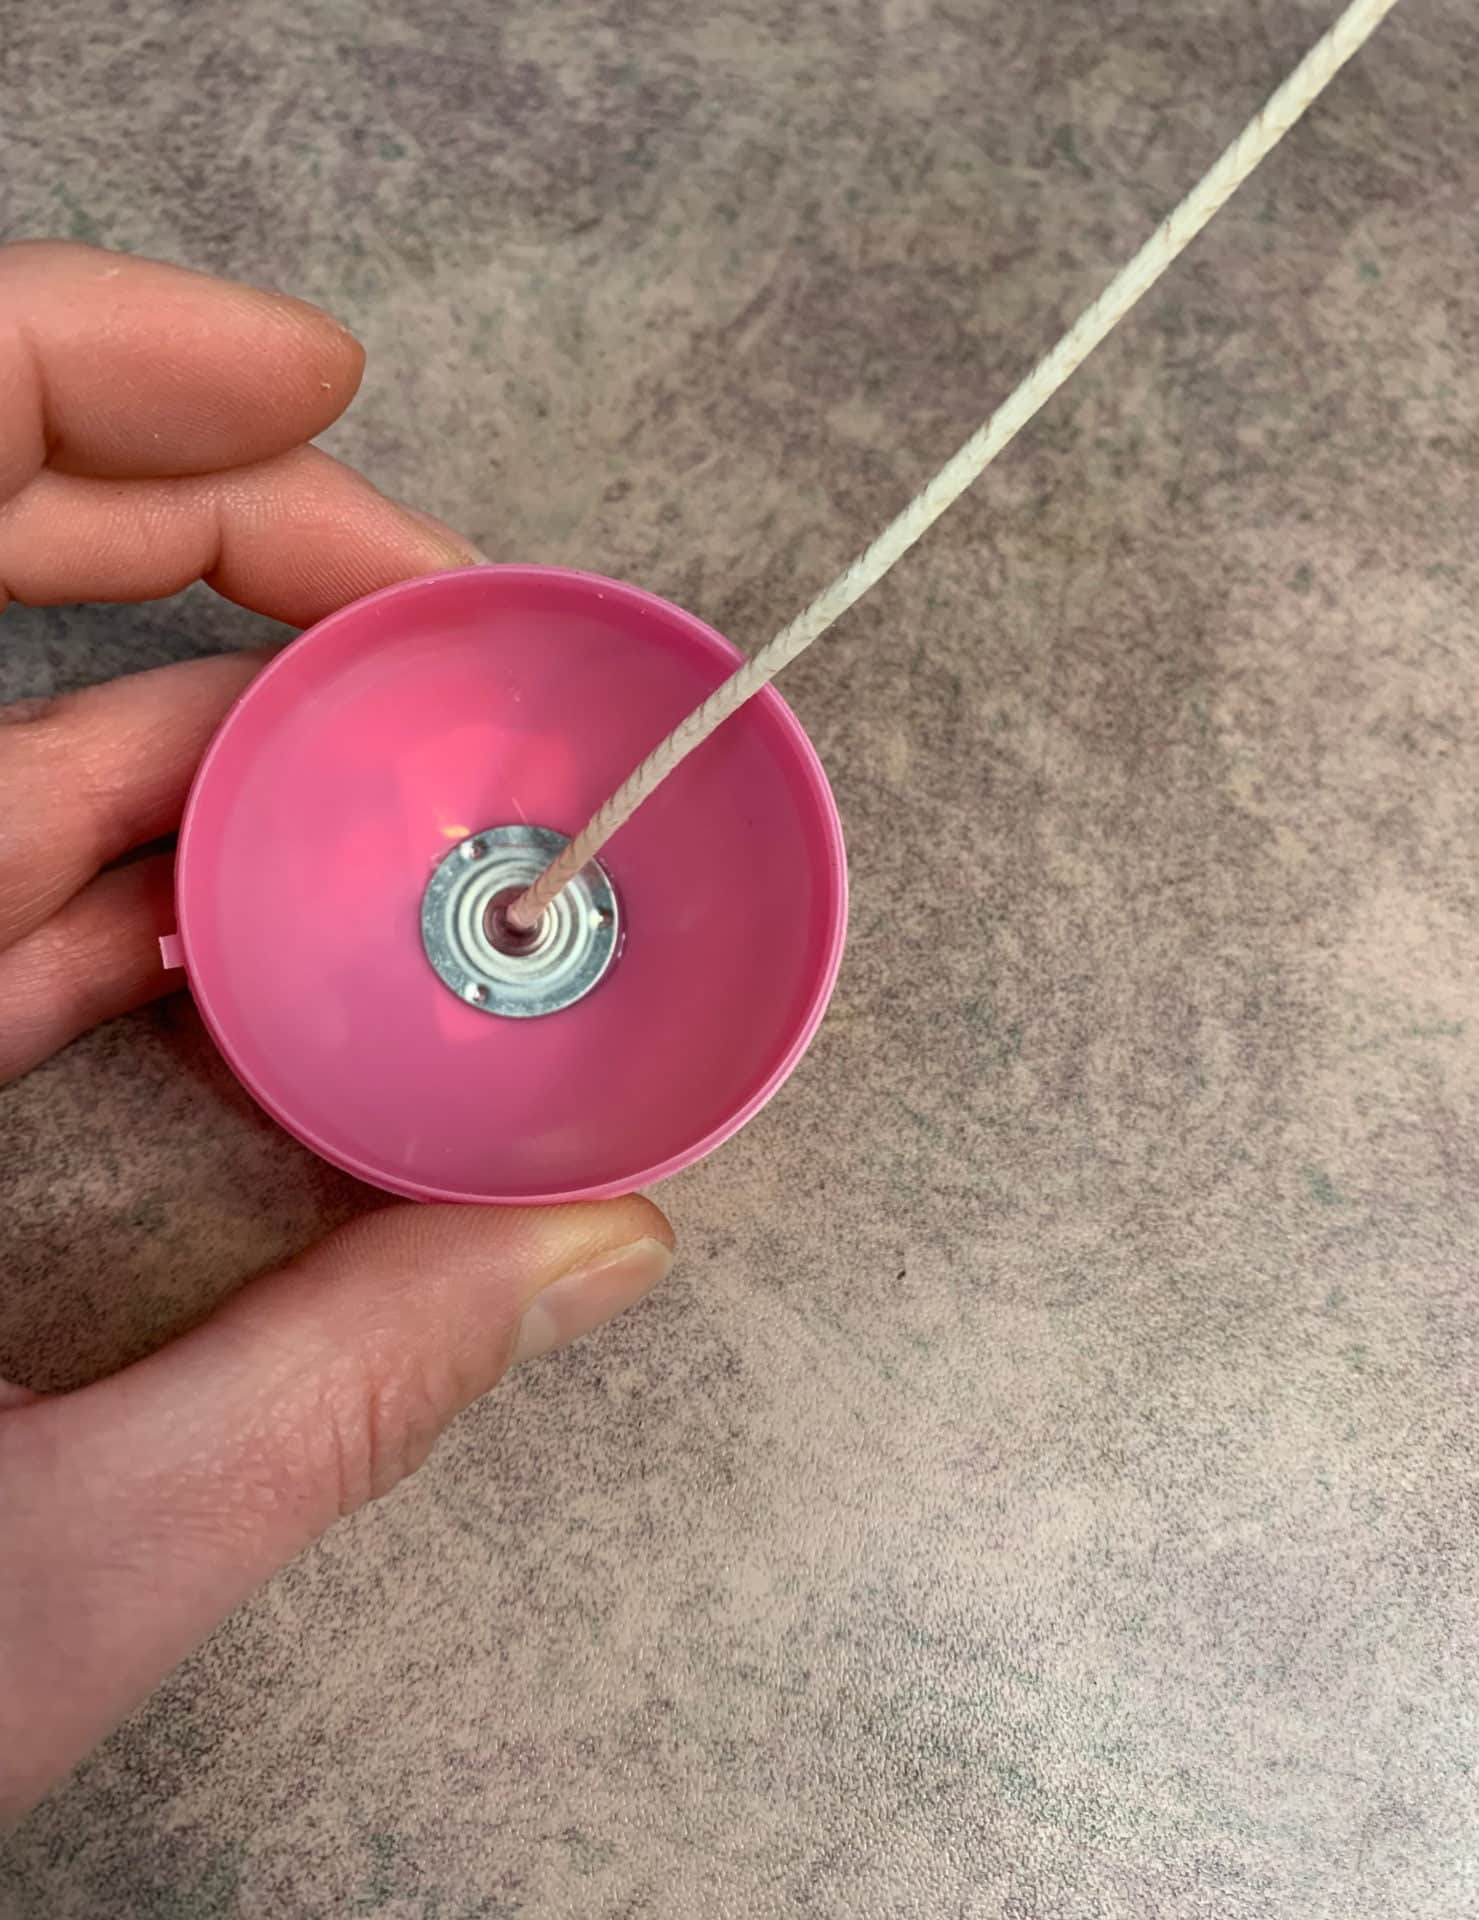
Candle Wick
The wick that you are going to use is going to depend on the size of your egg. So if you are using a regular egg, then these wicks would work.
Making Easter Egg Candles
Preparing the Egg and Wick
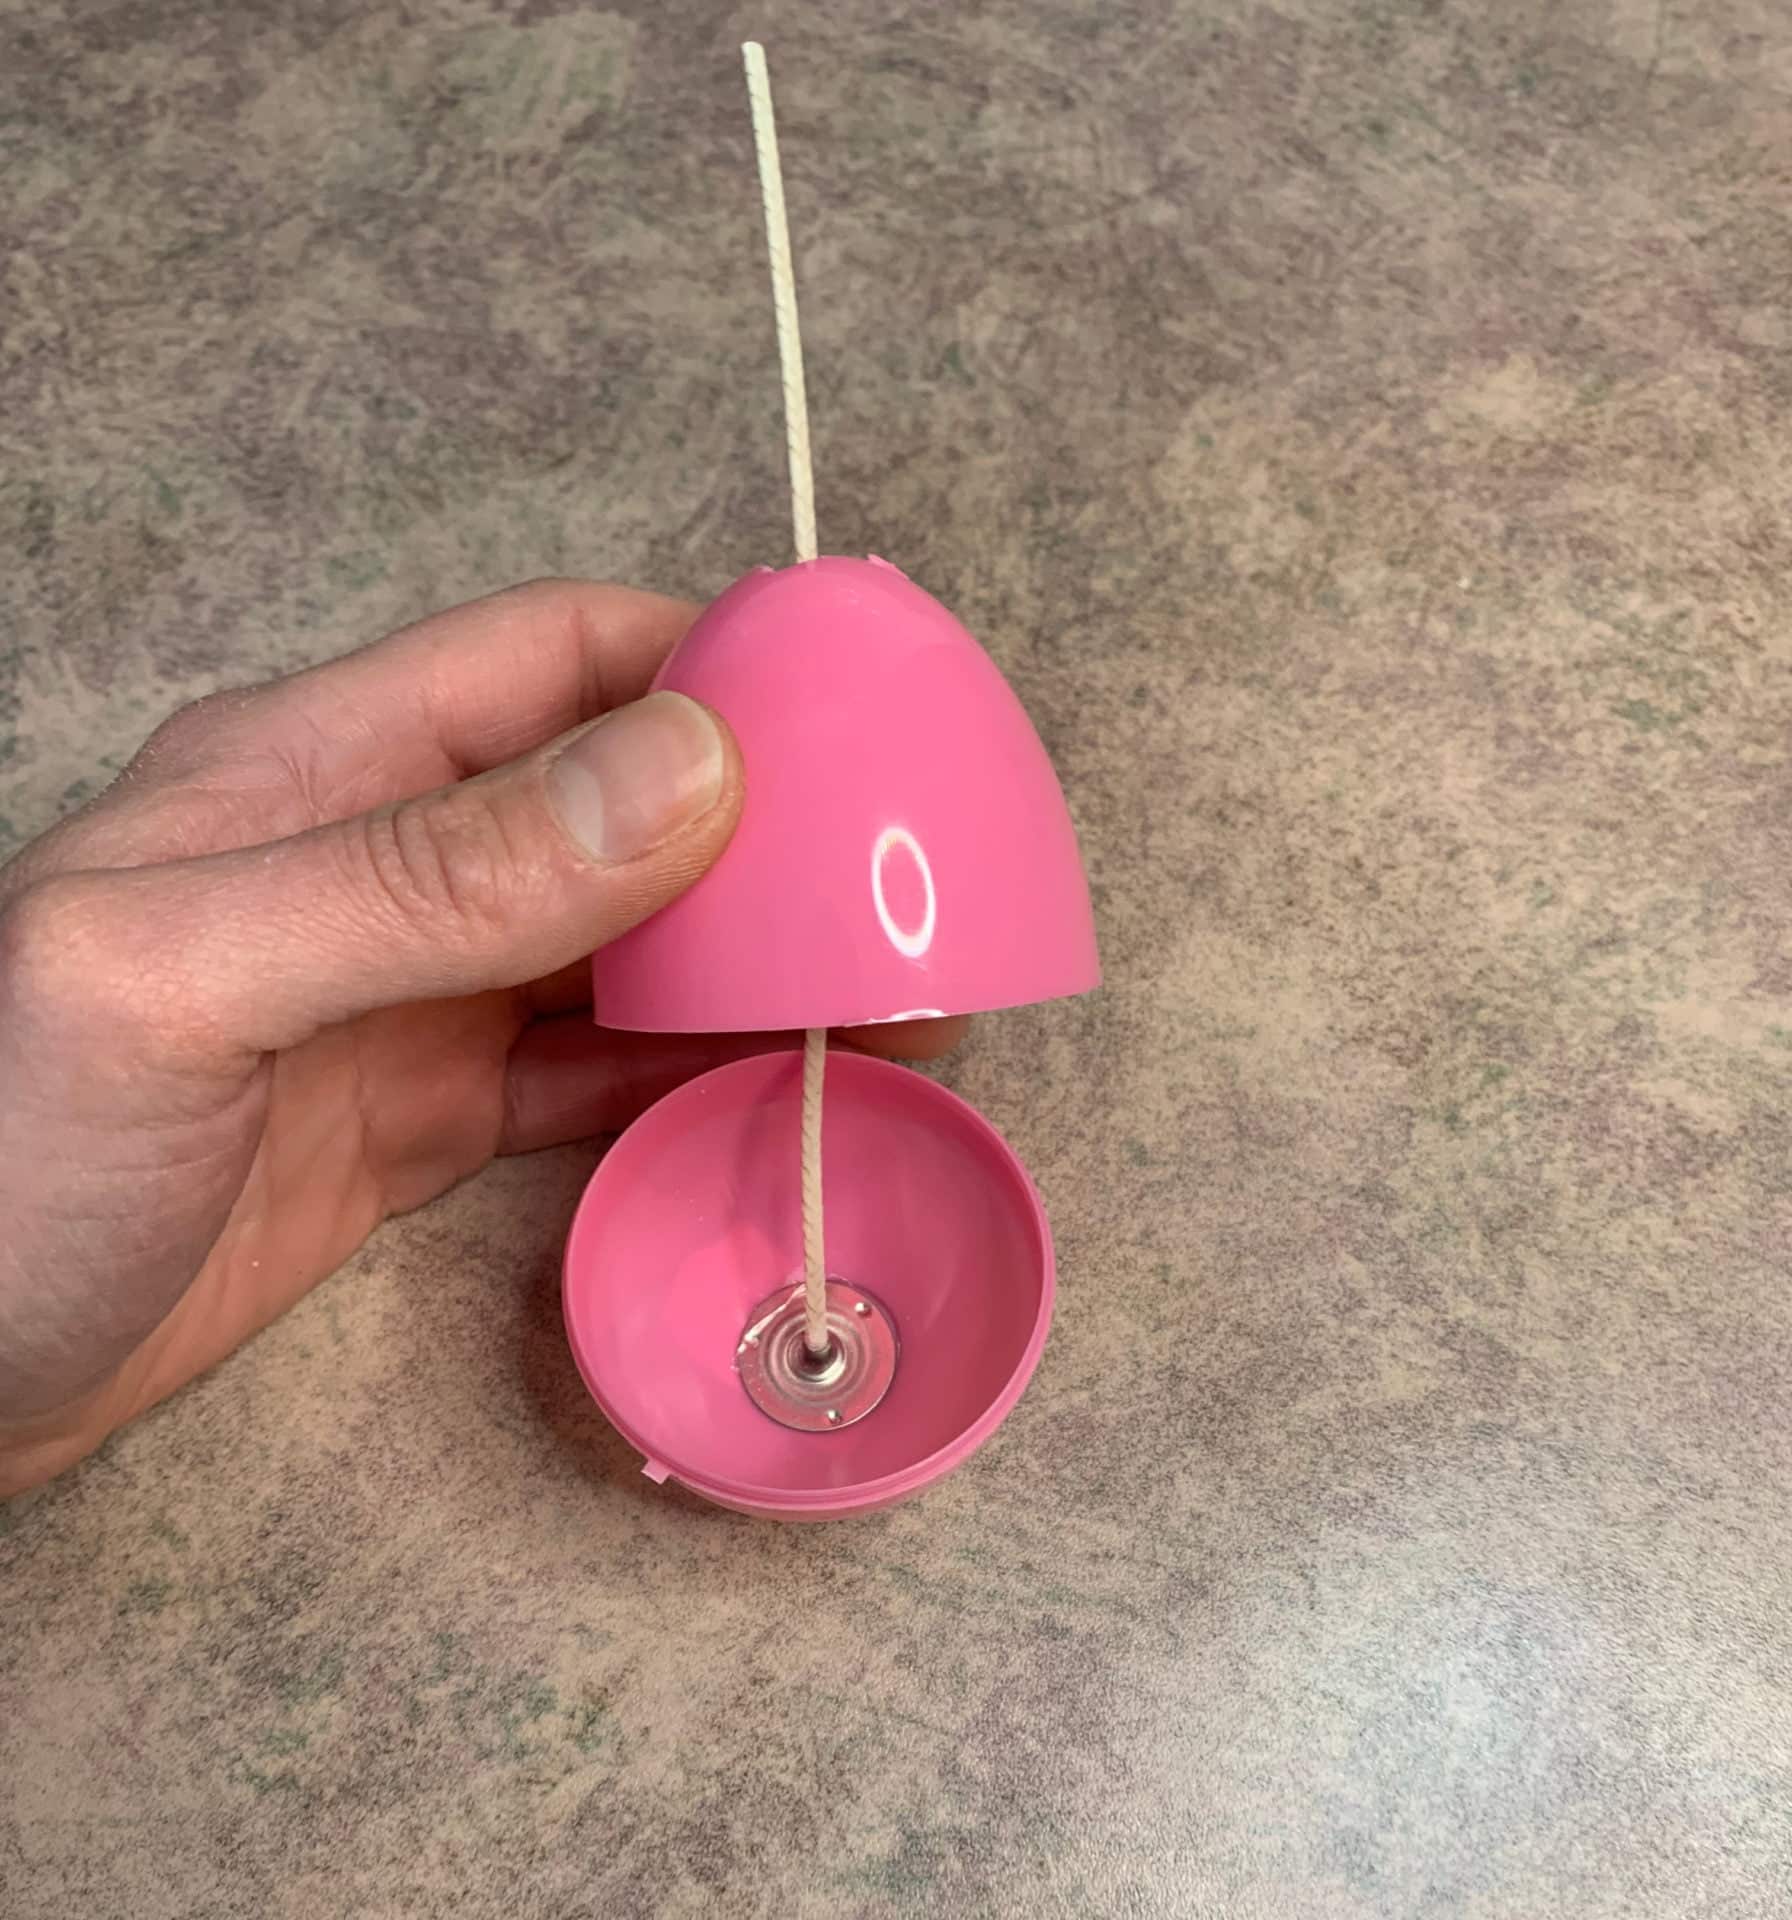
1. Put masking tape on the holes on the bottom of the plastic egg.
2. Really make sure that tape is pushed down good, because you don’t want all the wax to leak out the bottom.
3. Put a small amount of hot glue on the bottom of the wick tab and place the wick. (Normally, using a glue dot works too but I would not recommend it in this candle because we will be removing it from the egg and they are too good at adhering).
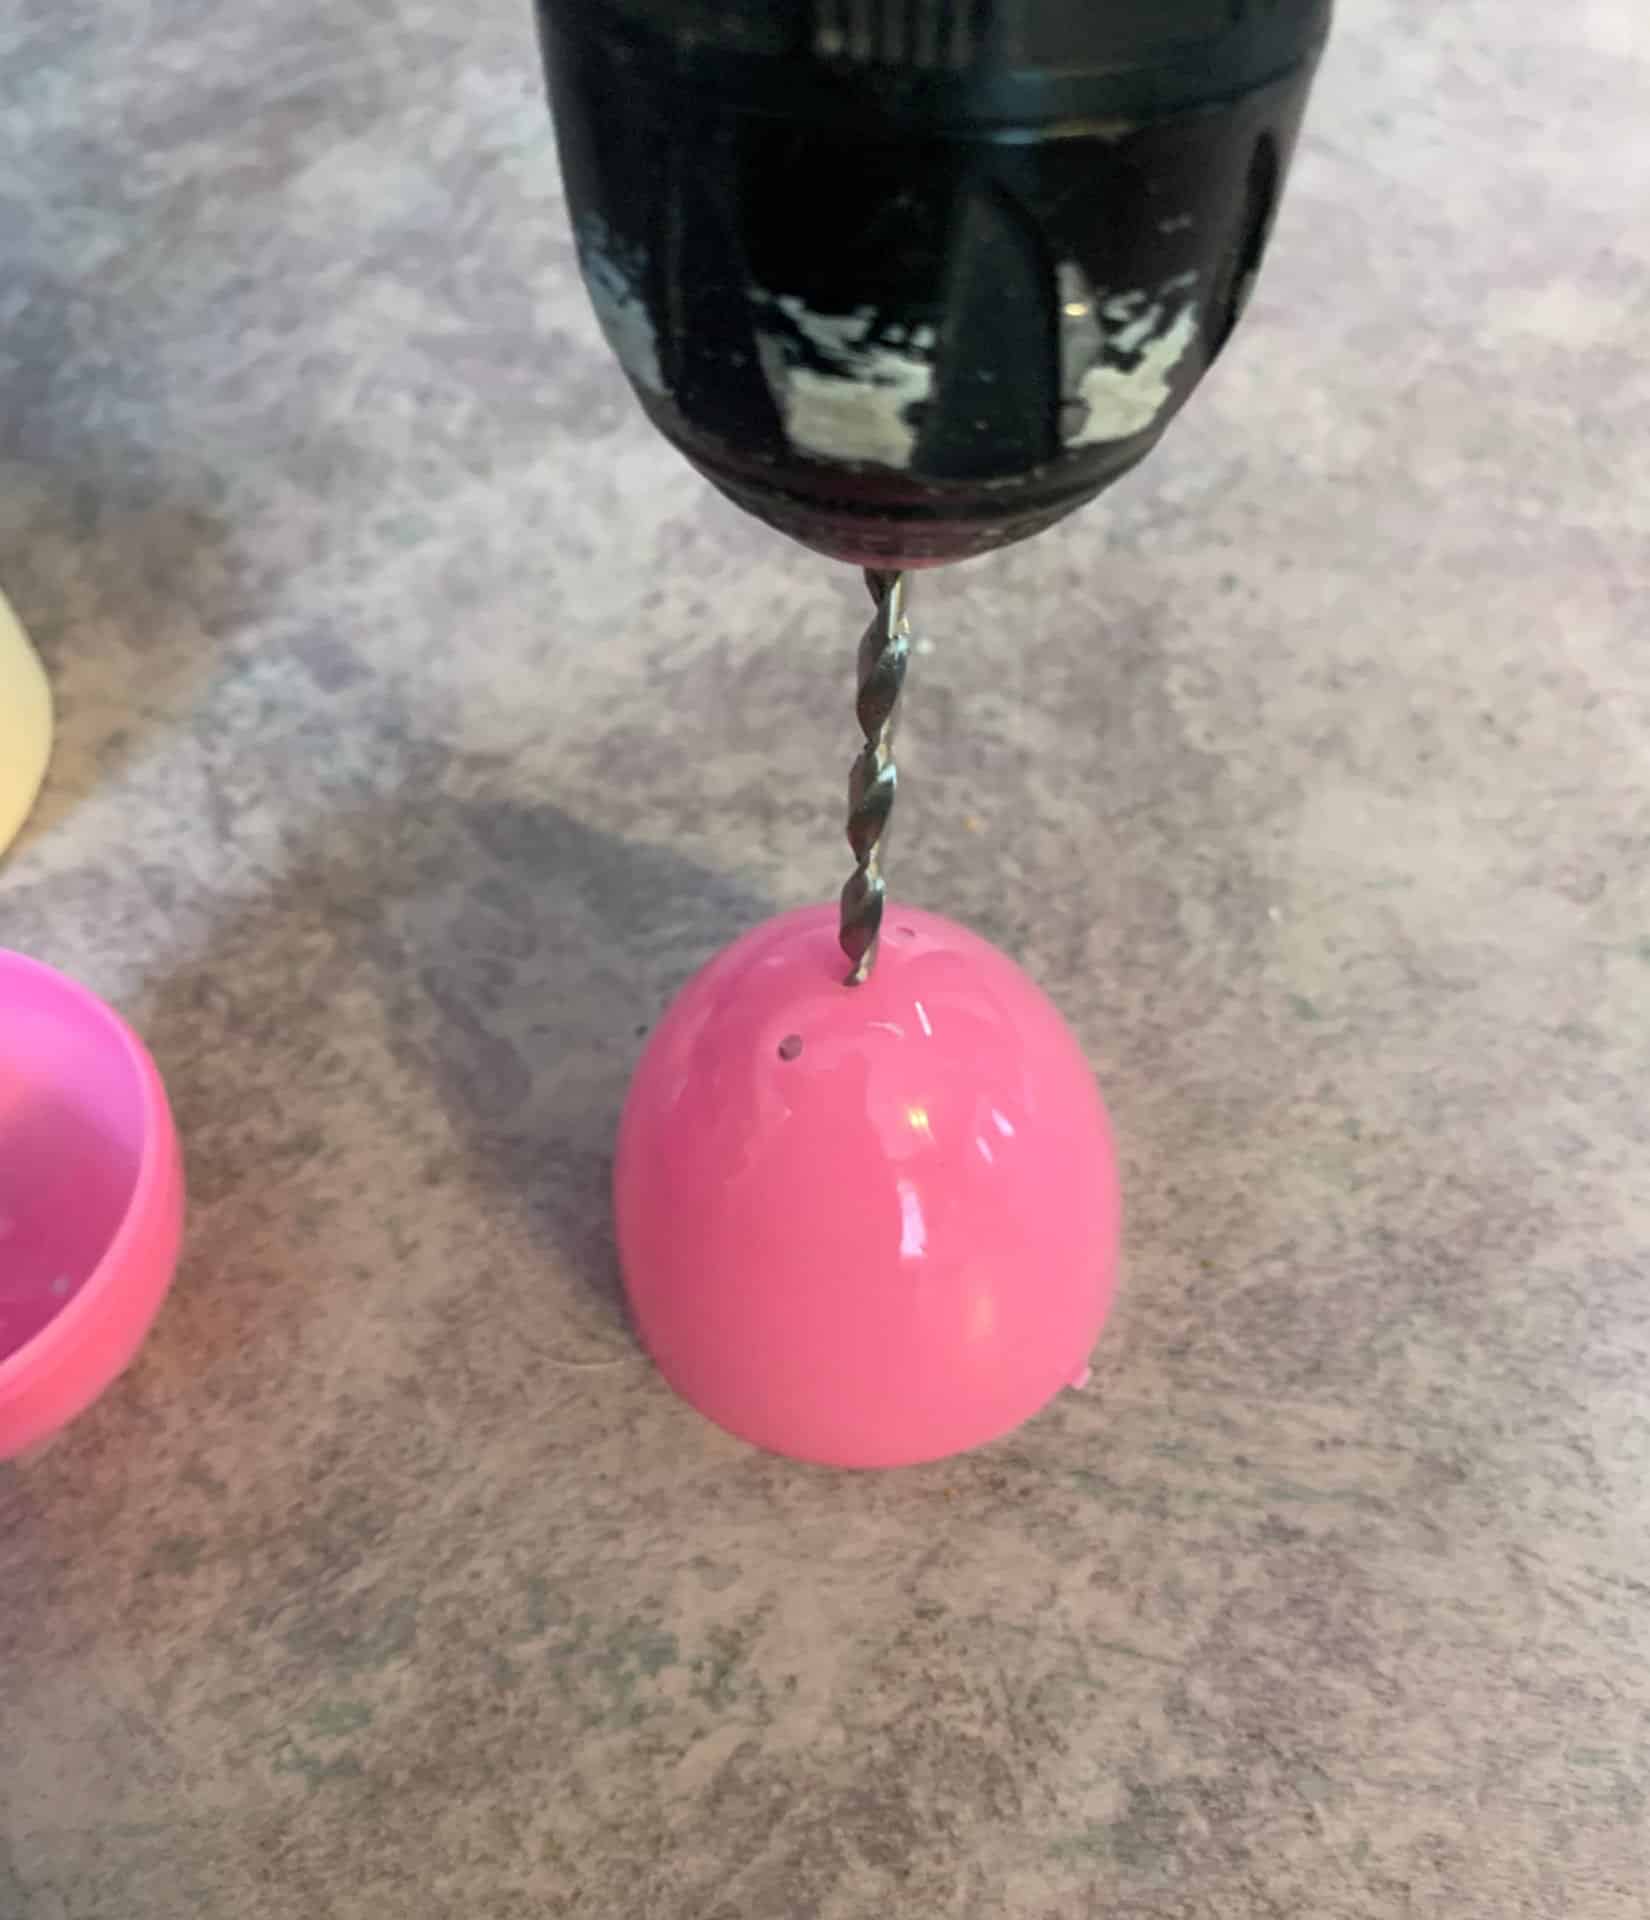
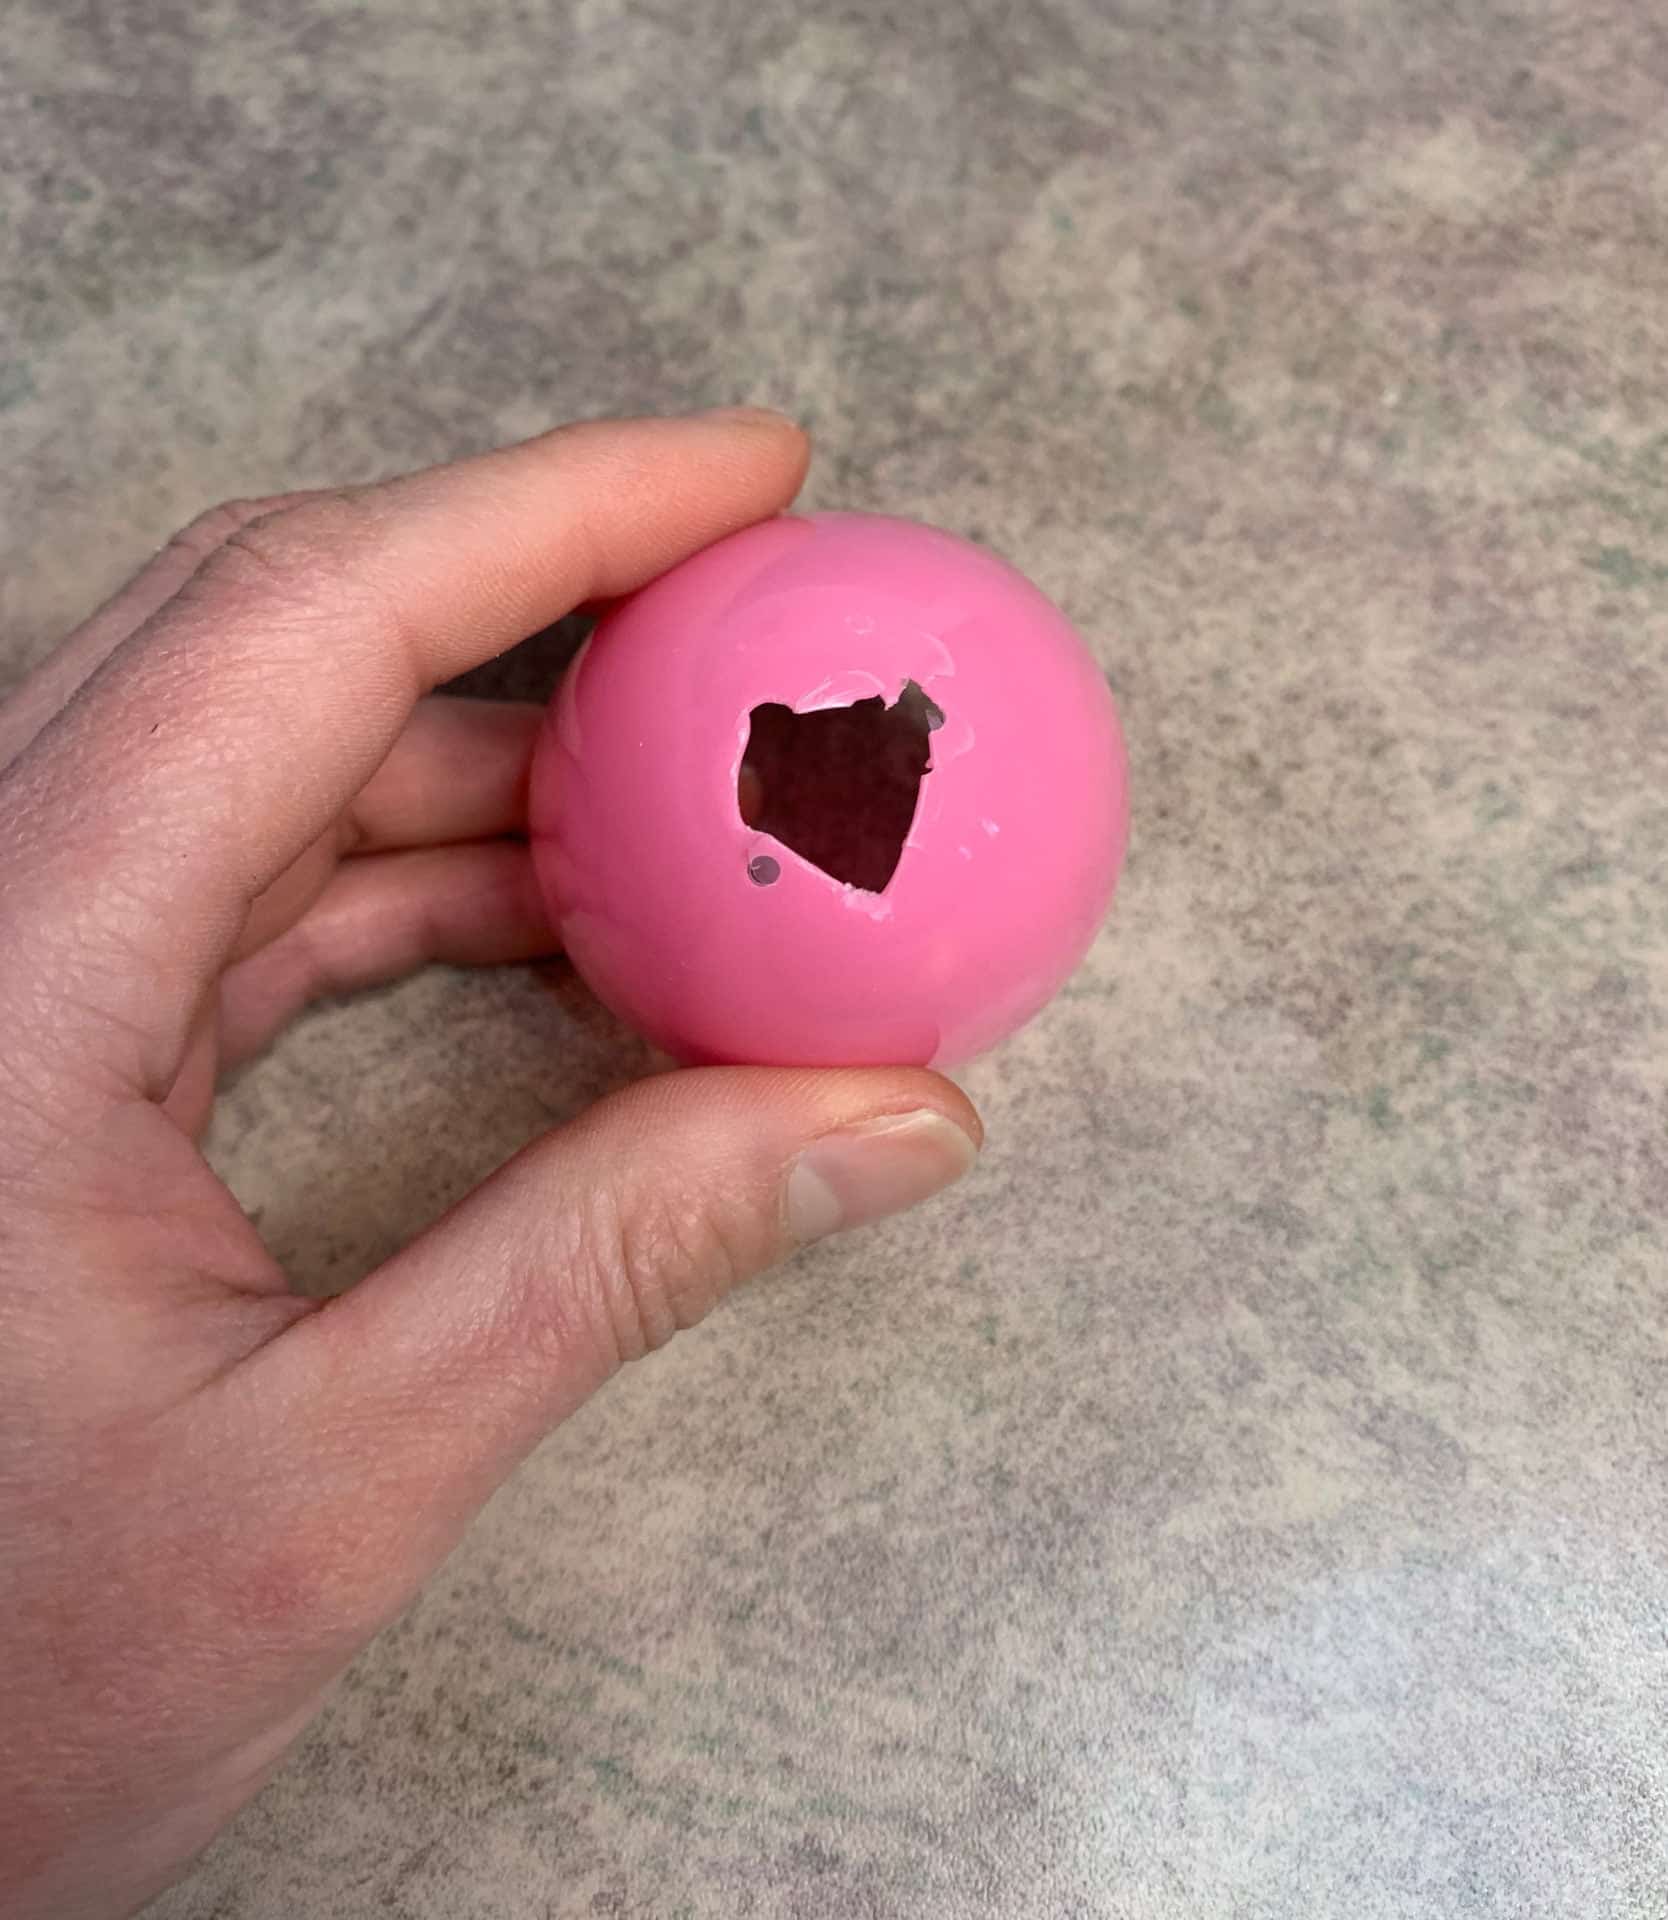
4. Drill a small hole in the top of your egg.
5. Carefully with a pair of scissors, cut the drill hole a little bigger. We only want to cut the hole big enough so we can pour the wax in.
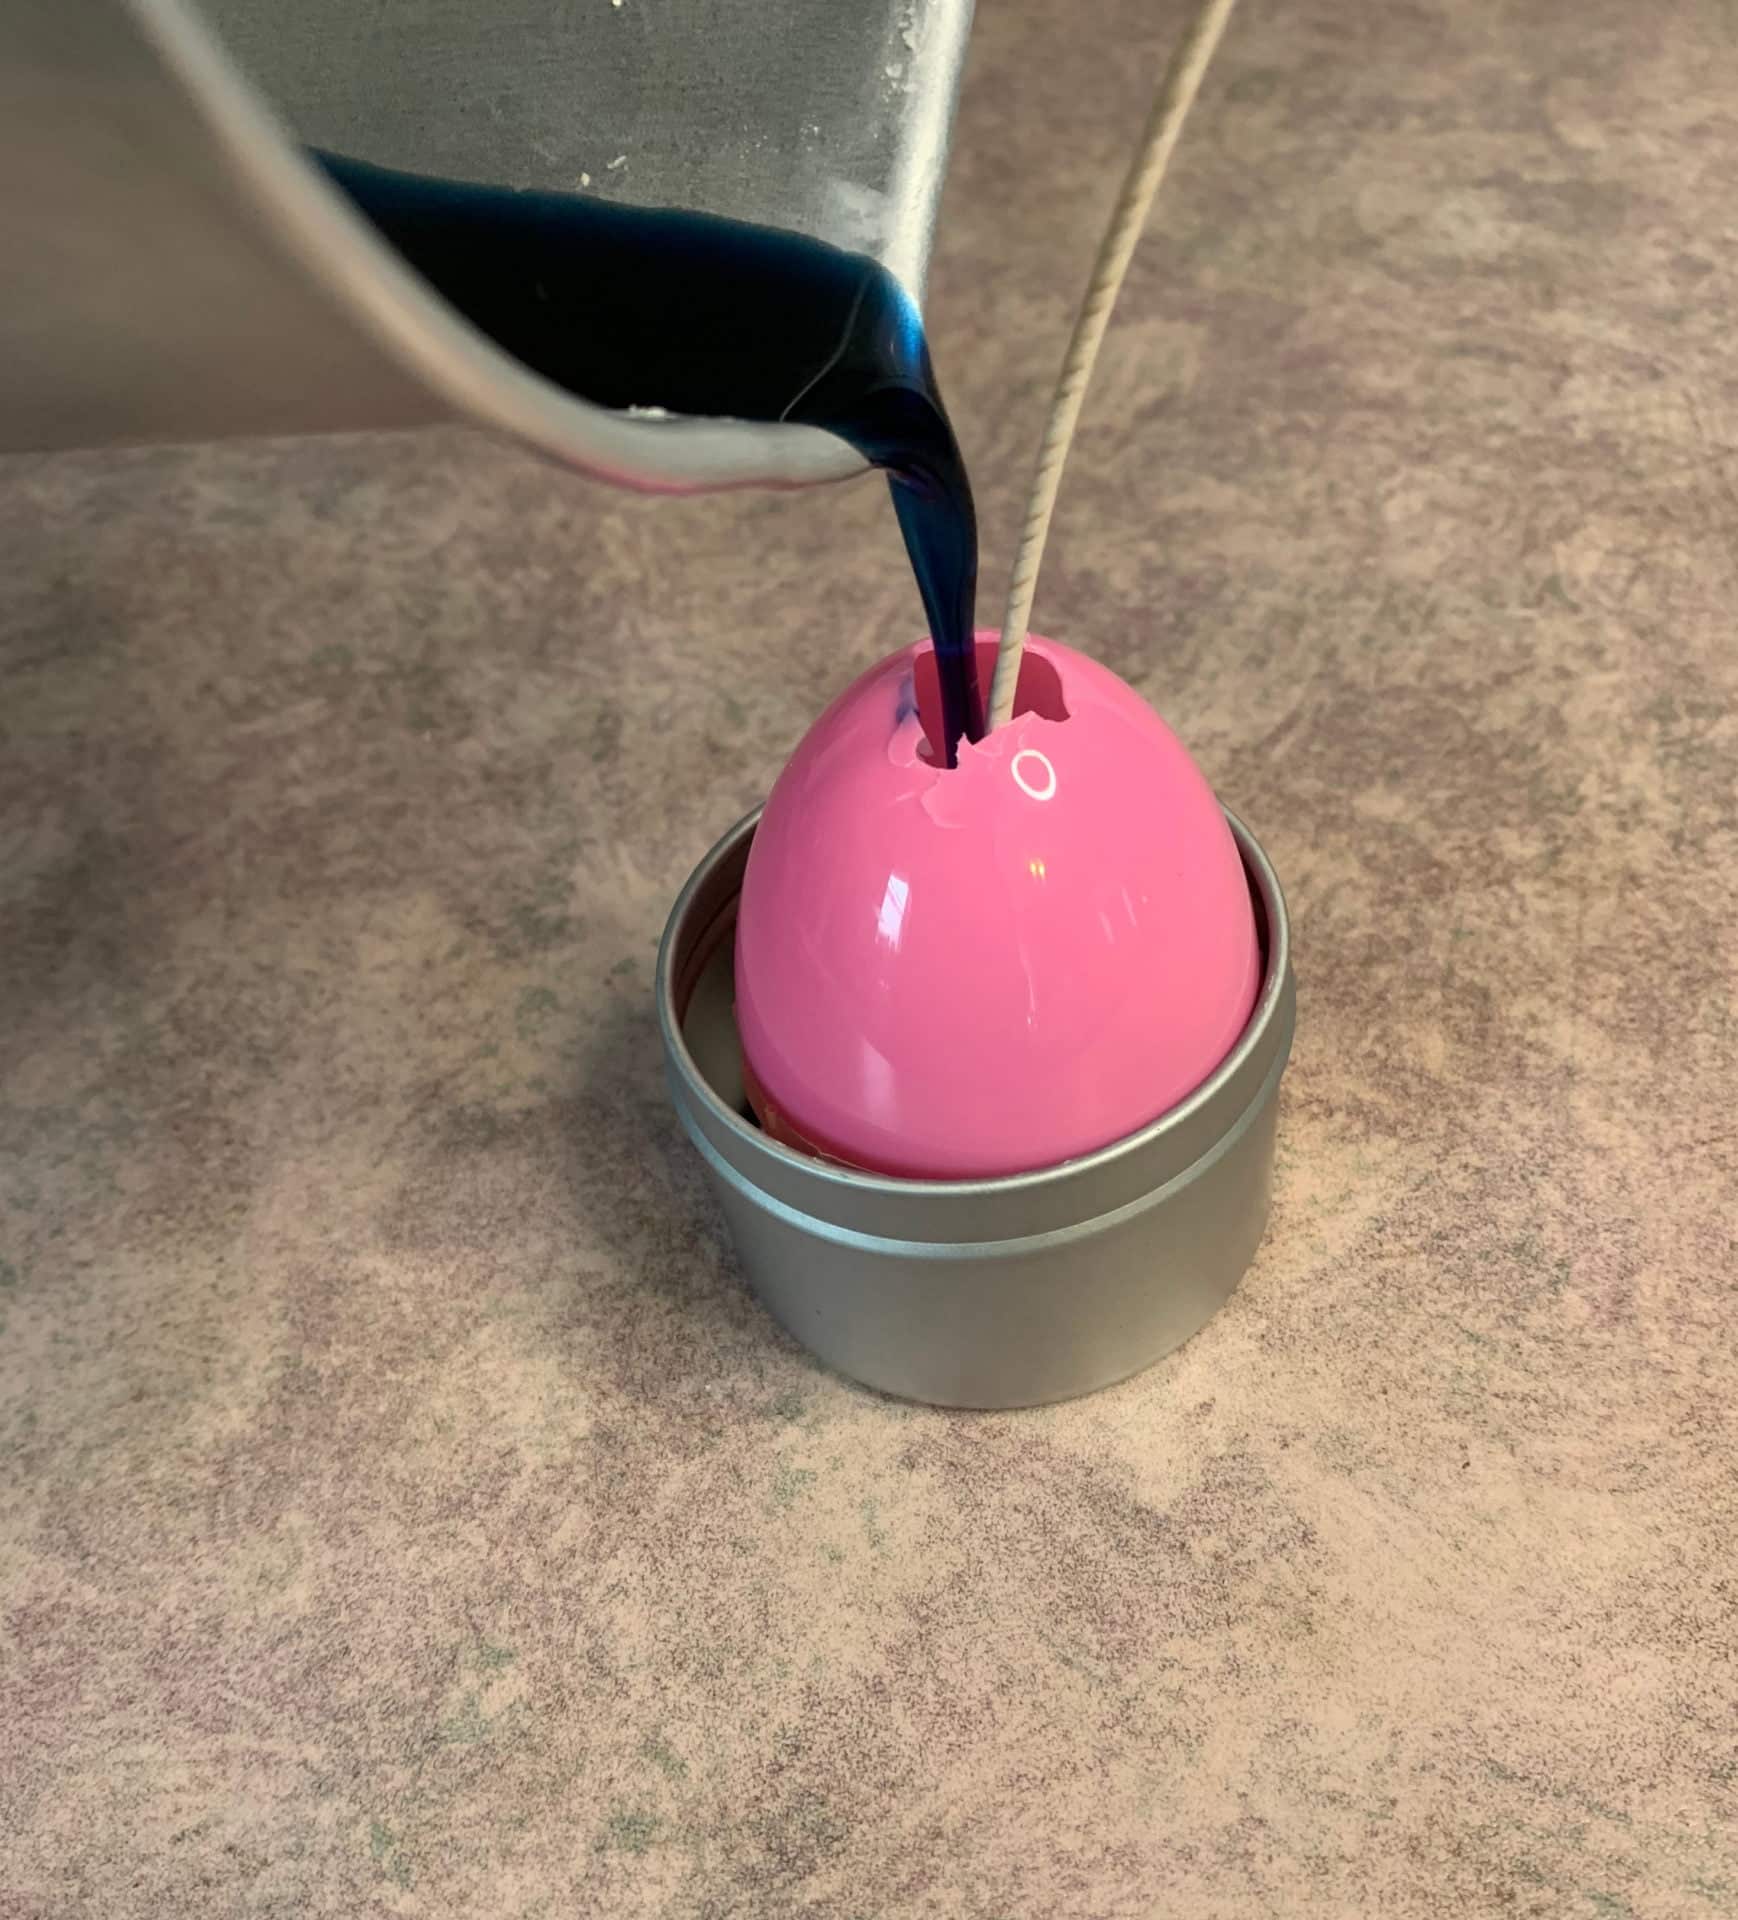
6. Place your plastic egg in a container to help keep it standing straight up.
Candle Making
7. Weigh out all your ingredients.
8. Place the wax and wax colorant in a pouring pot.
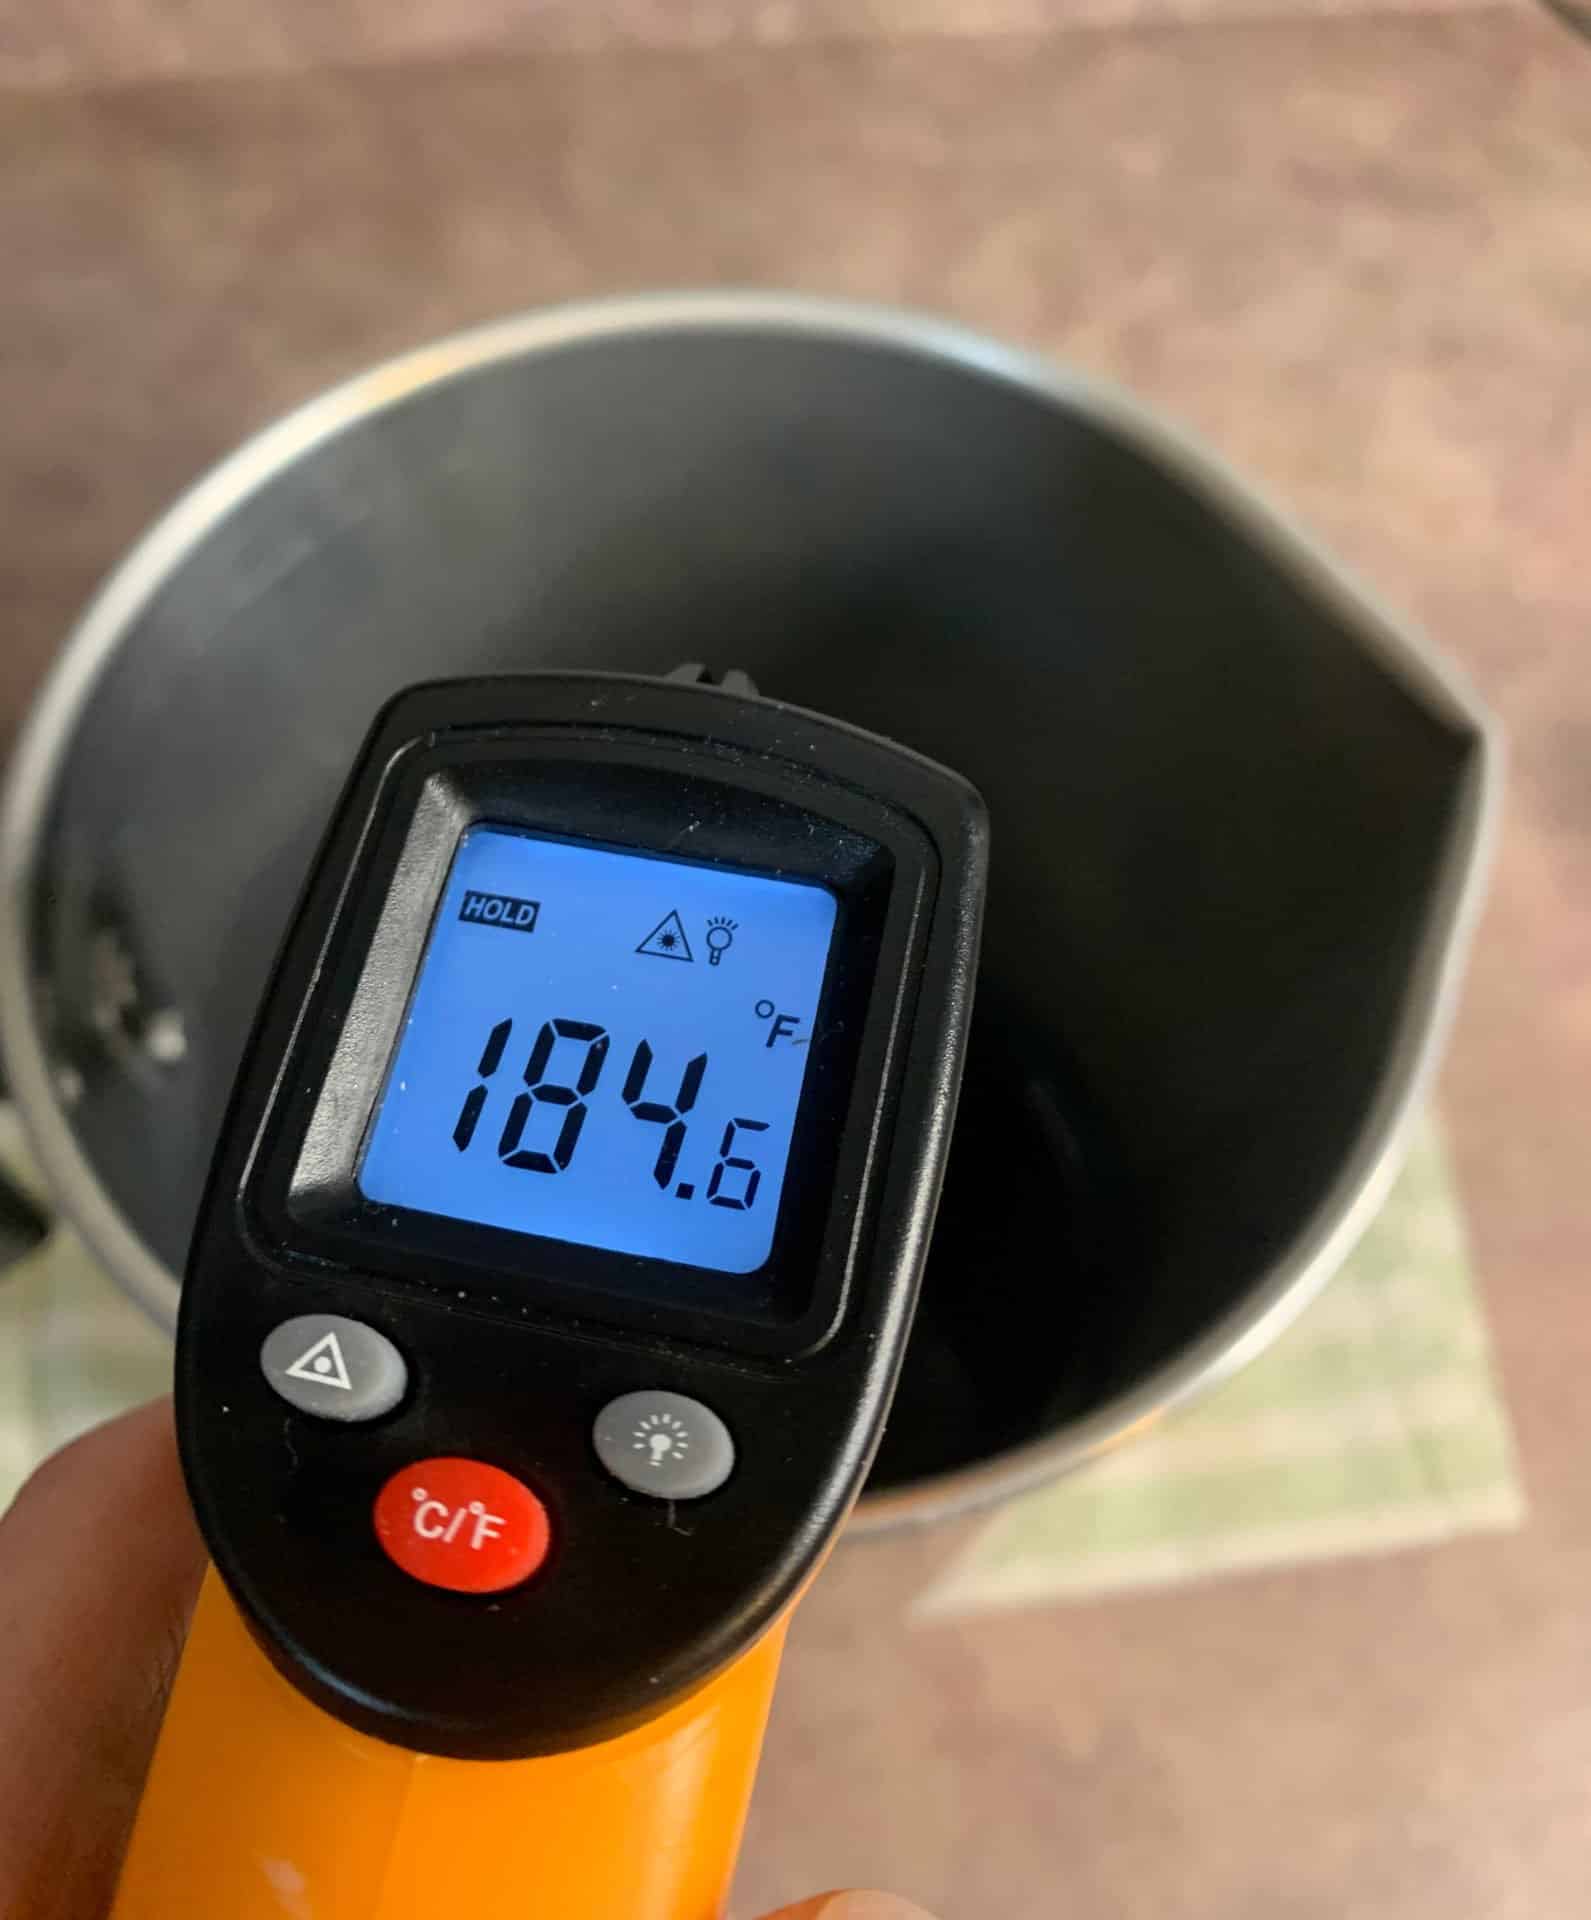
9. Place the pouring pot on a double boiler, until the wax is fully melted.
10. Verify the flash point of your fragrance oil. You do not want to add your fragrance oil to wax that is too hot because it can burn off some of the scent.
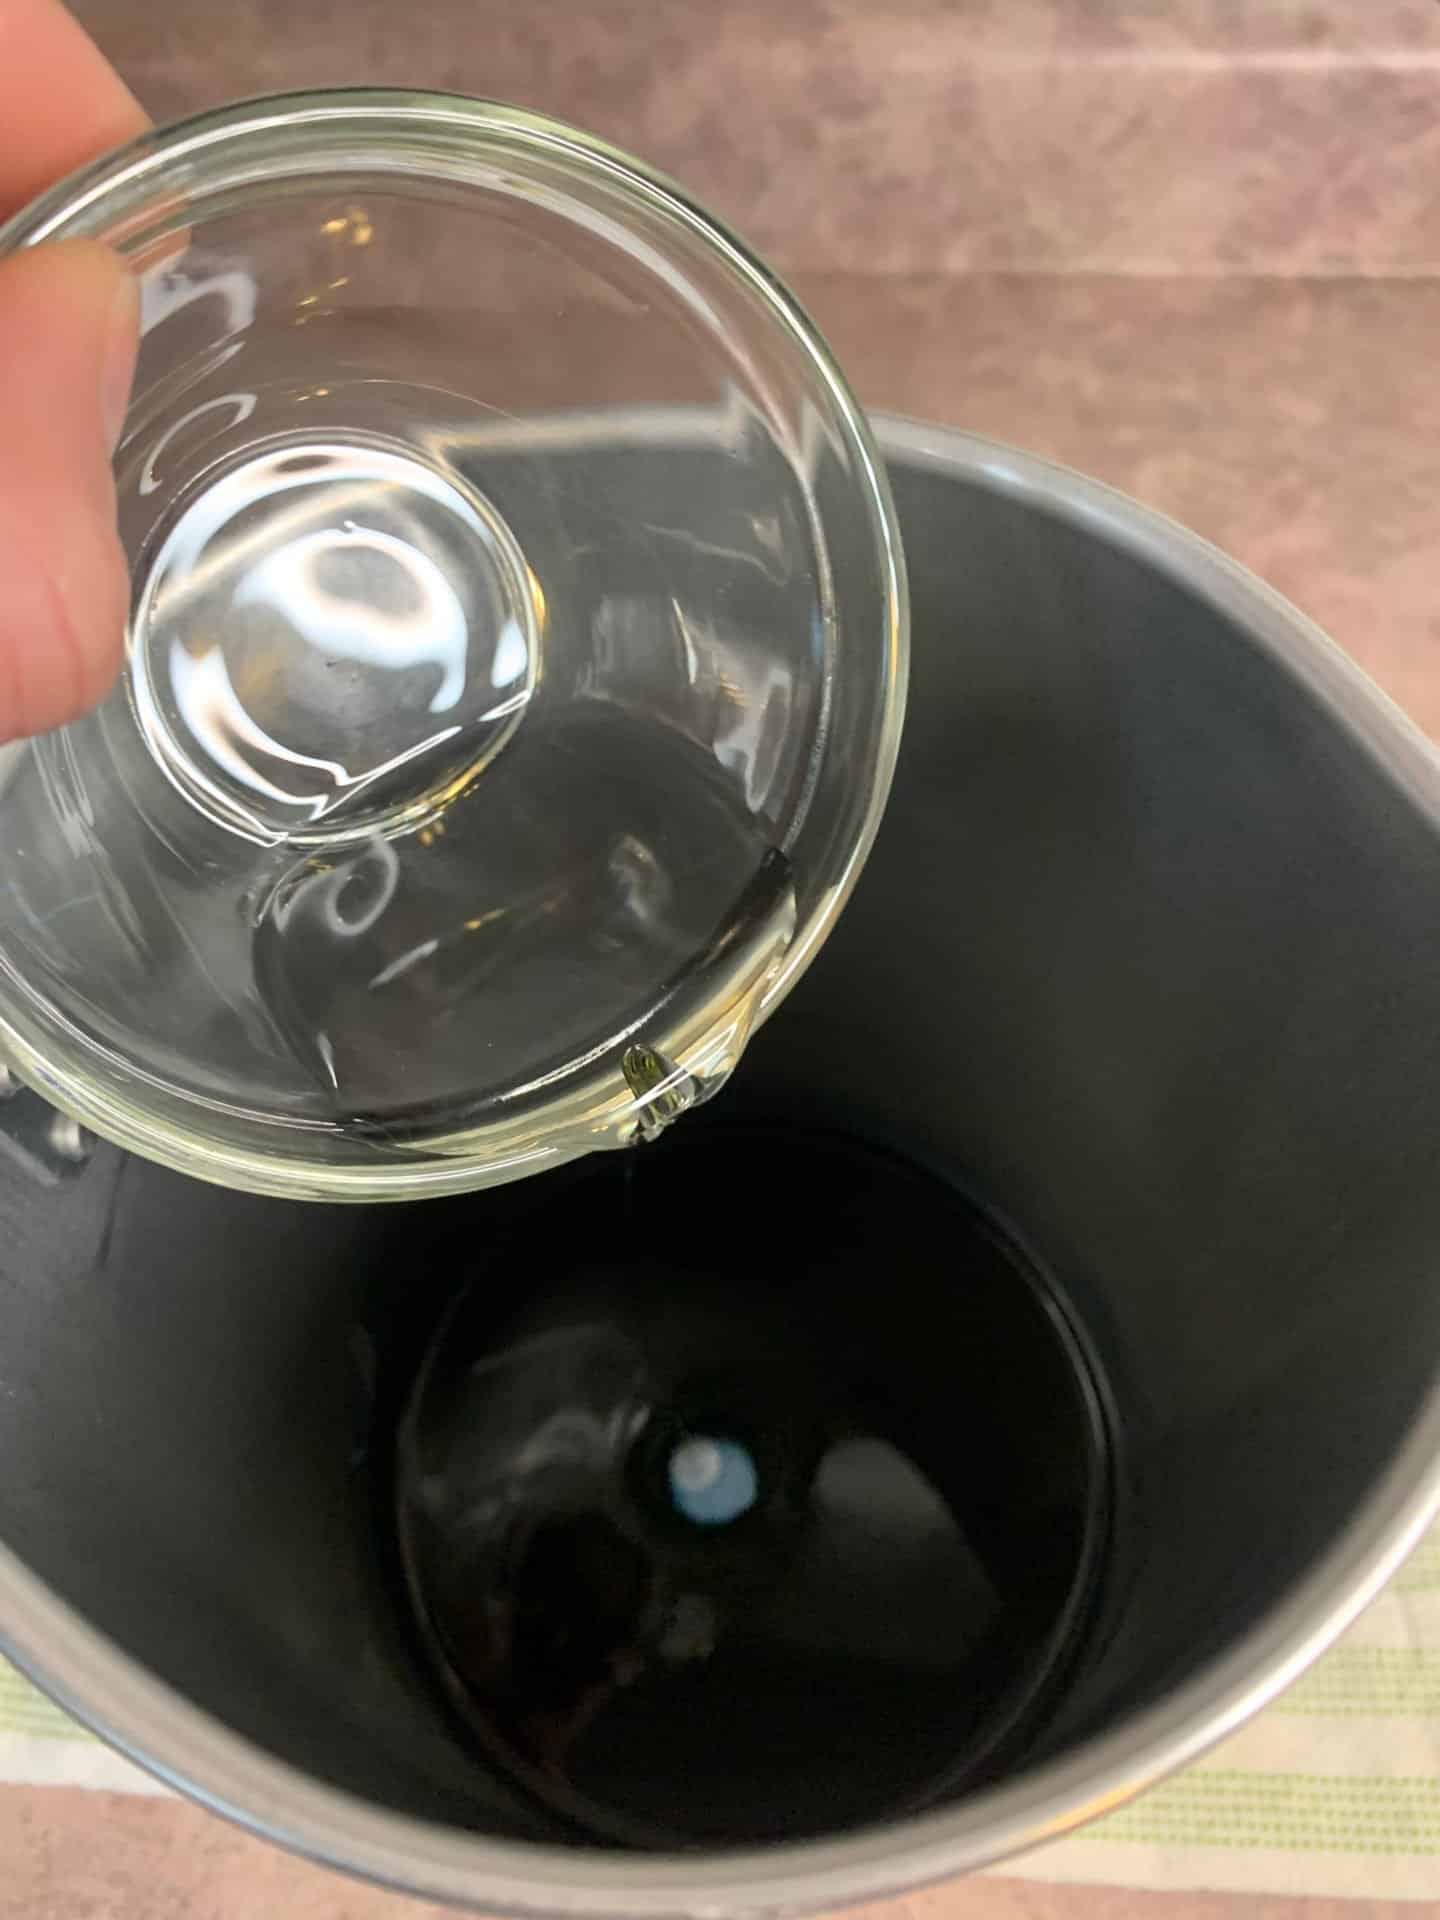
11. Once your wax is below the fragrance oil’s flashpoint, add the fragrance oil and mix well.
12. Carefully pour the wax into your plastic egg. Set the remaining wax off to the side for now.
13. Allow the candle to fully cool in the metal tin container. I found that allowing it to cool in the container, makes the candle slow cooler and the outside of the candle looks better when you remove it from the plastic egg shell.
14. You are going to notice when the candle cools, that there will be tunneling by the wick. That is completely normal. Just re-heat the left over wax on the double boiler.
15. Pour the heated wax into the Easter egg candle mold until the sink hole is filled.
16. Allow the candle to cool completely.
17. Remove the candle from the plastic egg. I like to start by taking the top half of the plastic egg off. Next, carefully pull the bottom half of the egg off the candle. You might need to put your nail on the edge of where the lid connects and push down to get it to come off.
18. Trim the wick to 1/4 inch.

Easter Egg Candle
Equipment
- Melting Pot
- Scale
Ingredients
- 3.84 ounce Wax
- 0.38 ounce Fragrance Oil
Instructions
Prepairing the Egg and Wick
- Put masking tape on the holes on the bottom of the plastic egg.
- Really make sure that tape is pushed down good, because you don't want all the wax to leak out the bottom.
- Put a small amount of hot glue on the bottom of the wick tab and place the wick. (Normally, using a glue dot works too but I would not recommend it in this candle because we will be removing it from the egg and they are too good at adhering).
- Drill a small hole in the top of your egg.
- Carefully with a pair of scissors, cut the drill hole a little bigger. We only want to cut the hole big enough so we can pour the wax in.
- Place your plastic egg in a container to help keep it standing straight up.
Candle Making
- Weigh out all your ingredients.
- Place the wax and wax colorant in a pouring pot.
- Place the pouring pot on a double boiler, until the wax is fully melted.
- Verify the flash point of your fragrance oil. You do not want to add your fragrance oil to wax that is too hot because it can burn off some of the scent.
- Once your wax is below the fragrance oil’s flashpoint, add the fragrance oil and mix well.
- Carefully pour the wax into your plastic egg. Set the remaining wax off to the side for now.
- Allow the candle to fully cool in the metal tin container. I found that allowing it to cool in the container, makes the candle slow cooler and the outside of the candle looks better when you remove it from the plastic egg shell.
- You are going to notice when the candle cools, that there will be tunneling by the wick. That is completely normal. Just re-heat the left over wax on the double boiler.
- Pour the heated wax into the Easter egg candle mold until the sink hole is filled.
- Allow the candle to cool completely.
- Remove the candle from the plastic egg. I like to start by taking the top half of the plastic egg off. Next, carefully pull the bottom half of the egg off the candle. You might need to put your nail on the edge of where the lid connects and push down to get it to come off.
- Trim the wick to 1/4 inch.