How to Whip Candle Wax - Whipped Candle Frosting Recipe
Learn how to Whip Candle Wax to make a Whipped Candle Frosting. Whipping candle wax is a great way to take your candles to the next level. It takes a little bit of practice to get comfortable with the process, but you will be whipping up your own creations in no time at all!
Servings: 1 Candle
Cost: $5
Equipment
- Scale
Ingredients
Candle
- 4.63 ounce | 90% Soy Wax
- 0.46 ounce | 10% Fragrance oil
- Candle Color
Whipped Candle Wax
- 5.5 ounce | 90% Soy Wax
- 0.55 ounce | 10% Fragrance oil
Instructions
Making The Candle
- Clean your candle jar out. After I clean mine, I will wipe the inside out with a bit of rubbing alcohol. Put a small amount of hot glue on your wick tab and place it in the center of your candle jar.
- Heat the wax on a double boiler. You do not want to place the pouring pot directly onto the stove. Once the wax is melted, remove from heat.
- Once the temperature of the wax is below the flash point add your fragrance oil and mix well. I like to mix the fragrance oil for at least a minute to make sure that it binds with my soy wax,
- Pour the scented candle wax into your container. When you are pouring, keep the pouring pot close to your candle jar and pour slowly. Pouring this way helps to prevent tunneling and frosting. Save a small amount of the wax, in case you have to re-pour the candle top.
- Use a sharpie or a candle wick holder to keep your wick in the center of the candle while it dries. Allow to cool completely.
- After the candle has dried, if the top is not perfect you can re-heat the wax you saved and pour the candle top again.
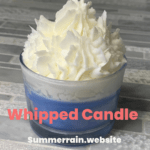
Whipping Soy Wax Candle Frosting
- Melt your soy wax the same as you did for your candle. I found that you are going to need a lot more wax than you would think for the pipping. For this candle, I used 5.5 ounces of wax.
- Allow the wax to cool for a little bit. You are going to notice that it will start to turn opaque. It will start to set up a little on the edge of the container and has a little film on the top.
- Use a spatula to clean off the edges of the container and then mix with a hand mixer. We are going to continue to mix the wax until it starts to harden up a little bit and the peaks will hold their shape.
- You have a little bit of time before the wax hardens up, but you want to work quickly.
- When piping the whipped wax you can either use a piping bag or a baggie. I prefer to use a baggie as it is one less thing that I have to clean when I am done.
- When transferring the whipped candle wax into your piping bag, I found that it is easier to place the piping bag in a cup.
- Pipe your wax and allow it to cool completely. Trim your candle wick to 1/4 of an inch and enjoy!