How to Make a Relaxing Massage Oil Candle with Soy Wax and Butters
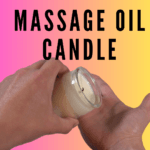
Imagine a relaxing evening where the soft glow of a candle casts a warm light, filling your space with a delightful fragrance. Now, picture that same candle not only enhancing the ambiance but also providing nourishing oils for your skin. This is the beauty of a massage oil candle!In this blog post, I will guide you through the delightful process of creating your massage oil candle using natural ingredients like soy wax, cocoa butter, shea butter, and hazelnut oil, all infused with the delicious White Tea and Pear Fragrance Oil. You’ll discover how easy it is to make a candle that serves a dual purpose: illuminating your home while pampering your skin.Making your own candles is not just a fun craft; it’s also a cost-effective and rewarding way to enjoy customized scents that cater to your personal preferences. Whether you want to unwind after a long day or give a thoughtful gift to a friend, a DIY massage oil candle is the perfect solution.
Servings: 6 ounces
Cost: $5
Equipment
- Scale
Ingredients
- 43% | 2.58 ounce Soy Wax
- 10% | 0.60 ounce Cocoa Butter
- 40% | 2.40 ounce Shea Butter
- 5% | 0.30 ounce Hazelnut oil
- 2% | 0.12 ounce White Tea and Pear Fragrance Oil
Instructions
- Measure IngredientsBegin by accurately measuring your ingredients. For all ingredients, use a kitchen scale to weigh out the appropriate amount, as precision is key to achieving the right consistency. I like to use a pipette for my fragrance oil as it makes it a little easier to control how much I put into the container.
- Melt the Soy Wax and ButtersStart out by adding soy wax, cocoa butter, shea butter, and hazelnut oil into a pouring pot designed for candle making. Place your pouring pot inside a larger pot filled with a few inches of water, creating a simple double boiler effect. Stir occasionally until everything is fully melted.
- Add FragranceAfter combining the oils, it’s time to add the fragrance oil. Allow the mixture to cool slightly before adding the fragrance—ideally when the temperature drops to around 160°F. This helps retain the fragrance’s potency. Stir the mixture thoroughly to ensure the fragrance oil is evenly distributed throughout the wax. You will want to give it a good mix, usually a few minutes.
- Wick PreparationPrepare your candle jars by attaching the wick. Use a small amount of melted wax or hot glue to secure the wick at the bottom center of each jar. If you’re using a wick holder, place it in the center of the jar before pouring the wax. This will help keep the wick upright as you pour the candle mixture in.
- Pouring The Candle When you're ready to pour, take your pouring pot or container and gently tilt it to create a steady stream. Begin by pouring the mixture slowly into the center of the jar, ensuring that the wick remains secured in the center. To prevent the wick from moving, you can hold it in place with your fingers or use a wick holder. Fill the jar until it's nearly full, leaving about 1/4 inch of space at the top to allow for expansion as the wax cools.