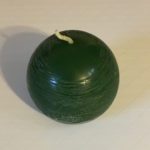
Ok, so I love love love circle candles.To be honest, this is the first time that I am making them and I am excited to try a bunch of different designs!
The hard part of candle making is all in the planning. After you have found the mold, wick and wax the rest is easy peasy.
Table of Contents
Prefer to watch this project instead of reading it?
Wax
Since we are making a circle candle that is a pillar candle (a candle that does not go into a jar), you will need to have a harder wax than if it was going into a container.
Normally, I prefer soy wax, but for this project I am using paraffin wax that is suitable for pillar candles. I chose this wax, because it is a lot harder than soy wax and I am looking for more vibrant color than what you normally get with soy wax.
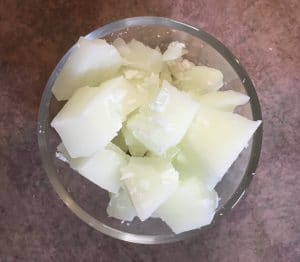
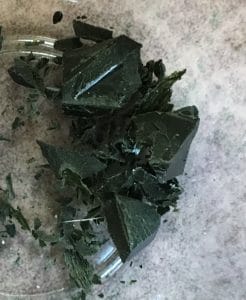
Since this is not a wax that I had on hand, I just ran to the local craft store and bought some. It was in a large brick. I would recommend buying the wax that comes precut. However, if you do get this kind you will want to cut it up into kind of small pieces. They don’t have to be super small, but if they are too large it is going to take a while to melt them.
Pros and cons of both types of wax for a circle candles:
- Burn time- Soy wax has a longer burn time
- Production- Soy wax is naturally derived from soybeans and paraffin wax is a byproduct of petroleum.
- Scent throw- Paraffin wax has a stronger scent throw. The reason the hot scent throw is stronger is, because the soy wax is more dense. Meaning it takes longer for the wax to heat up and release the fragrance.
- Frosting- This typically only occurs in soy wax candles
- Color- Typically paraffin wax will have a more vibrant color and soy wax has a more pastel color.
Wick
The rule of thumb with wicks stays the same, regardless if the candle goes into a jar or not. You need to ensure that you are using the correct wick if you want your candle to burn properly.
With the wicks, its kinda a goldilocks situation. Too small of a wick can cause tunneling down the center of the candle. Too large of a wick and the pool gets too big too fast and burns out or it burns up all the scent on you before it has a chance to evaporate.
We are looking for the wick that is just right!
I will be using LX-14 wicks. I actually have some tabbed ones left over from another project and I just cut the tabs off. The LX wicks do not have a core, they are specifically designed to be able to be used in container, pillar and votive candles. They are designed so pillar candles melt properly and not leak out of a hole in the side of the candle.
Colorant
I am a fan of the color blocks for candles. They are pretty inexpensive and I like that you can just scrape a little off the color block for your candles. For these candles I am going with a Christmas Green color.
I am actually debating making a few white candles to mix in. Or do you think red would look better? Let me know in the comments below!
Decorating Ideas!
Seriously, there are so many options on how to decorate these circle candles. I am going with just simple one color for now but, feel free to try these too!
- Pour half red and half green
- Make layers of white and red, like candy cane stripes
- Paint it to look like an ornament
- Glitter (YAS!!!)
Fragrance
You can use any fragrance that you would like, just make sure that you are using one that is safe for candles. Although these are Christmas candles for me, I am not using a Christmas scent. I am actually going to use Love Spell fragrance oil, which really can be used for any and all occasions!
My wax has a fragrance load of 10%, so that is the rate of the fragrance oil that I used. Be sure to check you wax fragrance load to ensure you are using the right amount.
Circle Candle Recipe
Circle Candle Recipe
Equipment
- Pouring pot or heat safe container
- Thermometer
- Pan to Boil Water
- Spatula or Stirring Stick
- Scale
- Marker (to hold wick straight)
- Scissors
- Circle candle mold
Ingredients
- 100 g Paraffin Wax
- 10 g Love Spell Fragrance Oil
- Green Color Block
- LX-14 Wick
Instructions
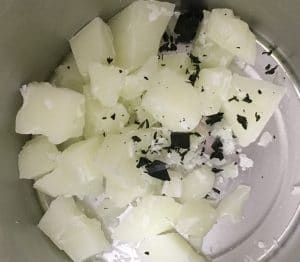
- Cut up the wax (if it did not come precut). Measure 100 g of wax and desired amount of color from the color block, then add both the wax and the color to your melting pot.
- Heat to about 190°F. Then remove from heat.
- Add Love Spell fragrance oil (or whatever scent you are using) to the heated wax. Mix well.
- Take your circle candle mold and insert the wick through it.
- When you wax is 185°F, pour it into the mold. Be sure to pour into the mold slowly.
- Use a marker to hold the wick center in the mold, while it dries.

- Everytime I have made these, I have wound up with a small sinkhole. I heat the remaining wax and pour it into the sinkhole. It is technically on the bottom of the candle, so you do not have to fill it if you do not want to. Please note that you will need it still to have a little bit of a hole in the bottom of the candle so you can push the wick in. Otherwise, it does not stand up right.
- Allow to dry all the way.
- Remove from the candle mold
- Cut wick to ¼ inch and push the wick into the small sinkhole on the bottom of the candle.