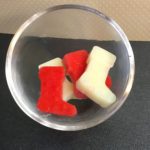
Fact: Bath melts are literally – the best thing you can have in the winter. In this post I am going to show you step by step, how to make a DIY bath melt right at home. I don’t know about you, but I could pretty much live in the bath when it’s cold outside. These bath melts make the bath water moisturizing for your skin, much like bath oil does.
Table of Contents
Prefer to watch this project instead of reading it?
Some links are affiliate links because I am an associate I make a small commission on them.
Since the recipe has a water based emulsifier, it makes the water feel silky smooth or softer, if that makes sense?! Seriously, take the few minutes to make these and your skin will thank you.
DIY Bath Melt Ingredients:
Hard Butters
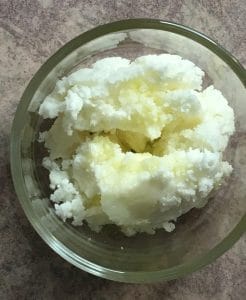
Cocoa Butter
Cocoa butter at room temperature, is solid and brittle. However, when you melt it in water it is both soothing and hydrating for your skin.
Shea Butter
Shea butter is also solid at room temperature and it melts at about the same temperature as our skin. This butter is the reason we cool our melts in the fridge. When you are cooling shea butter, it can sometimes wind up gritty. This is because the fatty acids cool at a different rates. To attempt to cool all of the fatty acids in the butter at the same time, you need to use an ice bath or refrigerate the melts.
Carrier Oil
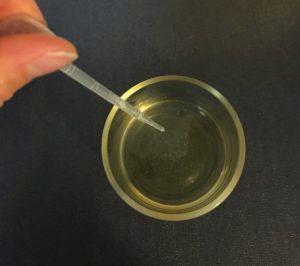
Olive oil
My love for olive oil is real! You can use any carrier oil that would would like in this recipe. I choose this one because it is inexpensive and for it’s skin loving properties.
Emulsifier
Polysorbate 80
Polysorbate 80 is the ‘secret sauce’ of the recipe. It is a water soluble emulsifier that helps the oil mix into the water. Without it, the oil would just pool on the top of the water. The really cool thing about polysorbate 80 is that it can be used with heavy butters.
Although we are using an emulsifier, always be sure to use caution when getting out of the tub. Just in case there is some slippyness left behind from your melt.
Optional Extras
Feel free to add in or leave out your favorite botanicals in this formula. Personally, I don’t love botanicals floating around the tub or cleaning them up afterwards. When I add them to this formula, I simply place the bath melt in a small mesh bag. That way all the botanicals get stuck in the bag not in the tub.
Another cool thing you can add to your bath melts are some colorant. Now, you are going to want to use a color that is powerful enough to color the tub. Mica powders will give you a pretty bath melt, but they don’t actually give the bath water much color. I will normally use a lake dye or da bomb soap dye. Both of these are skin safe and will color the water in the tub, just like a bath bomb does.
DIY Bath Melts
Equipment
- Scale
- Double boiler
- Heat Safe Container
- Spatula
Ingredients
- 5 grams | 10% Cocoa Butter
- 10 grams | 20% Shea Butter
- 31 grams | 62% Olive Oil
- 3 grams | 6% Polysorbate 80
- 1 gram | 2% Fragrance Oil
Instructions
- Weight all of your oils into a heat safe container and place it on a double boiler to melt.
%27%20fill-opacity%3D%27.5%27%3E%3Cellipse%20fill%3D%22%23e7f0c1%22%20fill-opacity%3D%22.5%22%20rx%3D%221%22%20ry%3D%221%22%20transform%3D%22matrix(-2.93132%2080.47461%20-100.31629%20-3.65407%20166.3%20106.5)%22%2F%3E%3Cpath%20fill%3D%22%231e1d28%22%20fill-opacity%3D%22.5%22%20d%3D%22M-3%20208.6h243.8v111.3H-2.9z%22%2F%3E%3Cellipse%20fill%3D%22%23302f39%22%20fill-opacity%3D%22.5%22%20rx%3D%221%22%20ry%3D%221%22%20transform%3D%22matrix(25.22485%20-64.09743%2044.16478%2017.38057%20.6%20170.6)%22%2F%3E%3Cellipse%20fill%3D%22%23c2d26c%22%20fill-opacity%3D%22.5%22%20rx%3D%221%22%20ry%3D%221%22%20transform%3D%22matrix(44.40499%20-52.31478%2041.07523%2034.86481%20132.2%20135.8)%22%2F%3E%3C%2Fg%3E%3C%2Fsvg%3E)
- Stir while melting. Once fully melted, remove from heat.
- Let cool until below 120°F.
- Add your polysorbate 80 and fragrance oil and mix thoroughly.
%27%20fill-opacity%3D%27.5%27%3E%3Cellipse%20fill%3D%22%23df7c4d%22%20fill-opacity%3D%22.5%22%20rx%3D%221%22%20ry%3D%221%22%20transform%3D%22matrix(15.21635%2046.55447%20-51.55676%2016.85135%2018.8%2039.3)%22%2F%3E%3Cellipse%20fill%3D%22%2305080a%22%20fill-opacity%3D%22.5%22%20rx%3D%221%22%20ry%3D%221%22%20transform%3D%22rotate(-138.9%2066.3%20100.3)%20scale(199.88649%2063.43479)%22%2F%3E%3Cellipse%20fill%3D%22%2306090b%22%20fill-opacity%3D%22.5%22%20rx%3D%221%22%20ry%3D%221%22%20transform%3D%22matrix(-23.15184%20-44.03906%2024.0034%20-12.61886%20290.8%20100.5)%22%2F%3E%3Cellipse%20fill%3D%22%234a4d52%22%20fill-opacity%3D%22.5%22%20rx%3D%221%22%20ry%3D%221%22%20transform%3D%22matrix(27.13508%2065.83464%20-42.56983%2017.54602%20101.6%2056.2)%22%2F%3E%3C%2Fg%3E%3C%2Fsvg%3E)
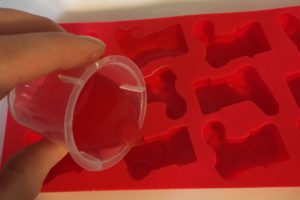
- Place your silicone mold on a tray, to make carrying it to the fridge easier.
- Fill the molds.
%22%20transform%3D%22translate(.6%20.6)%20scale(1.17188)%22%20fill-opacity%3D%22.5%22%3E%3Cellipse%20fill%3D%22%239d8d5e%22%20rx%3D%221%22%20ry%3D%221%22%20transform%3D%22matrix(21.94572%2032.55721%20-155.23566%20104.63914%2035%2021.9)%22%2F%3E%3Cellipse%20fill%3D%22%23453800%22%20rx%3D%221%22%20ry%3D%221%22%20transform%3D%22matrix(29.1125%20-9.11316%2016.51146%2052.7468%209%20136.4)%22%2F%3E%3Cellipse%20fill%3D%22%23d74b38%22%20cx%3D%22174%22%20cy%3D%22158%22%20rx%3D%22134%22%20ry%3D%2216%22%2F%3E%3Cellipse%20fill%3D%22%23970d00%22%20cx%3D%22194%22%20cy%3D%2280%22%20rx%3D%2268%22%20ry%3D%2268%22%2F%3E%3C%2Fg%3E%3C%2Fsvg%3E)
- Place in fridge to cool rapidly.
- Unmold and enjoy.


One thought on “DIY Bath Melt: Learn How to Create Moisturizing Bath Melts That Will Make Your Bath Feel Luxurious”
Thanks for any other informative blog. The place else may I am getting that type of info written in such a perfect manner?
I have a venture that I’m just now operating on, and I’ve been at
the look out for such info.
Comments are closed.