Are you searching for a fun, beginner-friendly way to create a custom chocolate chip silicone mold at home? This DIY chocolate chip mold is perfect for making adorable melt and pour soaps, candle embeds, resin pieces, or even wax crafts that look just like chocolate chips!
I made one recently using real chocolate chips, and the results were so darn cute—especially when I tested it with melt and pour soap. It’s budget-friendly, uses simple supplies, and gives you full control over the size and layout.
Pro tip: Glad cling wrap is a total game changer for mess-free release!
Table of Contents
Watch the Full Video Tutorial
See the entire process—from box building to final unmolding—with close-ups and extra tips!
Whether you’re into soap making, candle crafting, or custom DIY projects, this homemade silicone mold is versatile and super satisfying. Let’s dive in!
Some links on this website are affiliate links, meaning I may earn a small commission if you click and make a purchase. This comes at no additional cost to you.
Materials You’ll Need
- Cardboard (to build your mold box)
- Press and Seal (essential!)
- Silicone mold-making kit (equal parts A and B—follow your product’s instructions)
- Real chocolate chips (or whatever you are molding)
- Hot Glue Gun and Glue
- Mixing bowl and stir stick
- Scissors and tape (for the box)
For testing with melt and pour soap:
- Melt and pour soap base
- Heat-safe container
- Microwave
- Brown mica powder
- Optional: Fragrance oils
These are easy to grab from craft stores or online—making this a quick DIY silicone mold project.
Step-by-Step: How to Make Your Chocolate Chip Silicone Mold
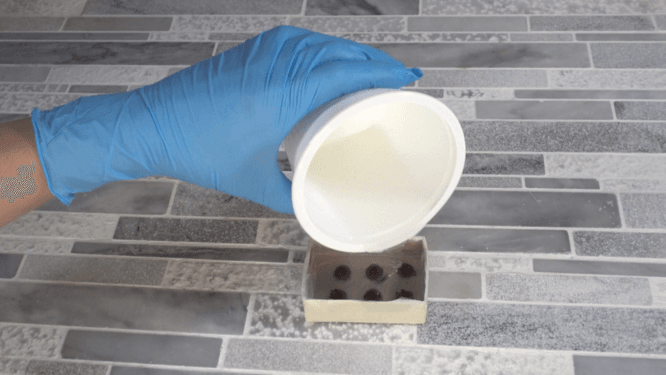
Build the Mold Box Create a cardboard box to your desired size (e.g., 4×6 inches for multiple chips). Tape it securely.
Line with Cling Wrap Cover the inside completely with Glad cling wrap. Smooth out wrinkles—this prevents sticking, silicone leaking and makes everything easier!
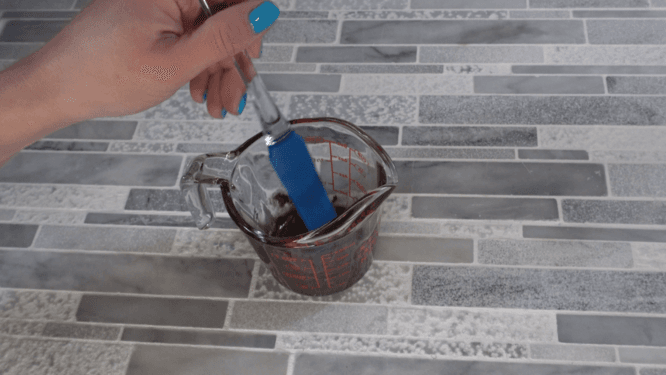
Mix the Silicone Combine equal parts A and B from your kit. Stir well for 2-3 minutes until uniform.
Arrange the Chocolate Chips Glue chocolate chips to the bottom of the lined box. Space them far enough apart so the mold is not weak. Careful—they might melt a tiny bit from the glue heat; chill them first if needed.

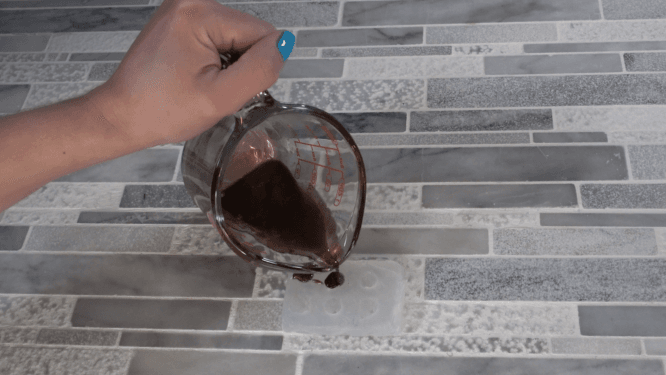
Pour the Silicone Slowly pour over the chips, covering fully. I found you don’t need to worry about bubbles, they seem to work themselves out.
Cure the Mold Let it cure for 6-8 hours (or per your silicone’s instructions). I left mine overnight.
Unmold Peel away the cling wrap, remove the silicone block, and gently pop out the chips. Wash with soap and water. Your custom chocolate chip mold is ready!
Here’s a close-up look at the detailed impressions you’ll get in the finished mold—perfect for realistic chocolate chip effects!

Testing It Out: Chocolate Chip Melt and Pour Soap
I tested mine with melt and pour soap—here’s how:
Cut soap base into equal-sized pieces and place in a heat-safe container.
Microwave in 10-second bursts, stirring in between bursts.
Stir in brown mica powder for chocolate color (add fragrance if desired).
Pour into your mold.
Allow to sit until completely cooled, then unmold.
They turned out so darn cute!

This works great for candle wax too (use wax melts and similar steps). Experiment with colors!
Tips for Success
- Chill chips before gluing to avoid melting.
- Wear gloves and ventilate when mixing silicone.
- Use food-grade platinum silicone if planning food contact (craft versions are fine for soap/candles).
- Scale up/down by changing box size.
- Clean mold after each use.
Frequently Asked Questions
Is this mold food-safe? It depends on your silicone—use platinum-cure/food-grade for real chocolate. Stick to crafts otherwise. The silicone I used is not food safe.
How long does curing take? 6-8 hours for most kits, but always check yours.
What if chips melt during gluing? Fridge them first—they stay firm!
Is cling wrap necessary? Yes—game changer for easy release and making sure the silicone doesn’t absorb into the box.
Can I use this for resin or other crafts? Absolutely! It’s super versatile.
If you try this DIY chocolate chip silicone mold, share your creations in the comments—I’d love to see them!!!