Creating your own custom silicone molds is a fun and creative way to add unique texture and detail to soaps, candles, wax melts, and more. In this tutorial, I’ll walk you through exactly how I made a Fruit Loop–style silicone mold from scratch and how I tested it using melt and pour soap.
This is a beginner-friendly project, and once you’ve made one mold, you’ll see just how versatile this method can be.
Table of Contents
Prefer to watch this project instead of reading it?
Some links on this website are affiliate links, meaning I may earn a small commission if you click and make a purchase. This comes at no additional cost to you.
Supplies Needed
For the Mold:
- Cardboard
- Press & Seal Plastic Wrap
- Hot glue gun and glue sticks
- Fruit Loop cereal
- Silicone
- Digital scale (grams)
- Mixing cups and stir sticks
For Testing the Mold:
- Melt and pour soap base
- Microwave-safe container
- Mica powder
- Fruity O’s Fragrance Oil
- Rubbing alcohol (in a spray bottle)
Step 1: Build the Mold Box
Start by making a box out of cardboard in the exact size you want your finished mold to be. The box should be sturdy and tall enough to allow for a thick silicone base underneath the Fruit Loops.
Once your box is assembled, use Press & Seal (or plastic wrap) to completely cover the inside of the box. This step is important because it prevents the silicone from sticking to the cardboard and makes cleanup much easier.
Step 2: Glue the Fruit Loops in Place
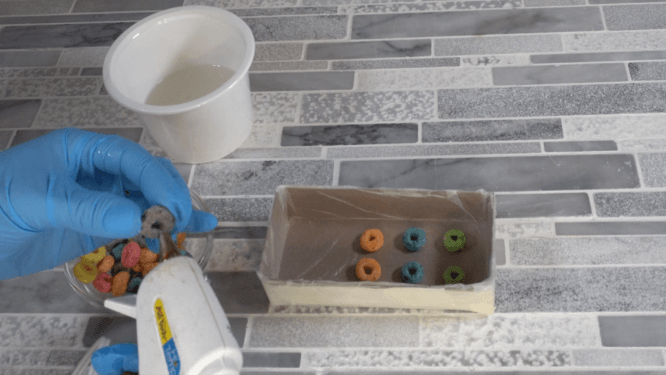
Using a hot glue gun, carefully glue the Fruit Loops to the bottom of the box. Place them flat-side down and space them however you’d like your mold cavities to look. Make sure each piece is firmly attached so nothing floats or shifts once the silicone is poured.
Take your time with this step—how neat this part is will directly affect how your final mold looks.
Step 3: Mix the Silicone
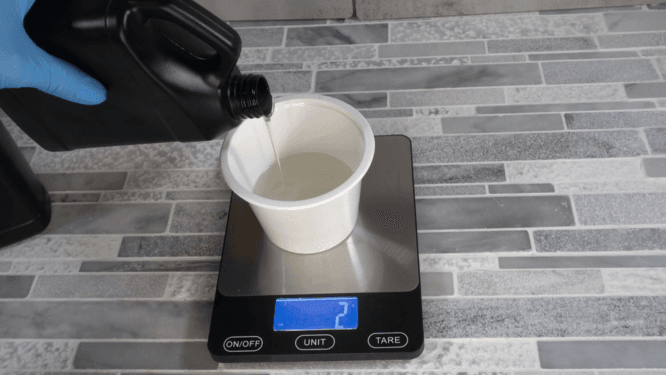
The silicone I am using requires equal parts of Part A and Part B.
- Place your mixing container on a digital scale
- Measure Part A in grams
- Measure the same amount of Part B in grams
Using a scale ensures accuracy, which is critical for proper curing.
Mix the silicone very thoroughly, scraping the sides and bottom of the container as you go. Incomplete mixing can result in sticky or uncured spots in your mold.
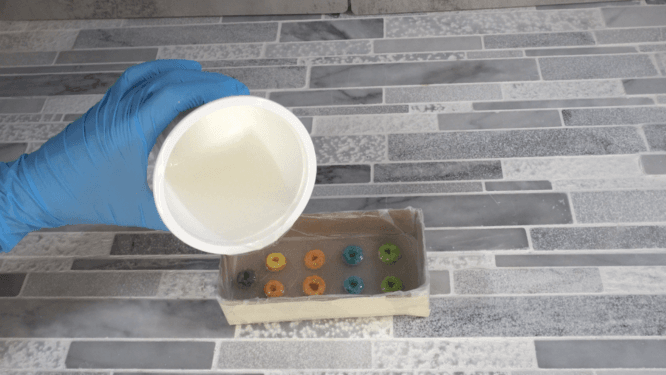
Step 4: Pour the Silicone
Slowly pour the mixed silicone into the mold box. Be sure not only to cover the tops of the Fruit Loops, but also to pour a little deeper than necessary.
This extra thickness is important—it ensures the bottom of the mold is strong and flexible and won’t tear or break during use.
I found that you do not need to worry about air bubbles; they seemed to work themselves out.
Step 5: Allow the Silicone to Cure
Allow the silicone to fully cure according to the manufacturer’s instructions. I left mine overnight to ensure it was completely set.
Once cured, carefully remove the mold from the cardboard box.
Step 6: Remove the Fruit Loops and Clean the Mold
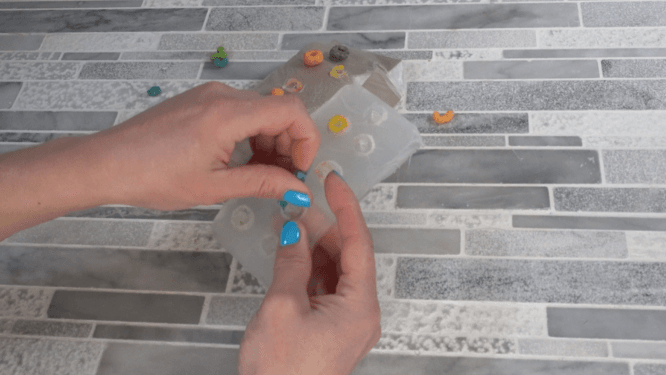
Gently unmold and remove the Fruit Loops from the silicone. Some cereal bits will likely be stuck inside the cavities, which is completely normal.
Wash the mold thoroughly with warm soap and water to remove all residue. Allow it to dry completely before use.
Step 7: Test the Mold with Melt and Pour Soap
To test the mold, start by cutting your melt and pour soap base into equal-sized pieces. Place the soap into a microwave-safe container. If you are new to soap making, check out my Beginner Soap Making post.
Heat the soap in the microwave in 10-second intervals, stirring between each interval, until the soap is fully melted.
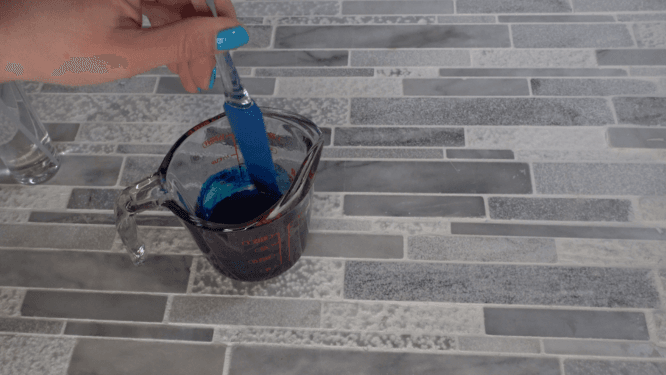
Once melted:
- Add your mica powder
- Mix very well
If you notice the mica is not mixing smoothly, lightly spray the soap with rubbing alcohol. This helps break the surface tension and allows the colorant to blend evenly.
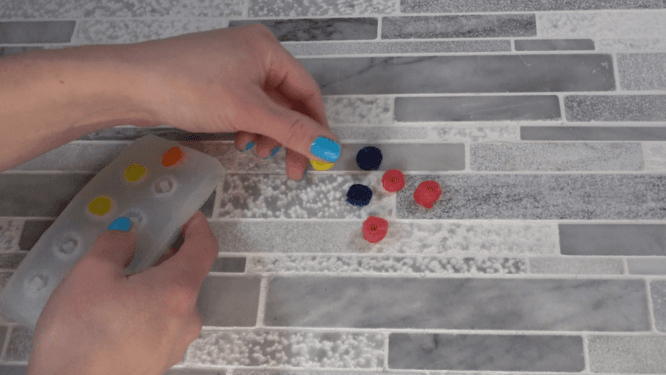
Step 8: Pour, Cool, and Unmold
Carefully pour the colored soap into the silicone mold. Allow the soap to cool completely and harden before attempting to unmold.
Once fully set, gently remove the soap pieces from the mold—and enjoy your custom Fruit Loop–shaped creations.
Safety Notes and Best Practices
- Wear gloves This helps keep silicone off your skin and makes cleanup easier.
- Use craft-only tools: Do not reuse tools for food after using silicone.
- Label your molds: Clearly mark molds as non-food safe.
Tips for Best Results
- Secure everything well: Make sure each Fruit Loop is firmly hot-glued in place. If one lifts or floats, it will distort the cavity.
- Use a scale, not cups: Silicone must be measured accurately. Grams are far more precise than volume measurements.
- Pour in a thin stream: This helps reduce trapped air bubbles as the silicone fills around the Fruit Loops.
Mold Care, Storage, and Longevity
- Clean after each use: Wash with warm soap and water, then air dry completely.
- Avoid sharp tools: Never use knives or sharp objects to remove soap from silicone molds.
- Store flat: Keeping molds flat prevents warping over time.
- Avoid extreme heat: Do not place silicone molds directly on hot surfaces.
Troubleshooting Common Issues
My silicone didn’t cure properly
This usually means the silicone wasn’t mixed thoroughly or the ratios were off. Always scrape the sides and bottom of your mixing cup and measure in grams.
Air bubbles formed around the Fruit Loops
Try tapping the mold gently on the table after pouring. Pouring slowly in a thin stream also helps.
Fruit Loop pieces broke apart inside the mold
This is normal. Wash the mold thoroughly with warm soap and water to remove all cereal residue before using.
Soap sticks in the mold
Let the soap cool completely before unmolding. Silicone releases best when the soap is fully hardened.
Frequently Asked Questions (FAQ)
Can beginners make silicone molds?
Yes. This project is very beginner-friendly as long as you measure accurately and mix thoroughly.
Can I reuse the same mold box?
Yes. If your cardboard box stays intact, it can be reused. You may need to replace the Press & Seal liner.
Can I use resin, wax, or candles in this mold?
Yes. This mold works well for melt and pour soap, wax melts, and resin. Always follow safety guidelines for each material.
Can I speed up the silicone curing time?
It’s best to allow silicone to cure naturally. Heat can interfere with proper curing unless the manufacturer specifically recommends it.
Frequently Asked Questions (FAQ)
Can I use a different cereal or object?
Yes. This method works with almost any small object. Just remember that food items are for crafting molds only—not food-safe use.
Is this mold food safe?
No. Because the mold is made using cereal and craft-grade silicone, it should only be used for soap, wax, resin, or candle projects.
How long will the silicone mold last?
With proper care, a well-made silicone mold can last for dozens—sometimes hundreds—of uses.
Can I color the silicone?
Yes, you can add silicone pigment if desired, but it is completely optional.
Final Thoughts
Making your own silicone molds may seem intimidating at first, but once you understand the process, it becomes a repeatable and reliable skill. This Fruit Loop silicone mold is a great beginner project that teaches the basics of mold making while producing a fun, textured result.
Using a sturdy mold box, accurate measurements, and a thick silicone base will help ensure your mold holds up over time. Whether you’re using it for melt and pour soap, wax melts, or other craft projects, this technique can be adapted to endless designs.