Want to learn how to make your own beeswax candles? You came to the right place! I am kind of old school when it comes to candles. I love them, they are just a part of my chillin’ at home vibe. Anytime I start cleaning the house, the very first thing I do it light a candle. I want all the smelly goodness that I can get in the house.
The same is true when I want to relax and watch some tv or read a book. So, basically anytime I am home there is a candle going. The thing that I love about using beeswax candles is that they are said to release negative ions that help to neutralize air pollutant particles.
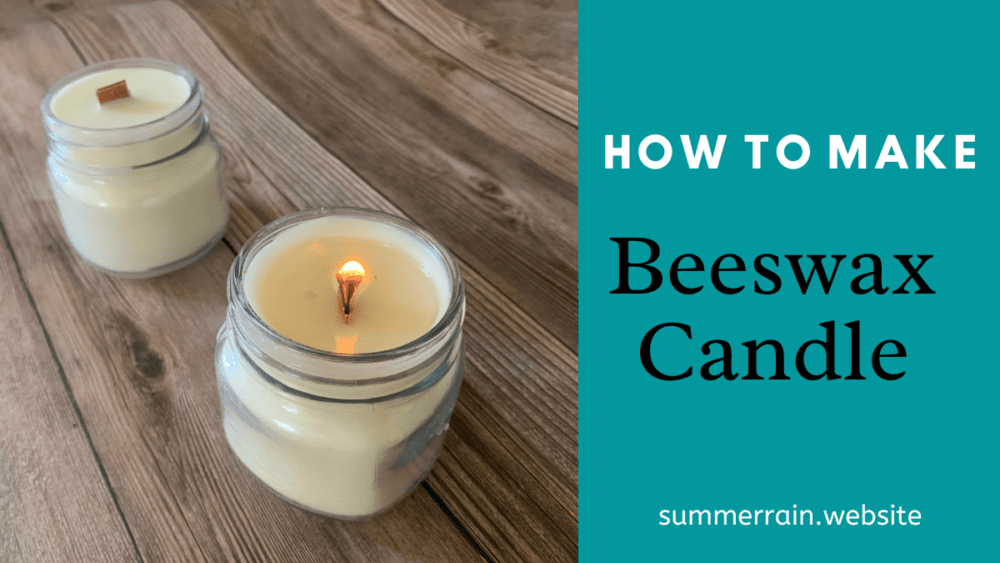
There is just something to a wood wick candle that you don’t get with a regular candle wick. It has a crackling sound and a flicker the is reminiscent of a summer campfire. I just need to have a summer vibe right now and this candle is about as close as it gets.
Prefer to watch the video tutorial for this project?
Cleanup Tip
It can be a pain to clean your container after you have melted beeswax in it. For an easier cleanup, place your wax melting pot back on the double boiler and allow all of the beeswax to re-melt. Then grab a paper towel and wipe out as much of the wax as you can.
First Burn
The first time you burn a candle is the most important. I know that sound silly but hear me out. There is a thing called a ‘memory burn’ where the candle follows the first burn pattern. When you burn the candle, you have to leave it lit long enough until the wax melts all the way to the edge of the container.
The general rule is it will take 1 hour per inch of candle width. So if your container is 3 inches wide, it will take 3 hours (give or take) to melt the full layer of beeswax.
Melting wax
I have seen some that recommend melting your beeswax in the microwave. I do not advise doing this. The best way to melt the beeswax is on a double boiler.
Candle Color
The color of the candle is going to be dependent on the color of the beeswax that you put in it. If you are going for a more natural yellowish color, then be sure to get the yellow beeswax pellets. I already have the white pellets on hand so that is what I use.
Candle Ingredients
Beeswax
Beeswax is a sort of soft wax that has a really high melting point. It is definitely more expensive than the other candle wax (soy or paraffin), but is worth it. The wax melts slower and has a unique aroma.
Coconut Oil
The coconut oil helps the candle burn all the way without tunneling. Tunneling is when the center part of your candle burns, but the outer edge stays intact, creating a tunnel. Beeswax has a very high melting point and without the coconut oil it can have a weak flame or cause the wick to drown.
Another reason why we use it, is to increase the scent throw a bit. Beeswax candles in general are difficult to get a good fragrance with.
Essential Oils
These are completely optional. You could also use fragrance oil as long as it is candle safe. Since I am going for a more natural candle, I will be using essential oils in this candle.
The essential oil that I used was eucalyptus, I am in love with the scent of it.
How to make candles from beeswax
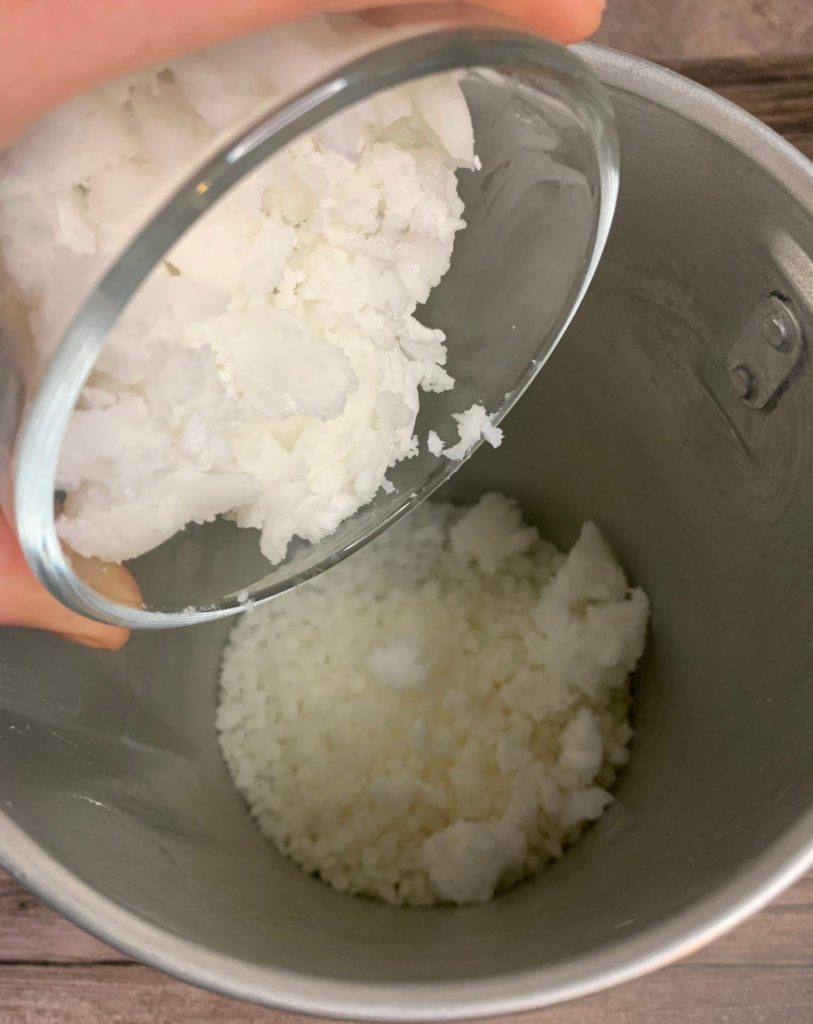
1. Melting the wax
Put your beeswax and coconut oil in your melting pot and place on a double boiler. Stir regularly until the wax in completely melted.
2. Cool and Scent Beeswax
Add eucalyptus essential oils and give it a good stir. I mean a good stir, like 1-2 minutes. You need to do this to really get the essential oils to bond with the beeswax molecules.
3. Placing wicks
Pour a small amount of melted wax in the bottom center of your container. Place the wood wick directly on top to secure it in place.
4. Pouring Beeswax
Slowly pour the melted beeswax into your container.
5. Cool Candle
Allow your candle to cool completely before moving it. Once it is cooled, usually a few hours (depending on the size of the candle).
6. Fixing Candle Top
If you candle top is not perfect, reheat the remaining wax and re-pour the top of the candle. Allow to cool.
7. Trim Wick
Carefully trim the wick to ¼ inch.
8. Cure Time
For best results, allow your candle to ‘cure’ for at least two days after you make it.
Printable recipe here!

How To Make Candles With Beeswax
Equipment
- Pouring pot
- Scale
- Double boiler
Ingredients
- 4.80 ounce | 60% Beeswax
- 2.96 ounce | 37% Coconut oil
- 0.24 ounce | 3% Eucalyptus essential oil
Instructions
- Put your beeswax and coconut oil in your melting pot and place on a double boiler. Stir regularly until the wax in completely melted.
- Add eucalyptus essential oils and give it a good stir. I mean a good stir, like 1-2 minutes. You need to do this to really get the essential oils to bond with the beeswax molecules.
- Pour a small amount of melted wax in the bottom center of your container. Place the wood wick directly on top to secure it in place.
- Slowly pour the melted beeswax into your container.
- Allow your candle to cool completely before moving it. Once it is cooled, usually a few hours (depending on the size of the candle).
- If you candle top is not perfect, reheat the remaining wax and re-pour the top of the candle. Allow to cool.
- Carefully trim the wick to ¼ inch.
- For best results, allow your candle to ‘cure’ for at least two days after you make it.
FAQ
My candle cracked
This can be caused by pouring the beeswax at too hot of a temperature. You should not pour above 155 degrees.
My candle is tunneling
You might need to try a bigger wick to get more heat to the candle and allow the beeswax to melt more even.


