
Welcome to the enchanting world of candle making, where creativity meets craftsmanship to illuminate spaces with warmth and charm. Among the myriad of candle varieties, few can match the whimsical allure of whipped cream candles. With its fluffy texture and delightful fragrance, a whipped cream candle adds a touch of elegance to any room and evokes a sense of indulgence.
In this blog post, I invite you to embark on a journey of discovery as I unveil the secrets to mastering the art of whipped cream candle making. Whether you’re a seasoned crafter seeking to refine your skills or a curious beginner eager to explore the world of candle making, this post is your gateway to creating candles that are as beautiful as they are fragrant.
Join me as I delve into the intricacies of temperature control, consistency, and piping techniques, uncovering the key ingredients for crafting perfect whipped cream candles every time. Get ready to unleash your creativity and transform ordinary wax into an exquisite work of art that will delight the senses and elevate any ambiance.
Are you ready to elevate your candle making game and unlock the secrets to crafting stunning whipped cream candles? Let’s dive in and illuminate the world with our creativity and passion for candle making!
Prefer to watch this project instead of reading it?
Certain links on this website are affiliate links, as I am an associate. Clicking on these links and making a purchase may earn me a small commission. Rest assured, there is no extra cost to you.
Secret #1: Temperature
In the realm of candle making, temperature is a critical factor in achieving the perfect whipped cream candle. Before delving into the intricacies of fragrance and texture, mastering temperature control sets the foundation for success.
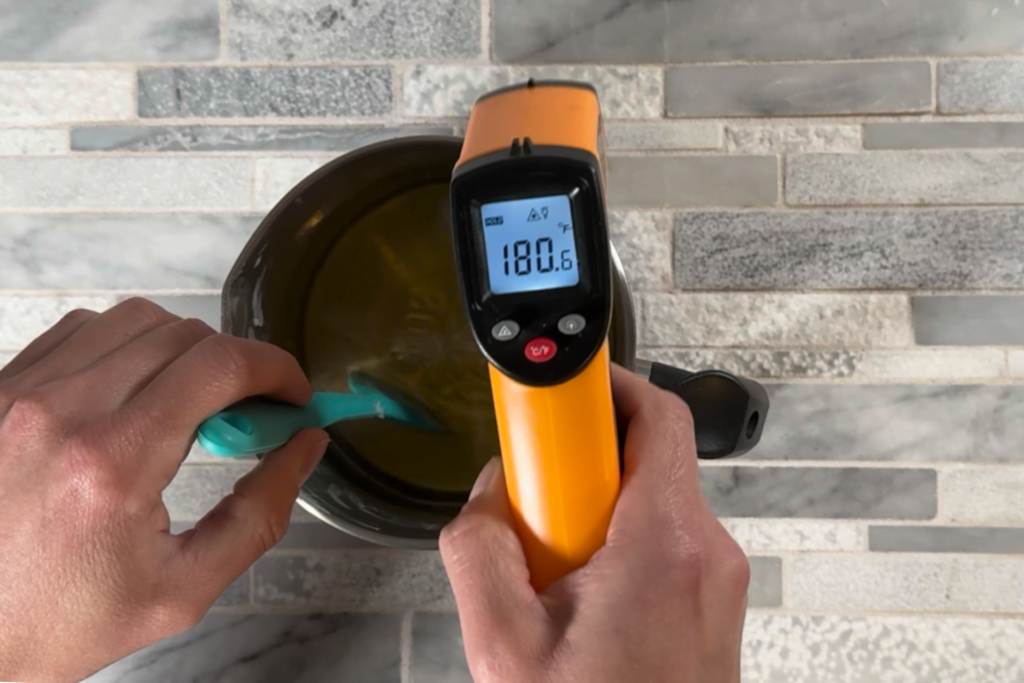
The optimal temperature range for heating Soy Wax is between 175°F and 180°F (79°C – 82°C). If your wax has not reached that temperature and is already melted, leave it on the double boiler until it reaches the desired temperature.
When it comes to incorporating fragrance oil, timing is key. Add the Sugared Strawberry Fragrance Oil only after reaching the desired temperature range. This allows the fragrance molecules to bind effectively with the wax, ensuring a long-lasting and aromatic candle.
To ensure thorough fragrance distribution, give the wax and fragrance mixture a vigorous stir for at least 2 minutes. This ensures that every part of the wax is infused with the fragrance, enhancing its scent throw and overall quality.
While you are waiting for the wax to cool down, place you Candle Wick in the center of the Candle Jar.
Maintaining a consistent temperature throughout the candle making process is paramount. Invest in a reliable thermometer and monitor the temperature diligently to avoid fluctuations that can impact the final outcome of your candles.
By mastering temperature control, you lay the groundwork for creating whipped cream candles that not only look beautiful but also exude captivating fragrance and charm. So, remember to keep a watchful eye on the thermometer and let the magic of temperature elevate your candle making journey.
Secret #2: Consistency
In the pursuit of crafting the perfect whipped cream candle, achieving the ideal consistency is paramount. Consistency entails ensuring that all the wax is at the same temperature and thoroughly mixed. This ensures the wax is pliable and ready for piping.
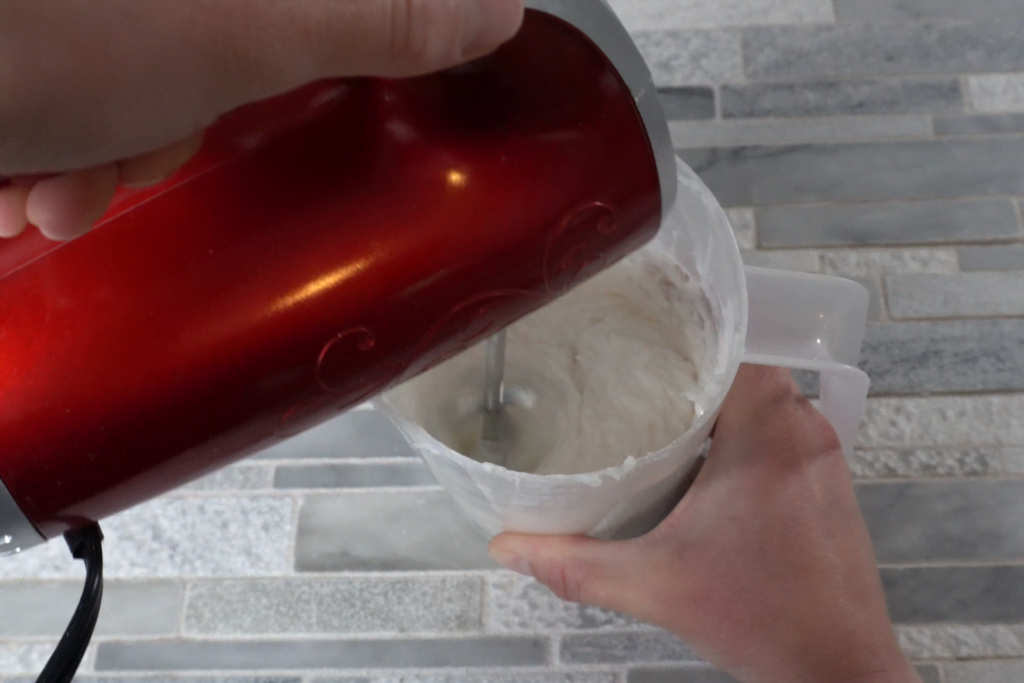
To achieve the desired consistency, you’ll need to use a hand mixer. Keep a close eye on the wax as it transforms, aiming for a light and fluffy texture reminiscent of whipped cream. Be mindful of over-whipping, as this can cause the wax to become too solid to pipe.
One key indicator of the ideal consistency is the texture of the wax before and after whipping. Initially, the wax may feel thicker due to varying cooling rates of different wax parts. However, as you whip, you’ll notice a transformation, with the wax becoming lighter and airier. Additionally, it will change color from an off-white to a pure white color.
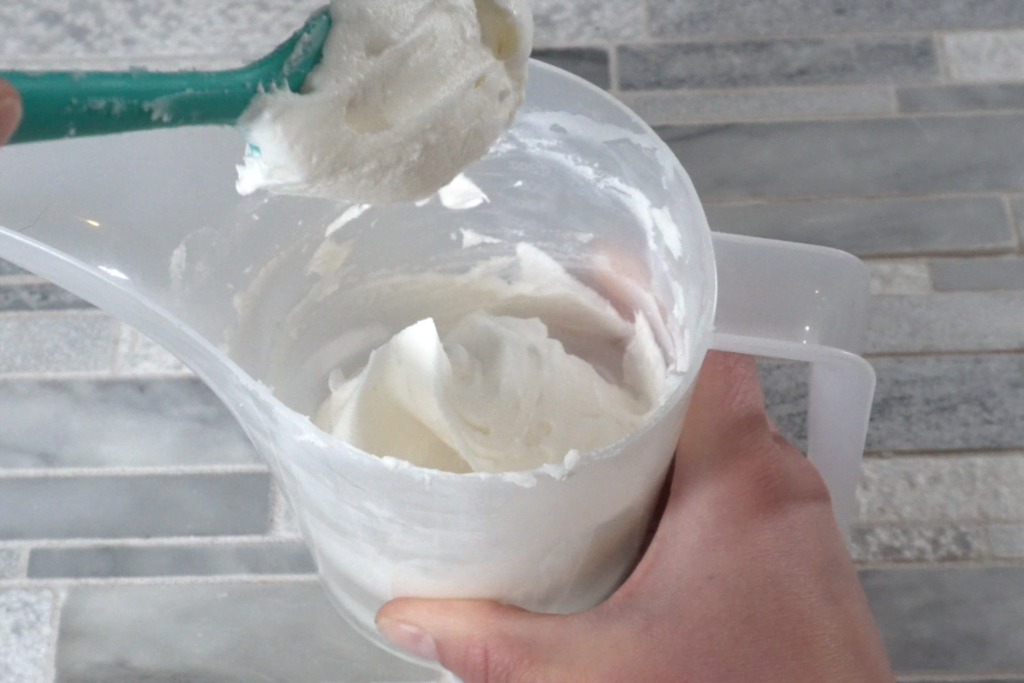
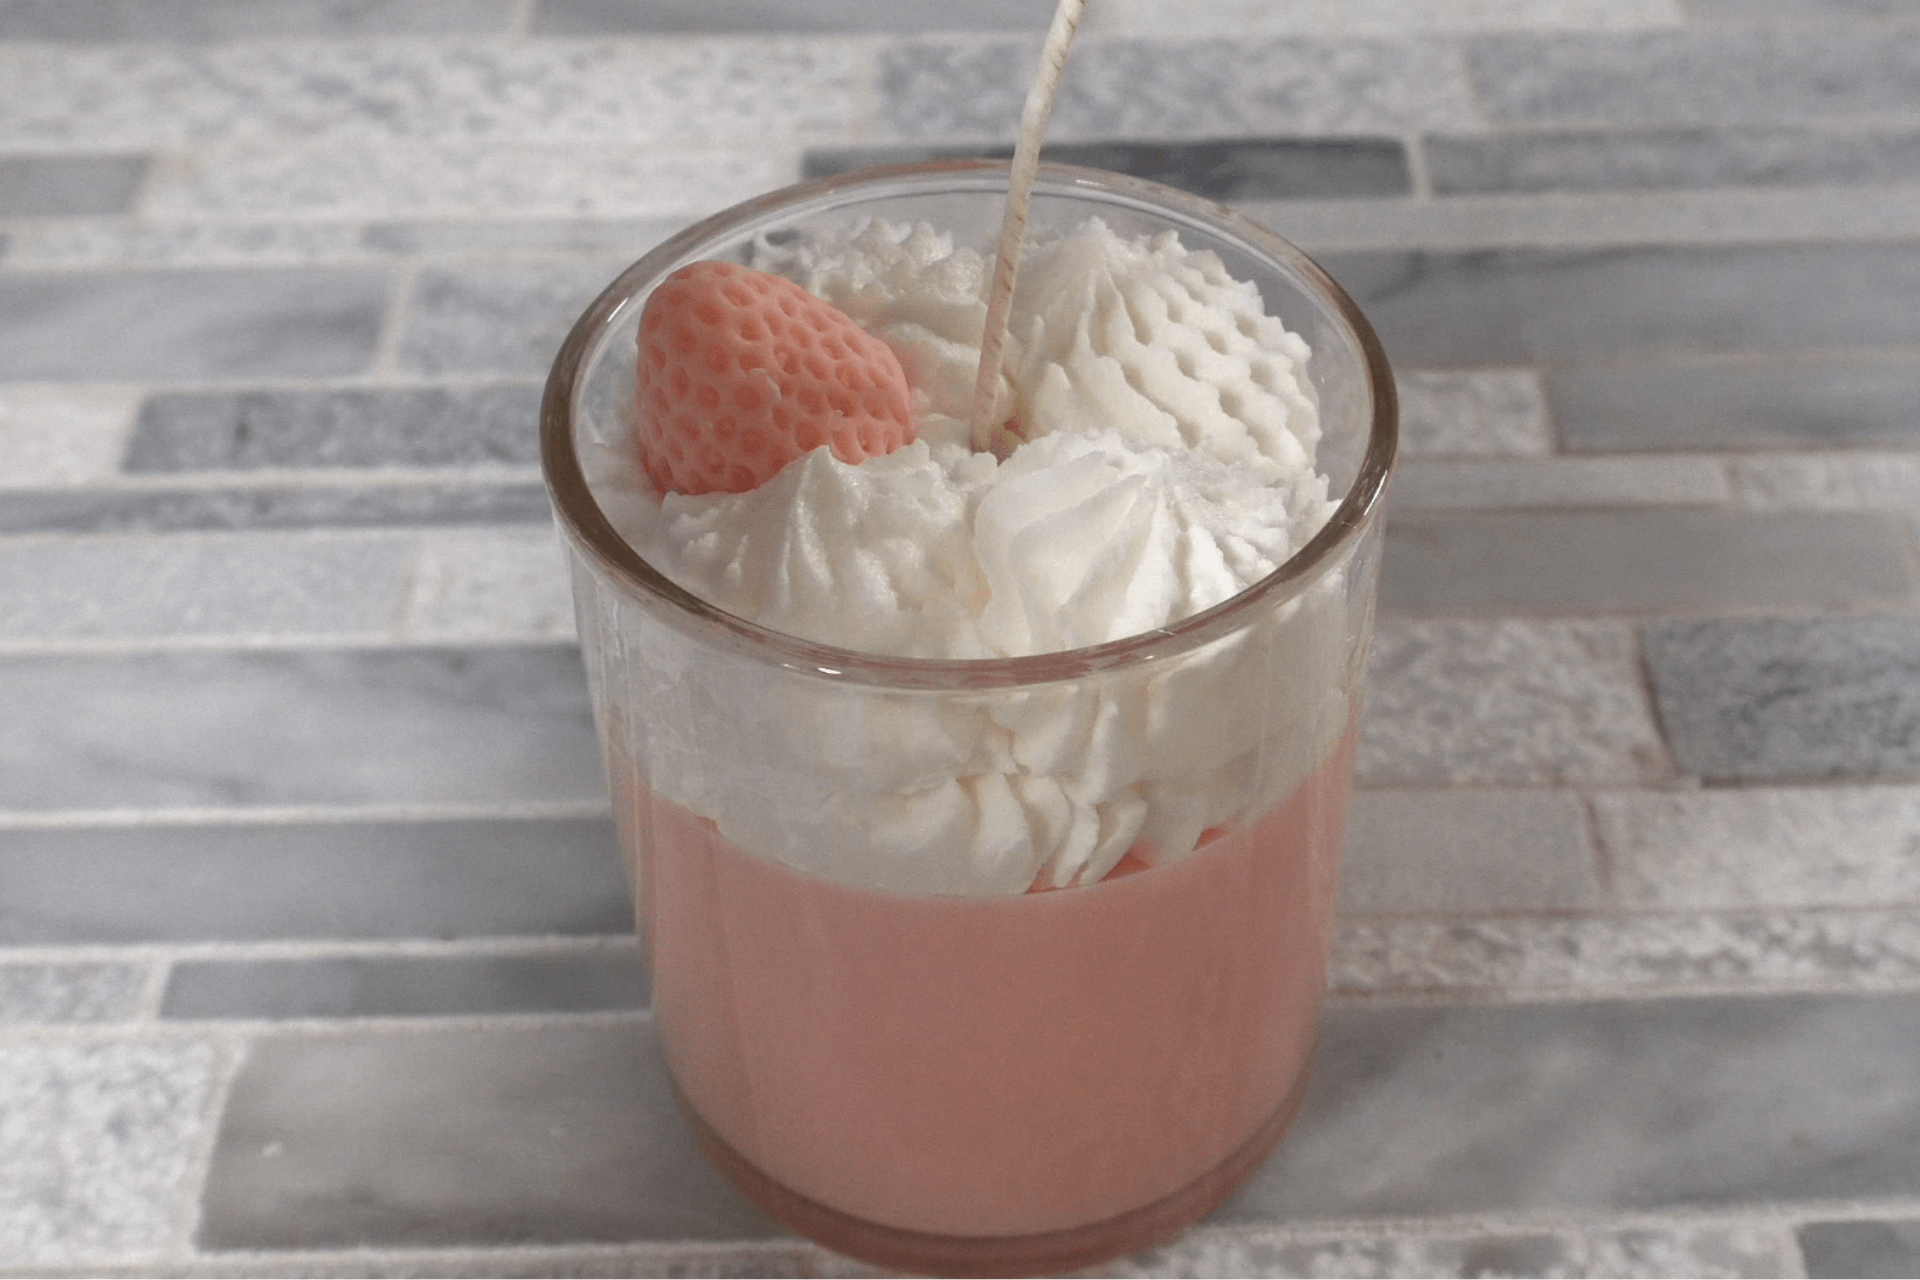
Once the wax can hold a peak, that’s when it’s ready to pipe. The wax needs to be thick enough to hold a peak or any design that you make in the wax. This ensures that your whipped cream candles will maintain their shape and intricate details once piped onto the candle surface.
Secret #3: Piping Quickly
Efficiency is crucial when it comes to piping whipped cream candles. Ensuring your candles maintain their desired shape and design relies on working swiftly and effectively during the piping process.
Here are expert tips for piping quickly and efficiently:
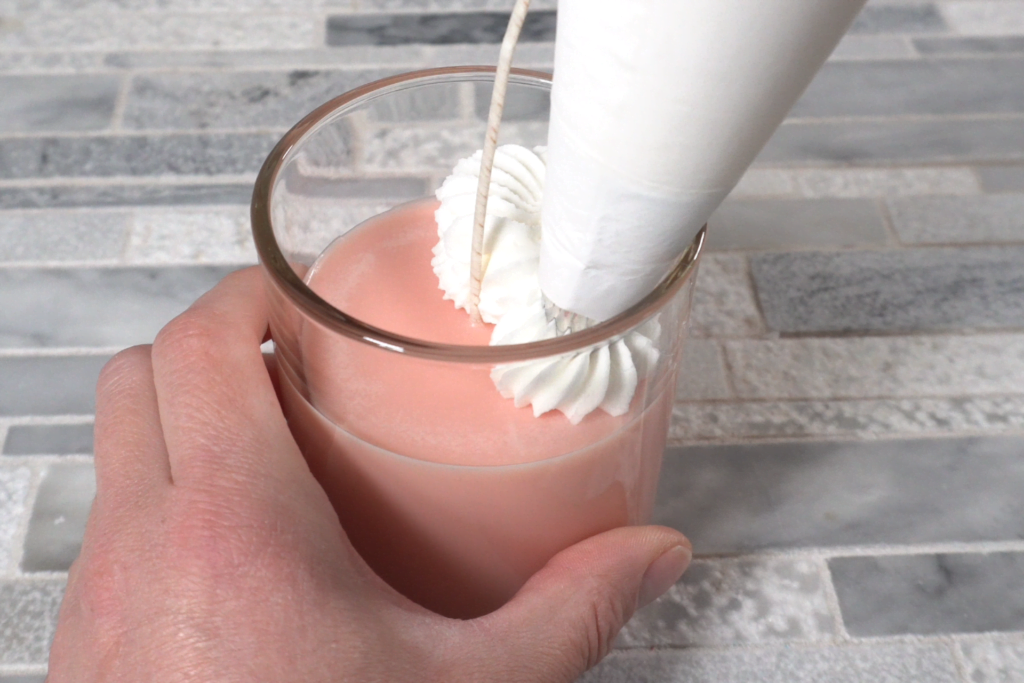
Prepare Your Piping Bag: Before piping, ensure your piping bag is ready. Fill it with the whipped wax mixture and securely seal the top to prevent leaks or spills.
Choose the Right Tip: Select a piping tip that suits your desired design. For instance, I used a large Piping Tip, and squeezing small blobs of wax onto the candle surface can create a charming whipped cream effect.
Work in Small Batches: Prevent the wax from hardening too quickly by working in small batches when piping. This allows you to control the wax consistency and ensures smooth piping.
Practice Makes Perfect: Piping whipped cream candles may require practice to master. Don’t be discouraged by initial imperfections. Remember, if you make a mistake when piping, you can always scrape off the wax and start again.
By following these tips and techniques, you’ll pipe whipped cream candles quickly and effectively, resulting in beautifully decorated candles sure to impress. So, roll up your sleeves, grab your Piping Bag, and let your creativity flow as you decorate your candles with intricate designs and patterns.
Strawberries and Whipped Cream Candle
Equipment
- Scale
Ingredients
Base Candle
- 2 Candle Jar
- 2 Candle Wick
- 1 Strawberry Embed Mold
- Red Candle Dye
- 5.4 ounce | 90% Soy Wax
- 0.60 ounce | 10% Sugared Strawberry Fragrance Oil
Whipped Cream Top
- 3.6 ounce | 90% Soy Wax
- 0.40 ounce | 10% Sugared Strawberry Fragrance Oil
- Piping Tip
- Piping Bag
Instructions
Candle Base & Strawberry Embed
- Place the candle wick in the center of the jar using hot glue.
- Heat the soy wax to 180 °F and remove it from the double boiler.
- Immediately add Sugared Strawberry fragrance oil and mix for at least 2 minutes.
- Add red candle colorant and mix well.
- When the wax has cooled down, pour it slowly and close to the candle jar until it is 3/4 filled with wax. Leave space for the whipped cream part on the top.
- Pour the strawberry embeds. If you want them darker, add a bit more colorant before pouring.
- Center the wick with a wick holder or pen while the wax cools.
Whipped Cream Frosting
- Heat the wax until it reaches 180°F.
- Add fragrance oil and mix well for at least 2 minutes.
- Pour the wax into a deep mixing container.
- Allow it to cool, periodically hand mixing. Be sure to scrape the sides and bottom of the container.
- When the mixture starts to thicken, mix with a hand mixer until fully combined. Repeat until the mixture is white and holds peaks.
- Immediately add the mixture to a piping bag.
- Pipe it onto candles and place embeds on top.
- Allow the candles to cool.
- Trim wick to 1/4 inch and place labels.


