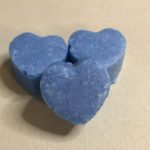
Learn how to make your own solid salt scrub cubes right at home, that will hydrate, cleanse and exfoliate all at the same time. In this post, you will learn about all the ingredients, why we use them, plus get a free recipe and video tutorial. I am in love with the way my skin feels after a good exfoliating.
I love these salt cubes when I am in need of a quick exfoliation. What I love is that the cubes are single use. Simply grab one before you hop in the shower and slough off those dead skin cells.
Table of Contents
Prefer to watch this project instead of reading it?
Some links are “affiliate links,” because I am an Amazon Associate and I earn from qualifying purchases. There is no additional cost to you, the price of the item is the same whether it is an affiliate link or not.
How to use Solid Salt Scrub Cubes
To use your salt scrub cubes, simply break the cube up a little bit in your hand. Then simply scrub your body with the cube…. yep, it’s that easy!
You can also scrub with the cube intact for a little more exfoliating power. However, if you find that it is a little too scrubby for you, just run it under the water a little bit.
No preservative
Another thing that I love about these salt cubes is that they do not need a preservative. This is because they do not contain any water in the formulation and because they are self use. Meaning they are unlikely to come into contact with any water. Also, there is no need to worry about getting water in the container with your dripping wet hands. If you have any left after exfoliating, just throw the rest of that one away.
I normally just store them in a decorative glass jar. Then I can just grab one out when I need it. Which is another win, am I the only one that feels like they have too many products in the shower?
Phase 1 – Cleansing and Moisturizing
Cleansing
This recipe uses clear melt and pour soap, which gives us the cleansing power. The reason why we want to use the melt and pour soap is to help to cleanse off the left over exfoliator as well as to help the Epsom salt to glide over our skin.
Moisturizing
I love the moisturizing abilities of Shea butter. It is solid at room temperature but melts at skin temperature, it really is the perfect butter for an exfoliating scrub like this.
You have the choice between getting refined or unrefined shea butter. Personally, I don’t love the smell of unrefined shea butter, so I normally get the refined.
Phase 2 – Exfoliating, Scent and Color
Ok, so there are sooooo many different things that you can exfoliate with. In this scrub, I have chosen epsom salt. I picked this because you know what, exfoliating, cleansing and moisturizing with one product just isn’t enough. I also want to help to relieve sore muscles!
Some other exfoliators:
- White Granulated Sugar
- Fine Sea Salt
- Brown Sugar
- Coffee Grounds
Mica Powder
To add a bit of color, we add just a dollop of mica powder. If you want to get really fancy you could also add a touch of biodegradable glitter!
Solid Salt Scrub Cubes – Learn How To Make Your Own
Equipment
- Microwave safe mixing bowl
- Spatula
- Scale
- Silicone mold
Ingredients
Phase 1
- .92 ounce | 46% Melt and Pour Soap
- .04 ounce | 2% Shea Butter
Phase 2
- 1 ounce | 50% Epsom Salt
- .04 ounce | 2% Fragrance
- Mica Powder Optional
Instructions
- Weight your melt and pour soap and shea butter.
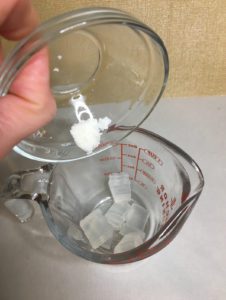
- Place both in a microwave safe container and heat for 15 seconds in microwave. Remove and stir. If it is not full melted, place back in microwave in 10 second intervals until melted.
%22%20transform%3D%22translate(.6%20.6)%20scale(1.17188)%22%20fill-opacity%3D%22.5%22%3E%3Cellipse%20fill%3D%22%23b9c0d1%22%20cx%3D%22168%22%20cy%3D%22180%22%20rx%3D%2299%22%20ry%3D%2299%22%2F%3E%3Cellipse%20fill%3D%22%238a6006%22%20rx%3D%221%22%20ry%3D%221%22%20transform%3D%22matrix(-28.47451%2039.98402%20-59.04106%20-42.04593%2028.8%2011.2)%22%2F%3E%3Cellipse%20fill%3D%22%23505667%22%20rx%3D%221%22%20ry%3D%221%22%20transform%3D%22matrix(-65.32365%2022.77298%20-23.47282%20-67.3311%205.6%20190.8)%22%2F%3E%3Cellipse%20fill%3D%22%23bfb952%22%20rx%3D%221%22%20ry%3D%221%22%20transform%3D%22rotate(-22.3%20115.4%20-433)%20scale(100.78851%2056.72574)%22%2F%3E%3C%2Fg%3E%3C%2Fsvg%3E)
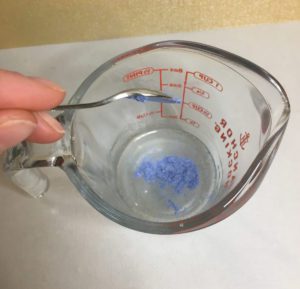
- Put mica powder into the melted "Phase 1" ingredients. Mix well.
%27%20fill-opacity%3D%27.5%27%3E%3Cpath%20fill%3D%22%23fff%22%20fill-opacity%3D%22.5%22%20d%3D%22M346.5%20144l56.2%20105.6-253.5%20134.8L93%20279z%22%2F%3E%3Cellipse%20fill%3D%22%23857256%22%20fill-opacity%3D%22.5%22%20rx%3D%221%22%20ry%3D%221%22%20transform%3D%22matrix(67.2217%20-291.16918%2065.45674%2015.11188%2020.1%20104.9)%22%2F%3E%3Cellipse%20fill%3D%22%23d5dcc6%22%20fill-opacity%3D%22.5%22%20rx%3D%221%22%20ry%3D%221%22%20transform%3D%22rotate(61.2%2081.6%20293.3)%20scale(264.44111%2078.26571)%22%2F%3E%3Cellipse%20fill%3D%22%23a0b945%22%20fill-opacity%3D%22.5%22%20rx%3D%221%22%20ry%3D%221%22%20transform%3D%22matrix(-244.63204%2022.26326%20-2.95134%20-32.42979%20177%203)%22%2F%3E%3C%2Fg%3E%3C%2Fsvg%3E)
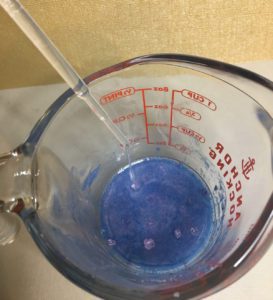
- Add fragrance oil and mix again.
%27%20fill-opacity%3D%27.5%27%3E%3Cpath%20fill%3D%22%232d2f5e%22%20fill-opacity%3D%22.5%22%20d%3D%22M194.6%20161.4L219.9%20321%203.5%20355.4l-25.3-159.7z%22%2F%3E%3Cellipse%20fill%3D%22%23eccf94%22%20fill-opacity%3D%22.5%22%20rx%3D%221%22%20ry%3D%221%22%20transform%3D%22rotate(-60.1%20137.2%20-138.2)%20scale(89.54267%20271.87501)%22%2F%3E%3Cellipse%20fill%3D%22%23b6c5d4%22%20fill-opacity%3D%22.5%22%20rx%3D%221%22%20ry%3D%221%22%20transform%3D%22matrix(-34.13095%20-167.20976%2045.9059%20-9.37034%20272.5%20230.2)%22%2F%3E%3Cellipse%20fill%3D%22%23ab9342%22%20fill-opacity%3D%22.5%22%20rx%3D%221%22%20ry%3D%221%22%20transform%3D%22matrix(6.84911%20-41.883%20140.81825%2023.02796%2043.4%2041.7)%22%2F%3E%3C%2Fg%3E%3C%2Fsvg%3E)
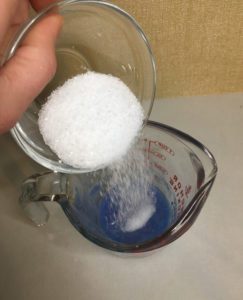
- Add Epsom salt and mix well.
%27%20fill-opacity%3D%27.5%27%3E%3Cellipse%20fill%3D%22%23e7f1ff%22%20fill-opacity%3D%22.5%22%20rx%3D%221%22%20ry%3D%221%22%20transform%3D%22matrix(21.98335%20-42.8128%2050.23078%2025.79231%2094%20115.3)%22%2F%3E%3Cellipse%20fill%3D%22%23414c5b%22%20fill-opacity%3D%22.5%22%20rx%3D%221%22%20ry%3D%221%22%20transform%3D%22rotate(166.5%204.9%20119.6)%20scale(140.22388%2060.33294)%22%2F%3E%3Cpath%20fill%3D%22%23b57521%22%20fill-opacity%3D%22.5%22%20d%3D%22M240.8%2081.8L-.2%2069.2%206.4-59.5l241%2012.6z%22%2F%3E%3Cpath%20fill%3D%22%23aab4c3%22%20fill-opacity%3D%22.5%22%20d%3D%22M327.9%20242.3L170.2%20394.6%2090.5%20312%20248%20159.7z%22%2F%3E%3C%2Fg%3E%3C%2Fsvg%3E)
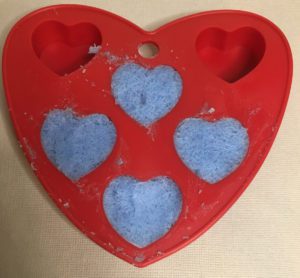
- Place the mixture into a silicone mold. Allow to sit until hardened.
%22%20transform%3D%22translate(.6%20.6)%20scale(1.17188)%22%20fill-opacity%3D%22.5%22%3E%3Cellipse%20fill%3D%22%23fff%22%20rx%3D%221%22%20ry%3D%221%22%20transform%3D%22matrix(-34.29527%20-37.99909%20161.89131%20-146.11157%20223.9%20197)%22%2F%3E%3Cellipse%20fill%3D%22%23912726%22%20cx%3D%2286%22%20cy%3D%228%22%20rx%3D%22140%22%20ry%3D%22140%22%2F%3E%3Cellipse%20fill%3D%22%23a61600%22%20rx%3D%221%22%20ry%3D%221%22%20transform%3D%22rotate(-127.9%2027%2015)%20scale(36.02287%2069.99713)%22%2F%3E%3Cellipse%20fill%3D%22%23348309%22%20rx%3D%221%22%20ry%3D%221%22%20transform%3D%22matrix(26.52547%2065.88158%20-29.18857%2011.752%2012.2%20225)%22%2F%3E%3C%2Fg%3E%3C%2Fsvg%3E)
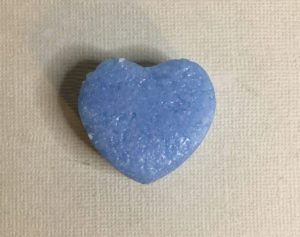
- Remove from mold and enjoy!
%27%20fill-opacity%3D%27.5%27%3E%3Cellipse%20fill%3D%22%234b4c78%22%20fill-opacity%3D%22.5%22%20rx%3D%221%22%20ry%3D%221%22%20transform%3D%22matrix(17.75567%20-60.21749%2070.07859%2020.66331%20105.4%2099.6)%22%2F%3E%3Cellipse%20fill%3D%22%23e5e5de%22%20fill-opacity%3D%22.5%22%20rx%3D%221%22%20ry%3D%221%22%20transform%3D%22matrix(-63.46354%20-13.4896%2062.12986%20-292.298%20260.1%20147.1)%22%2F%3E%3Cellipse%20fill%3D%22%23f7f7f7%22%20fill-opacity%3D%22.5%22%20rx%3D%221%22%20ry%3D%221%22%20transform%3D%22matrix(35.39003%202.83216%20-7.3475%2091.81262%20299.4%20177.5)%22%2F%3E%3Cellipse%20fill%3D%22%237374d8%22%20fill-opacity%3D%22.5%22%20rx%3D%221%22%20ry%3D%221%22%20transform%3D%22matrix(12.09112%20-45.12344%2043.76895%2011.72818%20147.5%20111.6)%22%2F%3E%3C%2Fg%3E%3C%2Fsvg%3E)


