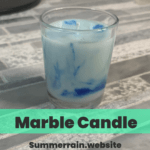
How to Create Stunning Marbled Soy Wax Candles: A Step-by-Step Guide
Welcome to the world of enchanting marbled candles! There's something undeniably captivating about the intricate swirls and vibrant hues that grace these candles, turning them into mesmerizing works of art. What adds to their allure is the medium used: soy wax. This natural and versatile material not only holds color brilliantly but also offers a clean and eco-friendly burn.Imagine infusing your space with the soft glow of a candle, each one a unique masterpiece. What's even more enticing is that creating these marbled wonders isn't just reserved for seasoned artisans. With the simplicity of using liquid candle colorants and the beginner-friendly nature of soy wax, crafting these candles becomes an accessible and delightful journey, perfect for anyone eager to explore the art of candle making.
Servings: 1 candle
Cost: $5
Equipment
- Scale
Ingredients
Instructions
- Weigh all ingredients.
Melting Soy Wax
- Prepare your pouring pot by adding the measured soy wax, then set it atop a double boiler—use a pan with a small amount of water in the bottom—to gently melt the wax over low to medium heat.
Add Fragrance Oil
- Once the wax reaches the desired consistency, it's time to add the fragrance oil. Measure out the required amount based on your recipe or preference, then gently pour it into the melted wax. Stirring is key here; ensure a thorough blend by stirring the fragrance oil vigorously into the wax. This step is crucial as it allows the fragrance to seamlessly bind with the wax, ensuring a consistent and well-scented final product. Take your time to stir thoroughly, ensuring an even distribution of fragrance throughout the wax for a delightful scent experience when the candle is lit.
Preparing Containers
- Begin by securing the wicks in the chosen containers. Using wick holders or glue tabs, carefully position each wick at the center of the container, ensuring they stand upright and remain in place during the pouring process. Take care to align them correctly to maintain an even burn when the candle is lit. To ensure the wicks stay in position, some crafters prefer using a drop of hot glue at the base of the wick, adhering it to the container's bottom.
Creating the Marbling Effect
- To achieve the mesmerizing marbled candles effect, begin by pouring the melted soy wax into your candle container. Next, take a toothpick and dip it into the liquid candle dye, ensuring it's fully coated. Carefully insert the dyed toothpick into the hot wax and gently swirl it around, creating intricate patterns. Repeat this process with different colors if desired, layering the marble effect for depth and vibrancy. Should you wish to add more color as the candle begins to dry, simply dip another toothpick in the dye and continue swirling to enhance the marbling effect, allowing your creativity to flourish as the candle takes shape. You can add color basically until the marbled candles are hard, if the top of the candle gets damaged you can use a heat gun to fix it.