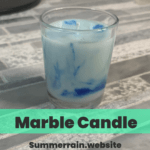
Welcome to the world of enchanting marbled candles! There’s something undeniably captivating about the intricate swirls and vibrant hues that grace these candles, turning them into mesmerizing works of art. What adds to their allure is the medium used: soy wax. This natural and versatile material not only holds color brilliantly but also offers a clean and eco-friendly burn.
Imagine infusing your space with the soft glow of a candle, each one a unique masterpiece. What’s even more enticing is that creating these marbled wonders isn’t just reserved for seasoned artisans. With the simplicity of using liquid candle colorants and the beginner-friendly nature of soy wax, crafting these candles becomes an accessible and delightful journey, perfect for anyone eager to explore the art of candle making.
Prefer to watch this project instead of reading it?
Some of the links are affiliate links, because I am an associate and I earn a small commission on them. There is no additional cost to you, I earn a commission if you click through and make a purchase.
In this guide, I’ll unravel the steps to craft these stunning marbled candles, allowing you to unleash your creativity and witness the magic of transforming simple ingredients into beautiful, personalized pieces that light up both space and spirit. Whether you’re a newcomer to the world of candle making or a seasoned hobbyist seeking a new artistic adventure, get ready to immerse yourself in the joy of crafting marbled soy wax candles.

Materials Needed:
- Fragrance Oil (Candle Safe):
- Choose your favorite scents to personalize your candles. I used Afternoon Tea Fragrance Oil, which has tart bergamot notes, sweet floral notes, and rich black tea. The use rate for this fragrance oil is 10%. Be sure to check the use rate for your candle.
- Soy Wax:
- Opt for high-quality soy wax for clean and eco-friendly burning.
- Candle Wick:
- Ensure it’s the appropriate length for your candle jar.
- Glue Tabs for Wicks:
- To secure wicks at the base of the jar.
- Empty Candle Jar:
- Select jars that suit your aesthetic preferences and candle size. I just used a candle holder that had an old candle in it and I reused the jar. If you need help on how to clean old candle jars, check out this Effortless Candle Jar Wax Removal video.
- Here is a candle jar that I think would look nice, if you do not have one that you can reuse.
- Toothpicks:
- The toothpicks are needed for creating the marbled effect.
- Liquid Candle Dye:
- Different colors of liquid candle dye for creating vibrant and unique marbling.
- Wick Holder:
- Helps keep the wick centered while pouring the wax. If you do not have one, you can use a sharpie to hold the wick in place.
- Pouring Pot and Double Boiler:
- For melting and pouring the wax safely. I love this pouring pot because it is shorter and easier to pour than the taller ones.
Preparing the Work Area:
Clean and Organized Space:
Before diving into your candle-making adventure, ensure your workspace is clean and decluttered. A clean area not only helps maintain hygiene but also minimizes the risk of contaminants affecting your candles. Keep your tools, surfaces, and containers tidy and free from any debris.
Determining Container Capacity:
If you’re unsure about how much wax your container can hold, a simple method involves filling it with soy wax twice. This will be pretty close to the amount of wax your candle can hold. This step is essential for calculating the right amount of wax needed for your candles.
Calculating Fragrance Oil Amount:
Once you know the weight of the wax required for your container, calculating the fragrance oil quantity becomes easier. Generally, fragrance oil is added at a specific percentage of the wax weight. With the weight of the wax determined earlier, you can accurately calculate the amount of fragrance oil needed for a perfectly scented candle.
My candle container held 2.70 ounces of soy wax.
The fragrance oil use rate is 10%, so I used 0.27 ounce of fragrance oil.
Melting the Soy Wax
Prepare your pouring pot by adding the measured soy wax, then set it atop a double boiler—use a pan with a small amount of water in the bottom—to gently melt the wax over low to medium heat.
Adding Fragrance Oil
Once the wax reaches the desired consistency, it’s time to add the fragrance oil. Measure out the required amount based on your recipe or preference, then gently pour it into the melted wax. Stirring is key here; ensure a thorough blend by stirring the fragrance oil vigorously into the wax. This step is crucial as it allows the fragrance to seamlessly bind with the wax, ensuring a consistent and well-scented final product. Take your time to stir thoroughly, ensuring an even distribution of fragrance throughout the wax for a delightful scent experience when the candle is lit.
Preparing the Containers
Begin by securing the wicks in the chosen containers. Using wick holders or glue tabs, carefully position each wick at the center of the container, ensuring they stand upright and remain in place during the pouring process. Take care to align them correctly to maintain an even burn when the candle is lit. To ensure the wicks stay in position, some crafters prefer using a drop of hot glue at the base of the wick, adhering it to the container’s bottom.

Creating the Marbling Effect
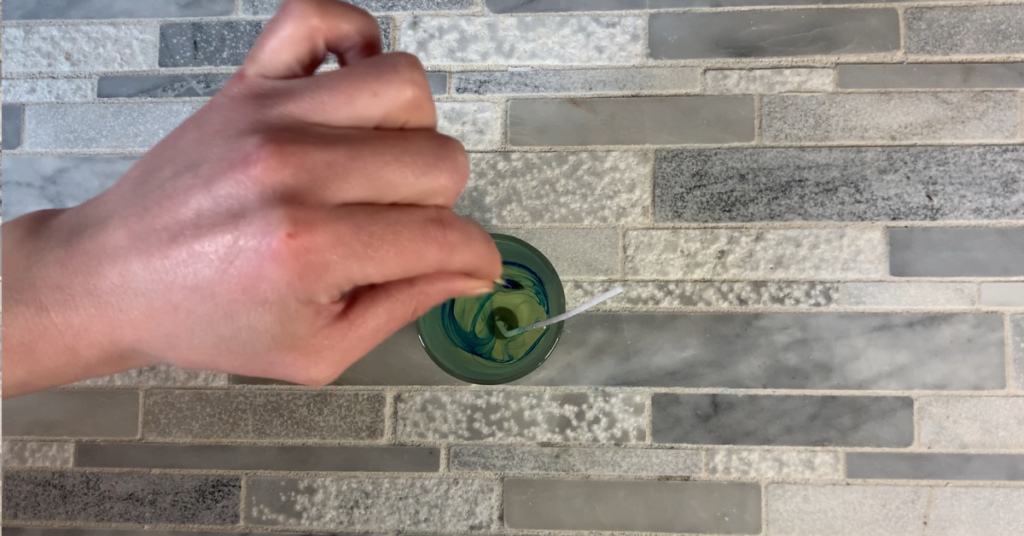
To achieve the mesmerizing marbled candles effect, begin by pouring the melted soy wax into your candle container. Next, take a toothpick and dip it into the liquid candle dye, ensuring it’s fully coated. Carefully insert the dyed toothpick into the hot wax and gently swirl it around, creating intricate patterns. Repeat this process with different colors if desired, layering the marble effect for depth and vibrancy.
Should you wish to add more color as the candle begins to dry, simply dip another toothpick in the dye and continue swirling to enhance the marbling effect, allowing your creativity to flourish as the candle takes shape. You can add color basically until the marbled candles are hard, if the top of the candle gets damaged you can use a heat gun to fix it.
How to Create Stunning Marbled Soy Wax Candles: A Step-by-Step Guide
Equipment
- Scale
Ingredients
Instructions
- Weigh all ingredients.
Melting Soy Wax
- Prepare your pouring pot by adding the measured soy wax, then set it atop a double boiler—use a pan with a small amount of water in the bottom—to gently melt the wax over low to medium heat.
Add Fragrance Oil
- Once the wax reaches the desired consistency, it's time to add the fragrance oil. Measure out the required amount based on your recipe or preference, then gently pour it into the melted wax. Stirring is key here; ensure a thorough blend by stirring the fragrance oil vigorously into the wax. This step is crucial as it allows the fragrance to seamlessly bind with the wax, ensuring a consistent and well-scented final product. Take your time to stir thoroughly, ensuring an even distribution of fragrance throughout the wax for a delightful scent experience when the candle is lit.
Preparing Containers
- Begin by securing the wicks in the chosen containers. Using wick holders or glue tabs, carefully position each wick at the center of the container, ensuring they stand upright and remain in place during the pouring process. Take care to align them correctly to maintain an even burn when the candle is lit. To ensure the wicks stay in position, some crafters prefer using a drop of hot glue at the base of the wick, adhering it to the container's bottom.
Creating the Marbling Effect
- To achieve the mesmerizing marbled candles effect, begin by pouring the melted soy wax into your candle container. Next, take a toothpick and dip it into the liquid candle dye, ensuring it's fully coated. Carefully insert the dyed toothpick into the hot wax and gently swirl it around, creating intricate patterns. Repeat this process with different colors if desired, layering the marble effect for depth and vibrancy. Should you wish to add more color as the candle begins to dry, simply dip another toothpick in the dye and continue swirling to enhance the marbling effect, allowing your creativity to flourish as the candle takes shape. You can add color basically until the marbled candles are hard, if the top of the candle gets damaged you can use a heat gun to fix it.
Summer Rain Community
Don’t miss out on your journey to crafting exceptional skincare at home! You can subscribe to my blog for a treasure trove of DIY skincare recipes, insightful tips, and expert guidance.
Subscribe to our newsletter!
Subscribe to our newsletter!
Join the community of skincare enthusiasts! Follow us on social media to dive deeper into the world of homemade skincare. Discover exclusive content, behind-the-scenes insights, and connect with like-minded individuals passionate about nurturing their skin naturally.
Facebook: https://facebook.com/summerrain.website/
Pinterest: https://www.pinterest.com/summerrainblog/
Patreon: https://www.patreon.com/Summerraindiy
TikTok: https://www.tiktok.com/@summerraindiy
Let’s embark on this exciting skincare adventure together—subscribe, follow, and elevate your DIY skincare game!