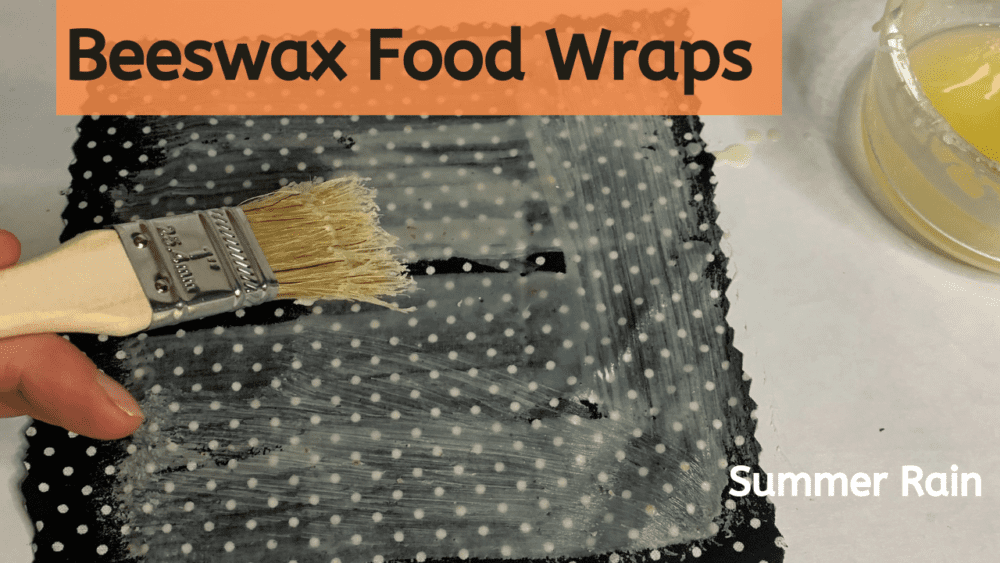
Beeswax food wraps are a marvelous replacement for plastic wrap, as they are made will all natural ingredients and can be used over and over again. These all natural wraps are made with 100% cotton fabric, beeswax, jojoba oil and pine rosin. It is a versatile wrap that is ready to cover a bowl and is simply folding into a sandwich bag.
Prefer to watch this project instead of reading it?
Some of the links are affiliate links, because I am an associate and I earn a small commission on them.
I seriously dislike using plastic wrap and baggies for that matter. It just feels like such a waste to use it once and have it live in the landfill forever. This is not to say that I am perfect at never using it, but I trying to get better and not use it at much.
Uses
- Covering bowls
- Covering plates
- Sandwich bag – You can find the tutorial on how to fold both bags down below
- Snack bag
How to use the beeswax wraps?
Place your beeswax food wrap over the container you want to cover. Gently press the wrap against the container side for a few seconds to get it to stick. The warmth from your hands is going to get the beeswax to stick.
Only use the wraps when the dish has cooled, be sure not to wrap it while it is still hot as this can melt the wax.
How do I clean the beeswax wraps?
To clean your beeswax wraps, simply rinse with cold water and use dish soap to clean. Lay or hang to dry.
Care Tips
- Avoid heat – microwave, hot water, dishwasher, etc.
- Don’t use on raw meat
- Always rinse with cold water
Storing beeswax wraps
- Hang them
- Roll them up
- Fold in the drawer
How long do they last?
From my experience, the beeswax food wraps will normally last upwards of 120 uses.
Disposing of old beeswax wraps
Here is the cool thing, you can cut the old wraps up into strips and compost them.
Folding Guides:
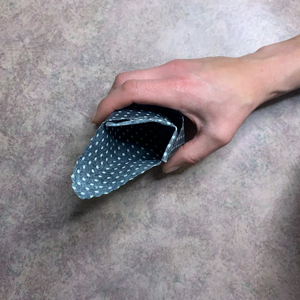
How to make beeswax food wrap bag
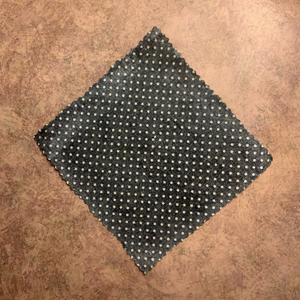
Start with your square.
Turn the square so one corner is pointing at you and it looks like a diamond.
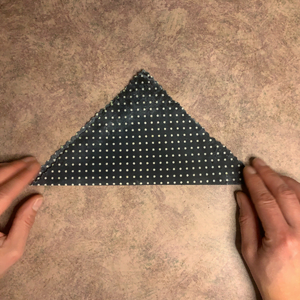
Fold it in half, so that it looks like a triangle.
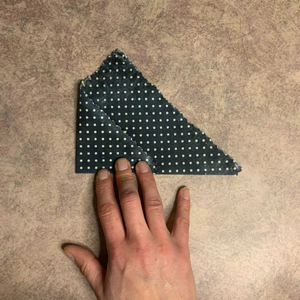
Now I like to fold it into thirds to get a crease in the fabric made.
Fold the right side over the base on the creased line you just made (a third of the way).
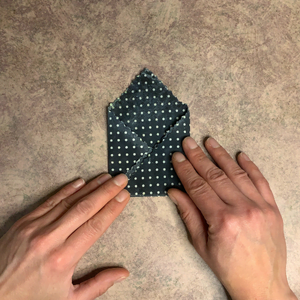
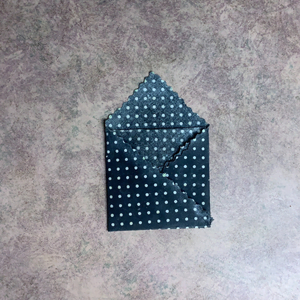
Fold the left side over the same way and tuck the fabric into the opening in the right side of the fabric.
In the opening, tuck the first piece of fabric under where the two sides come together.
Beeswax food wraps recommended sizes
Small – 7×7
Medium – 10×10
Large – 13×13
Ingredient Spotlight
Fabric
While you can use just about any fabric you would like to make beeswax wraps, I have found it is best to use 100% cotton. This fabric is all natural and safe to wrap your food with. Cotton fabric tends to absorb less of the wax mix and is the best for clinging.
Pine Rosin
If you are already into making your own skin care products, pine rosin is likely the only ingredient that you will actually need to purchase. Pine rosin is what is going to give the beeswax wraps a tacky feeling.
Beeswax
The beeswax has natural antibacterial and antifungal properties. Creates a breathable wrap that helps to keep food fresh while allowing it to breathe a little naturally.
Jojoba Oil
Jojoba oil is used to help to soften up the wax a little bit and to keep your wrap pliable.
Beeswax Food Wraps with Pine Rosin Equipment
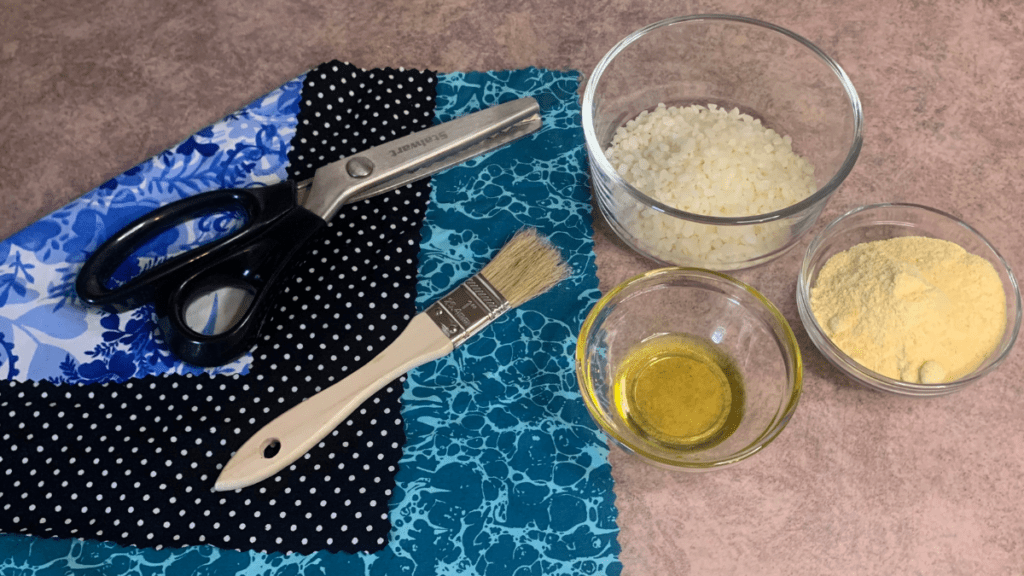
Pinking shears
Pinking shears are not technically required, but highly recommended. If you cut with regular scissors the fabric is going to have some fraying. Also, I think the edges look a little nicer when using shears. Maybe because I have a terrible time trying to cut a straight line!
Paint Brush
You will need a paint brush, but nothing fancy. Just go into the project knowing that whatever paint brush you use is now going to be dedicated to beeswax wraps.
Parchment Paper
I know that I call for parchment paper in this recipe, but use whatever you have on hand. I happen to have freezer paper from the solid bubble bars on hand, so that is what I used. It’s just to help cut down on the mess this can make. I don’t want my table to be all sticky!
Iron
An iron is used to help to evenly distribute the wax mixture on the fabric. So we want to ensure that every ounce of the fabric is covered, with as little of the mix that we can. Applying a little heat allows the wax to seep through the fabric and easier to spread.
Making Beeswax Food Wraps
Prepare Fabric
Wash and dry your 100% cotton fabric. Cut fabric into desired sizes. I recommend: small 7×7, medium 10×10 and large 13×13.
Prepare Work Area
Put parchment or wax paper over the counter. (You can place this on a cookie sheet to ensure you do not get any of it on your counter). Place the cut fabric on top of the parchment paper.
Heat Ingredients
Place beeswax and jojoba oil a heat safe container. Then place in a double boiler. (For a double boiler, I use a sauce pan with a bit of water and a silicone mat on the bottom). Heat on a low to medium heat until the beeswax is completely melted, mixing occasionally.
After it is off the heat add the pine rosin and mix well.
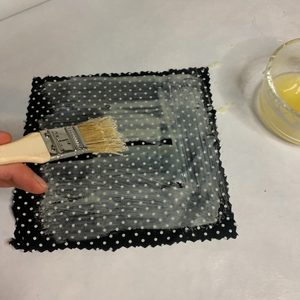
Spreading the Wax Mix
Using a paint brush, start painting the beeswax food wrap mixture on your fabric.
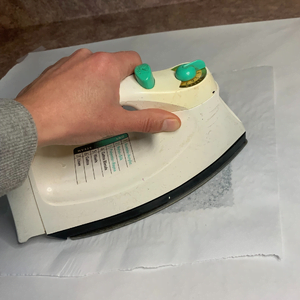
Iron
Place another piece of parchment paper on top of the fabric. On a low setting, iron the parchment paper to evenly spread out the beeswax mixture.
Cool
Peel the fabric off of the parchment paper. Allow to cool for a few seconds.
Troubleshooting Beeswax Food Wraps
Doesn’t stick
If you find that your wrap is not sticking to itself or the container you wish to cover, you probably did not add enough of the wax mixture. Simply heat your wax mix up and add a little more to the wrap. The trick is that you want as little of the wax mixture as you can on the wrap. At the same time, you don’t want any spots that do not have wax on them. Remember, it’s easier to add more of the wax mix then it is to take some away.
Too stiff
If you notice that your wrap is too stiff, decrease the amount of beeswax that you use.
Oily Feeling
If there is an oily feeling to the wraps, add some more jojoba oil.
Lines on wrap
Over time when you fold your wrap you will notice some lines in it. It is fine to just continue using it. However, if you want to fix it you can. Warm the oven to 200 F. Place your beeswax wrap on parchment paper and pop it in the oven for about 5 minutes.
Pine Rosin Not Mixing
Sometimes the pine rosin will clump up on you. If this happens, just sprinkle a bit on the wrap before you iron it.
Left over wax mixture
I hate to waste anything that I make. It is difficult to know exactly how much beeswax you will need to make the wraps. I tend to just make a little more than I think I will need. The cool thing is you can grab a silicone mold and pour the remaining was mixture in there. Then the next time you need to make wraps, simply heat it up.
Drying time
It is not going to take very long to dry, but you do need to have a way to have them dry while not being laid down. If you are able to hang them on a line to dry with clothes pins, this is the best route. If that is not an option, you could always just hold them up for 1-2 minutes. I normally just hold them up for a few minutes, because I don’t make enough at a time to justify hanging a line.
First Use
After you have made your beeswax wraps and are ready to use them for the first time, crumple them up. Seriously, do this a few times like it is a piece of paper you are tossing out. For whatever reason, doing this seems to sort of ‘activate’ the wraps.
Beeswax Food Wraps with Pine Rosin
Equipment
- Double boiler
- Scale
- Parchment paper
- Pinning shears
- Paint brush
- Iron
Ingredients
- 100% cotton fabric
- 2.19 ounce | 73 % Beeswax
- 0.54 ounce | 18% Pine rosin
- 0.27 ounce | 9% Jojoba oil
Instructions
Prepare Fabric
- Wash and dry your 100% cotton fabric. Cut fabric into desired sizes. I recommend: small 7×7, medium 10×10 and large 13×13.
Prepare Work Area
- Put parchment or wax paper over the counter. (You can place this on a cookie sheet to ensure you do not get any of it on your counter). Place the cut fabric on top of the parchment paper.
Heat Ingredients
- Place beeswax and jojoba oil a heat safe container. Then place in a double boiler. (For a double boiler, I use a sauce pan with a bit of water and a silicone mat on the bottom). Heat on a low to medium heat until the beeswax is completely melted, mixing occasionally. After it is off the heat add the pine rosin and mix well.
Spreading the Wax Mix
- Using a paint brush, start painting the beeswax food wrap mixture on your fabric.
Iron
- Place another piece of parchment paper on top of the fabric. On a low setting, iron the parchment paper to evenly spread out the beeswax mixture.
Cool
- Peel the fabric off of the parchment paper. Allow to cool for a few seconds.


