
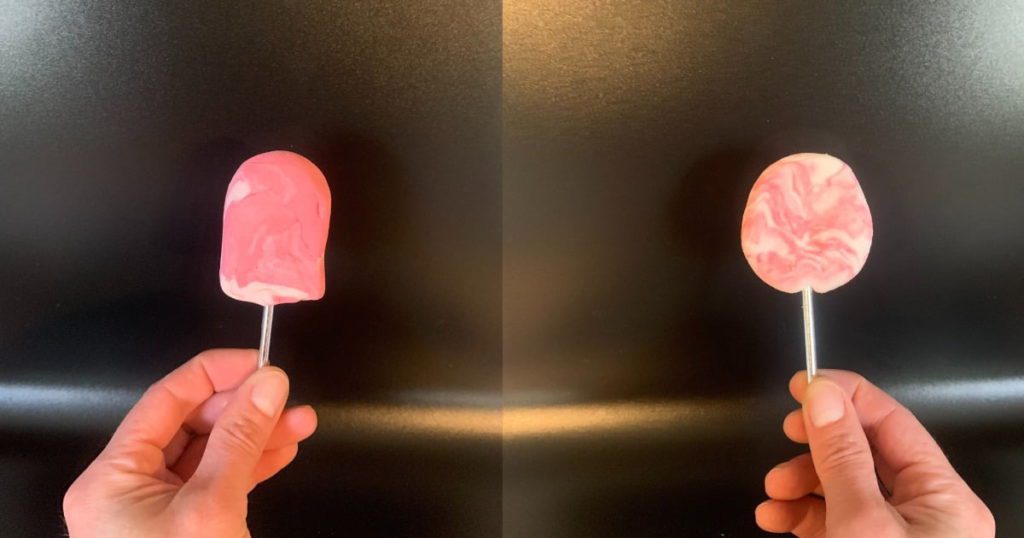
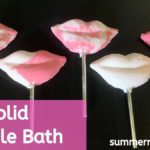
Learn how to make a solid bubble bath (aka bubble bar) with this simple recipe. Unlike a bath bomb that fizzes and doesn’t provide bubbles, a bubble bar creates all kinds of bubbles. Simply crumble your solid bubble bath bar under the running bath water and you’ll have heaps of bubbles in your bath.
Prefer to watch this project instead of reading it?
Some of the links are affiliate links, because I am an associate and I earn a small commission on them.
Make Fun Shapes
There are so many different ways to customize you solid bubble bar by creating new shapes. You can make it with an ice cream scoop, rolled into a bar or with a mold.
Using the solid bubble bath
You are going to pinch off a piece of the bubble bath and hold it under the running faucet to create bubbles. Sometimes if the bar feels too hard, you will have to rub your hand together under the water to help it soften up a bit.
Since we are not using a preservative, you do not want to introduce it to water and then reuse the bar. It is best to just break off a bit.
Storing the bars
Once the bubble bars have dried, you will want to store them in an air tight container or wrap them with a shrink wrap.
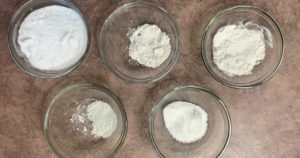
Ingredients
Baking Soda
The Baking Soda is used to help to create the “dough” for the bar. When it is introduced to the bath water, it also helps with softening the water. It makes the water softer because it makes it slightly more alkaline.
Cream of Tartar
The Cream of Tartar is used to help harden the bubble bar and to help hold the ingredients together so our bars don’t fall apart.
Arrowroot Powder
The Arrowroot Powder is used to help thicken the bubble bar up. It also helps to make the bath water feel softer.
Kaolin Clay
The Kaolin Clay is added to help harden the bar.
Butters / Oils
We need to use some type of carrier oil or butter to hold our bar together. I am using Cocoa Butter because it is a brittle butter that will help with keeping the bar in solid form. The emulsifier in this recipe will actually allow the cocoa butter to disperse into your water so you actually get the benefits of it.
Humectant
Vegetable Glycerin is a humectant, which means that it draws moisture to its self. We add this to the bubble bars because it will hold the moisture on the bubbles and make them last longer.
Surfactants
In this recipe I am using three surfactants. Two of the surfactants (SLSa and Cocamidopropyl betaine) are to create bubbles and the third (polysorbate 80) is an emulsifier.
SLSa is derived from coconut and palm oils and is a natural surfactant. It is what adds bubbles to our bubble bar and gives a quality long lasting bubble.
Coco Glucoside is our secondary surfactant. It is compatible with anionic, cationic and nonionic surfactants. We use this to improve the foam (makes the bubbles more stable and last longer) and to help with wetting the mixture to make a “dough”.
Polysorbate 80 is also a surfactant, but not to create bubbles, it is used to emulsify. We need to add an emulsifier to disperse the oils and fragrance oil evenly throughout the bath water. It also helps to prevent the mica powder from sticking to the sides of the tub. As a general rule, you want to use it at a rate of 1 part polysorbate 80 to 2 parts oil.
Colors / Scent
The fragrance oil that I am using for these bubble bars is Sugared Strawberry Fragrance Oil it is a sweet strawberry scent. The strawberry scent is enhanced by light notes of sweet nectar, green apples, and grape.
For the color, I went with a Firecracker Mica Powder and Amaranth Pink Mica.
Making your Solid Bubble Bath
In a small container mix together the wet ingredients (vegetable glycerin, coco glucoside, polysorbate 80, fragrance oil and melted cocoa butter) until they are fully combined.
In a large container mix together the dry ingredients (SLSa, baking soda, cream of tartar, arrowroot powder, and kaolin clay). The SLSa is a very fine powder and you may want to wear a face mask when adding it.
Pour the wet ingredients into the dry ingredients and mix well. I like to start out with a spoon or spatula and then finish mixing it with my hands.
If you are adding more than one color, separate the dough and add the coloring to each part. Note: When choosing the color, you will need to decide if you want the bath water to be colored. Mica will color the bar but not the bath water. To get the bath water colored, you will want to use a lake dye.
If at any point, the dough gets too sticky, just add more baking soda to it.
Place the bubble bar dough into your Mold. Place your silver sticks into the mold and cover with the bubble bar dough. You will want to press down firmly on the dough to really pack it into the mold.
Allow the bars to sit out for a few days to dry completely. If you live somewhere that is very humid, it may take longer for it to harden. Pull at the edges of the mold to loosen the bars. Turn the mold upside down to release.
Solid Bubble Bath
Equipment
- Scale
Ingredients
Dry Ingredients
- 2.30 ounce | 57.6% Baking Soda
- 0.26 ounce | 6.5% SLSa
- 0.52 ounce | 13% Cream of Tartar
- 0.16 ounce | 4% Arrowroot Powder
- 0.04 ounce | 1% Kaolin Clay
Liquid Ingredients
- 0.04 ounce | 1% Cocoa Butter
- 0.32 ounce | 8% Vegetable Glycerin
- 0.22 ounce | 5.4% Coco Glucoside
- 0.06 ounce | 1.5% Polysorbate 80
- 0.08 ounce | 2% Sugared Strawberry Fragrance Oil
Mica Powders
Instructions
- In a small container mix together the wet ingredients (vegetable glycerin, coco glucoside, polysorbate 80, fragrance oil and melted cocoa butter) until they are fully combined.
- In a large container mix together the dry ingredients (SLSa, baking soda, cream of tartar, arrowroot powder, and kaolin clay). The SLSa is a very fine powder and you may want to wear a face mask when adding it.
- Pour the wet ingredients into the dry ingredients and mix well. I like to start out with a spoon or spatula and then finish mixing it with my hands.
- If you are adding more than one color, separate the dough and add the coloring to each part. Note: When choosing the color, you will need to decide if you want the bath water to be colored. Mica will color the bar but not the bath water. To get the bath water colored, you will want to use a lake dye.
- If at any point, the dough gets too sticky, just add more baking soda to it.
- Place the bubble bar dough into your Mold. Place your silver sticks into the mold and cover with the bubble bar dough. You will want to press down firmly on the dough to really pack it into the mold.
- Allow the bars to sit out for a few days to dry completely. If you live somewhere that is very humid, it may take longer for it to harden. Pull at the edges of the mold to loosen the bars. Turn the mold upside down to release.


