Making lotion from scratch doesn’t have to be intimidating. This beginner lotion recipe is designed to teach you the fundamentals of emulsified lotion making while producing a smooth, lightweight, and professional-quality final product.
Table of Contents
Watch the Full Video Tutorial
Watch me make this lotion step-by-step—perfect for a beginner!
Some links on this website are affiliate links, meaning I may earn a small commission if you click and make a purchase. This comes at no additional cost to you.
In this guide, you’ll learn:
- A complete 240-gram beginner lotion recipe
- What each ingredient is, why we use it, and substitution options
- A step-by-step method with explanations for every phase
- Beginner tips, customization ideas, shelf life guidance, and FAQs
This post is designed to pair with our step-by-step video tutorial and help you understand why each step matters—not just how to do it.
Beginner Lotion Recipe (240 Grams Total)

Water Phase
- Distilled Water – 78.5% (188.4 g)
- Vegetable Glycerin – 3% (7.2 g)
Oil Phase
- Sweet Almond Oil – 8% (19.2 g)
- Shea Butter – 2% (4.8 g)
- Emulsifying Wax – 5% (12 g)
- Stearic Acid – 2% (4.8 g)
Cool Down Phase
- Fragrance Oil – 1% (2.4 g)
- Germall Plus (Preservative) – 0.5% (1.2 g)
Lotion Ingredients Explained (Beginner-Friendly Guide)
Distilled Water
What it is:
Purified water with minerals and contaminants removed.
Why we use it:
Water provides hydration and makes up the bulk of lotion. Distilled water is essential because tap water contains minerals and microorganisms that can destabilize your lotion and shorten shelf life.
Substitutions:
- Aloe vera juice
- Hydrosols (rose, lavender, etc.)
(Still requires a preservative.)
Sweet Almond Oil
What it is:
A lightweight carrier oil derived from almonds.
Why we use it:
Adds softness and slip without feeling greasy. It’s beginner-friendly and suitable for most skin types.
Substitutions:
- Jojoba oil
- Apricot kernel oil
- Sunflower oil
Shea Butter
What it is:
A natural butter rich in fatty acids.
Why we use it:
Adds creaminess, moisture retention, and a luxurious feel while helping soothe dry skin.
Substitutions:
- Mango butter
- Cocoa butter (firmer, stronger scent)
Emulsifying Wax
What it is:
An ingredient that binds oil and water together.
Why we use it:
Without an emulsifier, oil and water will separate. Learn more on my post Why DIY Skincare Separates. Emulsifying wax creates a stable, creamy lotion.
Substitutions:
- Polawax
- Olivem 1000
(Texture may vary depending on emulsifier.)
Stearic Acid
What it is:
A plant-derived fatty acid.
Why we use it:
Thickens the lotion, improves stability, and gives a more professional texture.
Substitutions:
- Cetyl alcohol
- Cetearyl alcohol
Vegetable Glycerin
What it is:
A humectant that draws moisture to the skin.
Why we use it:
Boosts hydration and helps skin feel soft and supple.
Where to add it:
- Water phase for uniform hydration
- Or cool-down phase (both are acceptable)
Fragrance Oil
What it is:
Skin-safe scent designed for cosmetic use.
Why we use it:
Enhances the sensory experience of the lotion.
Substitutions:
- Essential oils (used safely)
- Leave out for fragrance-free lotion
Germall Plus (Preservative)
What it is:
A broad-spectrum preservative.
Why we use it:
Water-based lotions must be preserved to prevent mold, yeast, and bacteria.
Substitutions:
- Optiphen (formula adjustments may be needed)
Step-by-Step: How to Make Lotion for Beginners
Step 1: Prepare Your Workspace
- Sanitize tools, containers, and utensils
- Use a digital scale for accuracy
- Work in a clean environment
Step 2: Heat the Water Phase
Weigh distilled water and vegetable glycerin into a heat-safe container. Heat in a double boiler.
Why distilled water matters:
It prevents contamination and improves lotion stability and shelf life.
Step 3: Heat the Oil Phase
In a separate heat-safe container, combine:
- Sweet almond oil
- Shea butter
- Emulsifying wax
- Stearic acid
Heat until fully melted.
Why Both Phases Must Be Heated to the Same Temperature
Heat both phases to approximately 160–170°F (70–75°C). You can find more information on my What Is an Emulsion post.
This:
- Prevents separation
- Allows proper emulsification
- Creates a stable, long-lasting lotion
If one phase is cooler, the lotion may fail or become grainy.
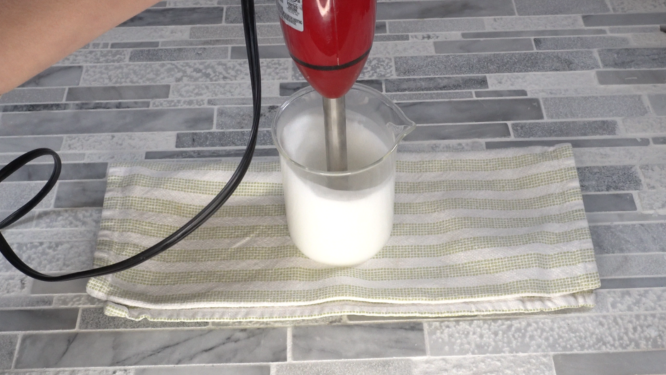
Step 4: Combine and Emulsify
Slowly pour the hot water phase into the hot oil phase.

Blend using an immersion blender in short bursts.
Why use an immersion blender?
It creates the shear force needed to form a stable emulsion. Hand stirring is not sufficient.
Tip: The lotion may look thin at first—this is normal.
Step 5: Cool Down Phase
Once the lotion cools to below 120°F (49°C), add:
- Fragrance oil
- Germall Plus
Blend briefly to fully incorporate.
Why wait?
Heat can damage preservatives and fragrance, reducing effectiveness.
Step 6: Cool, Bottle, and Label
Allow the lotion to cool completely, then transfer to sanitized containers. Label with name and date.

pH Information for Beginner Lotion Makers
This lotion typically falls between pH 5–6, which is:
- Skin-friendly
- Compatible with Germall Plus
Optional: Test with pH strips or a meter and adjust only if necessary.
How to Customize This Lotion Recipe
- Thicker lotion: Increase stearic acid to 2.5–3%
- Lighter lotion: Reduce stearic acid to 1%
- More nourishing: Swap part of almond oil for jojoba or avocado oil
- Sensitive skin: Omit fragrance entirely
Shelf Life & Storage
With proper sanitation and preservation, this lotion has a shelf life of 6–12 months.
Store in:
- Airtight containers
- A cool, dry place
- Away from direct sunlight
Discard if you notice mold, odor changes, or separation.
Beginner Lotion FAQs
Why can’t I use tap water?
Tap water contains minerals and microbes that compromise safety and stability.
Can I make lotion without an immersion blender?
It’s strongly recommended. Proper emulsification requires high shear.
My lotion looks thin—did I fail?
No. Lotion thickens as it cools. Wait several hours before judging texture.
Can I sell this lotion?
For selling, follow local cosmetic regulations and perform proper testing.
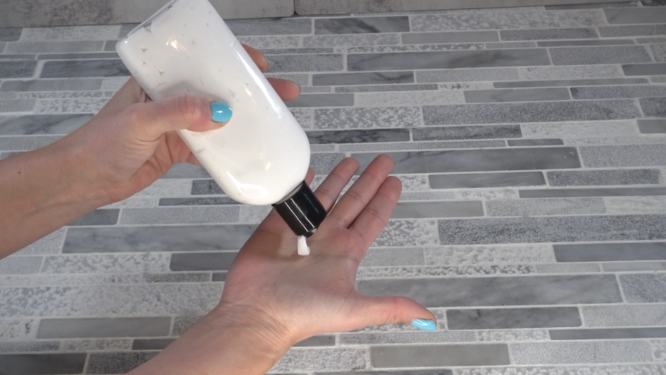
How to get thick lotion into container
How to Make Professional Lotion at Home | Beginner Recipe Explained
Ingredients
Heat Phase
- 188.4 g | 78.5% Distilled Water
- 7.2 g | 3% Vegetable Glycerin
Oil Phase
- 19.2 g | 8% Sweet Almond Oil
- 4.8 g | 2% Shea Butter
- 12 g | 5% Emulsifying Wax
- 4.8 g | 2% Stearic Acid
Cool Down Phase
- 2.4 g | 1% Fragrance Oil
- 1.2 g | 0.5% Germall Plus (Preservative)
Instructions
Step 1: Prepare Your Workspace
Sanitize tools, containers, and utensilsUse a digital scale for accuracyWork in a clean environmentStep 2: Heat the Water Phase
Weigh distilled water and vegetable glycerin into a heat-safe container. Heat in a double boiler.Step 3: Heat the Oil Phase
In a separate heat-safe container, combine:Heat until fully melted.Sweet almond oil, Shea butter, Emulsifying wax, and Stearic acidStep 4: Combine and Emulsify
Slowly pour the hot water phase into the hot oil phase.Blend using an immersion blender in short bursts.Step 5: Cool Down Phase
Once the lotion cools to below 120°F (49°C), add:Fragrance oil and Germall PlusBlend briefly to fully incorporate.Step 6: Cool, Bottle, and Label
Allow the lotion to cool completely, then transfer to sanitized containers. Label with name and date.
One thought on “How to Make Professional Lotion at Home | Beginner Recipe Explained”
Comments are closed.