
Discover the secrets of creating a special kind of candle – the secret message candle. Unlike regular candles, these have hidden messages or images inside them. The exciting part is that you can’t see the message when the candle is not lit. When you light it, the message slowly appears. Once you blow out the candle, the message is hidden again. It’s a thrilling way to make a personalized and mysterious candle for any special occasion.
Prefer to watch this project instead of reading it?
Some of the links are affiliate links because I am an associate, and I earn a small commission on them. There is no additional cost to you; I earn a commission if you click through and make a purchase.
Choosing the Perfect Candle Container
Selecting the right container plays a crucial role in crafting any candle. Consider the diameter, material, and aesthetics of the candle holder to find your ideal vessel.
Where to Find Containers: I prefer reusing candle jars multiple times. When buying one, ensure you truly love the container. Learn how to clean them here. You can also purchase a container specifically for your secret message candle.
Candle Diameter: Once you’ve chosen your container, determine the appropriate size for your hidden message. Roughly measure the diameter of the candle jar, opting for a slightly smaller size to allow room.
For example, if your candle jar has a 2-inch diameter (remember this for selecting the wick later), you might choose a maximum message size of 1.5 inches. This ensures a perfect fit for your secret message candle.
How to determine the amount of wax goes into your container
Figuring out how much wax is needed for your container can be a bit challenging. An effective method is to fill the candle jar 1 1/2 to 2 times with wax. This approach provides a close estimate of the required wax amount. Ensure you stop filling when the wax reaches the intended level (approximately 1/2 below the top of the candle jar).
For example, the jar used in this tutorial required 2.50 ounces of soy wax. This measurement serves as a helpful reference for accurately preparing your secret message candle.
Choosing and Placing Your Candle Wick
Remember the diameter measurement we took earlier for your candle – it’s crucial in picking the right wick. Follow these steps to ensure your secret message candle turns out just right.
Choosing the Correct Wick:
Use the diameter measurement to select the right-sized wick for your candle jar. Too small a wick can lead to tunneling, hiding your secret image. If the wick is too large, your candle might flicker excessively and produce soot, making the container and wax hotter than it should be. This could result in a broken jar or a melted message.
Determining Fragrance Oil Amount:
Consider the weight of your wax – I am using 2.5 ounce of soy wax. Check the fragrance oil’s recommended usage percentage – the fragrance oil that I am using has a 10% use rate. The soy wax has a fragrance load of 10%, matching the capacity of both the fragrance oil.
Note: Balancing these factors is crucial. Adding too much fragrance can affect the candle’s scent quality.
Calculating Fragrance Amount:
Multiply the wax amount by the fragrance percentage to get the required fragrance amount.
For example, 2.50 * 10% = 0.25 ounces.
I’ll be using 0.25 ounces of Smell The Rainbow Fragrance Oil for my secret message candle. This ensures a delightful aroma without compromising the candle’s performance.
How to place a candle wick
Begin with a clean jar; I like wiping mine with a bit of rubbing alcohol for a thorough clean.
For securing the wick, I personally opt for a hot glue gun, but candle wick stickers work well too. I find hot glue is easier to clean out of the jar when reusing them.
Here’s the step-by-step for placing the wick:
- Apply a small amount of hot glue or use a wick sticker on the wick tab.
- Position the wick at the center of your candle jar for an even burn.
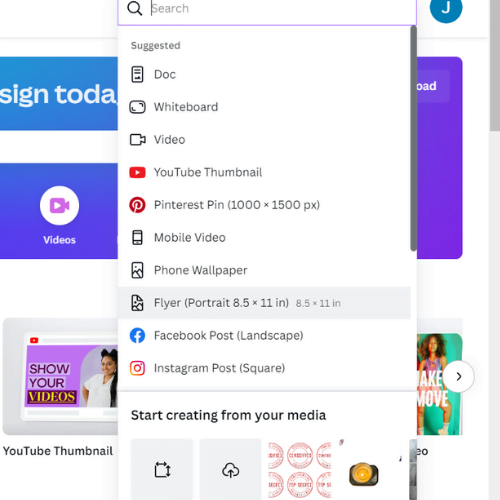
Creating a Design for Secret Message Candles in Canva
Choose your preferred software for creating the secret message; in my case, I use Canva’s free version.
Start by clicking on the Flyer (Portrait 8.5 * 11 in) from the “Create” drop down
To get the curved text effect, type the text that you would like. Then click “Effects” and choose “Curved”.
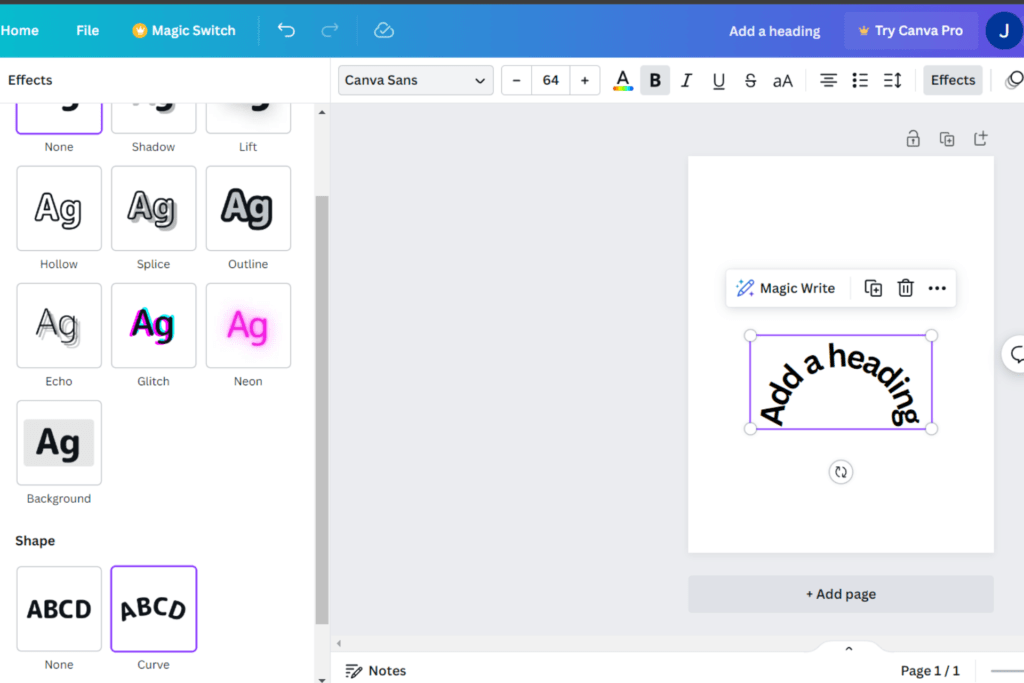
Add any other images or text that you would like on your design.
When you are ready to print, choose the “PDF Print” option.
Printing your secret message for your candle
This is the most important part of making the candle, you want to use a very specific type of material.
Transparent Paper for Inkjet Printer
Now the paper has to be loaded a specific way. Pay attention to the “Print Side” before you remove it from the package.
It will have a little sticker that shows you what the print side is, however once you remove it from the package there is no way to tell if you are printing on the correct side.
The paper will be dry immediately after printing and is ready to use. Simply cut out your design and place it in the candle!
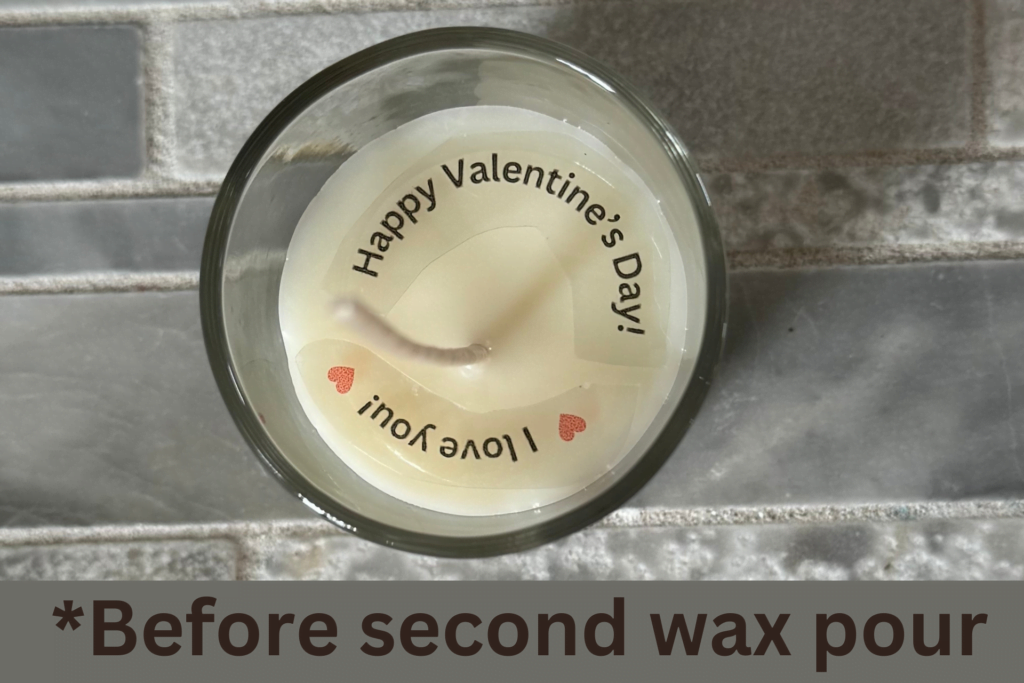
Tips for adjusting SECRET MESSAGE
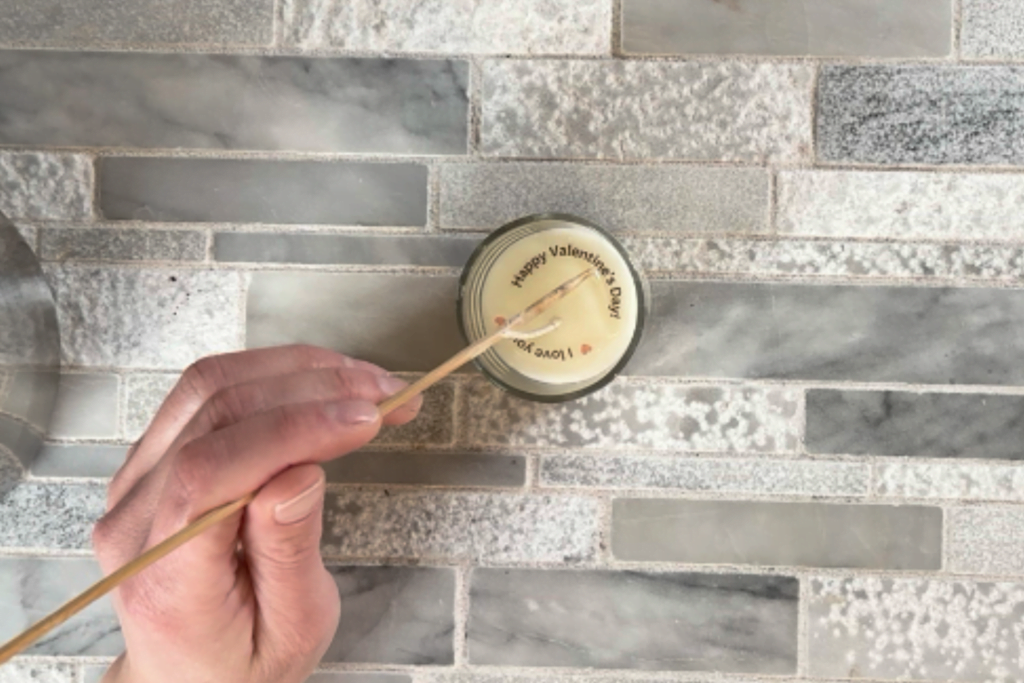
Place the secret message exactly where you want it.
Pour slow and close to the container, I cannot stress how important this step is. Slow and low!
If the secret message moves or needs to be adjusted, use a Wooden Skewer to adjust it. You can use the skewer to move the message around and to push it securely into the wax.
How to make the BEST secret message candle
Equipment
- Printer
Ingredients
- 2.50 ounce Soy Wax
- 1 Candle Wick
- 0.25 ounce Smell The Rainbow Fragrance Oil
- Transparent Paper for Inkjet Printer
- Wooden Skewer
Instructions
- Weigh out the candle wax and place it into a pouring pot. Heat the wax on a double boiler over low heat until it is completely melted.
- Using a hot glue gun, position the candle wick in the center of your candle.
- Remove the candle wax from the heat, add fragrance oil, and mix well.
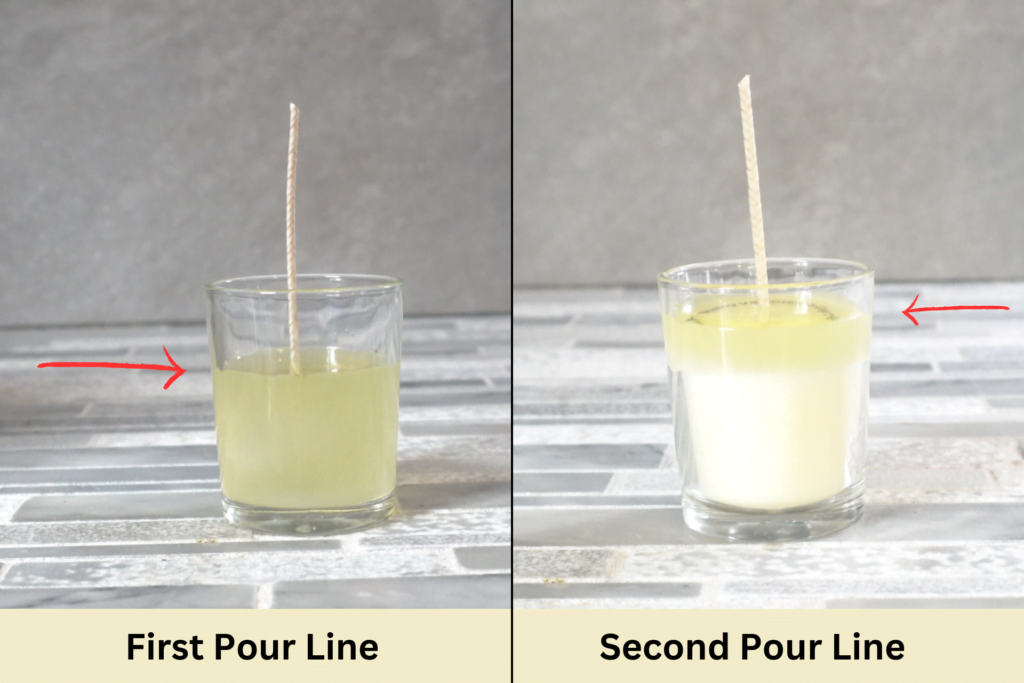
- Pour the candle wax about 3/4 of the way and allow it to cool completely.
- Print out your design and cut it out.
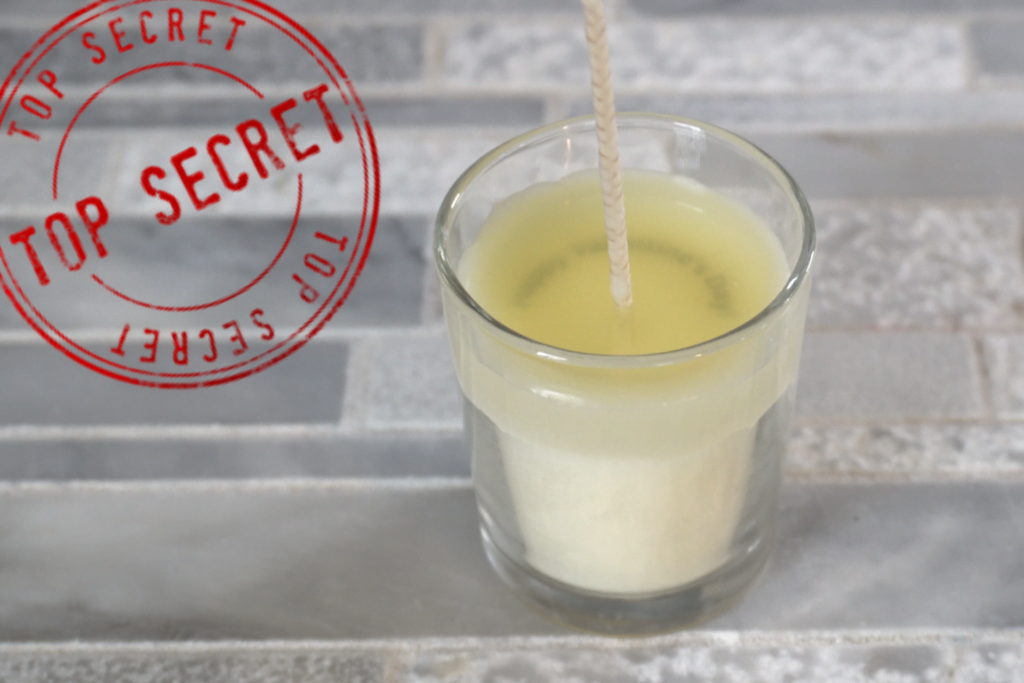
- Once the candle has cooled completely, place the design on the candle.
- Pour the remaining candle wax on top of the design, ensuring a slow and close-to-the-container pour.
- Use a wooden skewer to move the design back into place if necessary. Allow the candle to cool completely.
- Trim the wick to 1/4 inch.
Summer Rain Community
Don’t miss out on your journey to crafting exceptional skincare at home! You can subscribe to my blog for a treasure trove of DIY skincare recipes, insightful tips, and expert guidance.
Subscribe to our newsletter!
Subscribe to our newsletter!
Join the community of skincare enthusiasts! Follow us on social media to dive deeper into the world of homemade skincare. Discover exclusive content, behind-the-scenes insights, and connect with like-minded individuals passionate about nurturing their skin naturally.
Facebook: https://facebook.com/summerrain.website/
Pinterest: https://www.pinterest.com/summerrainblog/
Patreon: https://www.patreon.com/Summerraindiy
TikTok: https://www.tiktok.com/@summerraindiy
Let’s embark on this exciting skincare adventure together—subscribe, follow, and elevate your DIY skincare game!


