Welcome to the world of homemade lotions, where luxurious skincare meets simplicity and affordability. The art of crafting your own lotions not only embodies a delightful creative endeavor but also empowers you to nurture your skin with tailor-made, natural goodness.
Imagine indulging in velvety lotions personalized to meet your skin’s unique needs—all created from your kitchen. The beauty of DIY lotions lies in their simplicity; armed with the right ingredients and know-how, you can whip up these skin-loving concoctions effortlessly.
Moreover, diving into the world of homemade lotions isn’t just about a creative project; it’s a budget-friendly alternative to store-bought products. Say goodbye to harsh chemicals, and embrace a more natural, cost-effective skincare routine.
In this comprehensive guide, I will walk you through every step of the lotion-making process. From understanding the fundamental ingredients to customizing recipes for diverse skin types—dry, oily, sensitive, or combination—prepare to unlock the secrets to creating sumptuous lotions that cater to your skin’s unique cravings. Get ready to embark on a journey towards silky-smooth, nourished skin, all from the comfort of your home.
Prefer to watch this project instead of reading it?
Some of the links are affiliate links, because I am an associate and I earn a small commission on them. There is no additional cost to you, I earn a commission if you click through and make a purchase.
Understanding the Basics of Homemade Lotions
Lotions typically consist of five primary types of ingredients:
- Water: The base component of lotions, providing a foundation for the formulation.
- Oils: Various oils are incorporated to moisturize and nourish the skin, offering different properties and textures.
- Emulsifiers: Essential for blending oil and water components together, ensuring a stable and uniform consistency.
- Preservatives: Added to prevent bacterial growth and maintain the lotion’s shelf life, preserving its quality.
- Scent: Fragrance elements, contributing to the lotion’s aromatic profile, offering a pleasant and personalized experience.
The typical formula for creating a homemade lotions involves:
- 70-80% Distilled water as the base.
- 8-25% Oils/Butters for moisturization and texture.
- 3-6% Emulsifiers to blend oil and water phases.
- 2-5% Co-Emulsifiers for stability and texture enhancement.
- 0.5 – 1% Preservative to prolong shelf life and prevent microbial growth.
Ingredients Overview
Water Phase
Distilled Water: Distilled water serves as the foundational component of homemade lotions, offering a pure and clean base. Through the distillation process, impurities, minerals, and potential contaminants are removed, ensuring that the water used in the lotion is free from any elements that could compromise the lotion quality.
Vegetable Glycerin: The vegetable glycerin plays a pivotal role as a humectant. Its ability to attract moisture to the skin and retain it makes it a valuable addition to lotions. Being water-soluble, it easily blends with the water phase of the lotion, enhancing its hydrating properties. This makes the skin feel softer and smoother, locking in essential moisture.
Oil Phase
Emulsifiers: Emulsifiers are crucial for blending oil and water, which naturally repel each other. Emulsifying Wax, a common plant-based emulsifier used in lotions, possesses properties that allow it to bind oil and water together. It ensures that the mixture remains stable and well-combined, preventing separation of the oil and water phases in the lotion.
For more information on emulsions check out Emulsions – What Are They and How Do They Work? post.
Co-Emulsifiers: In tandem with emulsifiers, co-emulsifiers such as Stearic Acid aid in thickening the lotion and maintaining the stability of the emulsion. These ingredients contribute to the texture of the lotion, ensuring it has the desired consistency while keeping the oil and water phases properly mixed.
Carrier Oils: Choosing the right carrier oil can significantly impact the lotion’s properties. For instance, Hazelnut oil, the oil that I am using in this lotion, is known for its quick absorption and non-greasy feel. It’s a moisturizing oil that penetrates the skin rapidly, leaving it feeling hydrated without a heavy residue. Carrier oils provide essential fatty acids and nutrients, nourishing the skin.
Butters: Butters like Cocoa Butter are renowned for their richness in fatty acids and their ability to deeply moisturize the skin. Cocoa Butter, with its emollient properties, creates a protective barrier that helps prevent moisture loss and shields the skin against environmental stressors. It contributes to the luxurious feel and thickness of the lotion.
Each of these ingredients brings distinct properties and benefits to the homemade lotion, contributing to its texture, hydration, and overall effectiveness. Understanding their individual roles enables the creation of a tailored skincare product that suits specific skin needs and personal preferences.
Cool Down Phase
Preservatives: Adding water-based ingredients to lotions increases the risk of bacterial growth and mold formation. Preservatives like Germall Plus are vital for extending the shelf life of the lotion by preventing microbial contamination. They inhibit the growth of bacteria, yeast, and mold, ensuring the lotion remains safe for use over an extended period.
Fragrance Oil: While optional, fragrance oils like Persephone’s Kiss contribute to the sensory experience of the lotion. They infuse the product with captivating scents, creating a delightful aroma that lingers on the skin. These oils often consist of blends carefully curated to offer a pleasing fragrance profile, enhancing the overall appeal of the lotion.
Vitamin E Oil: Vitamin E oil serves a dual purpose in homemade lotions. Firstly, it acts as an antioxidant that helps extend the shelf life of the oils and butters used in the formulation. By preventing or slowing down oxidation, it minimizes the risk of the oils turning rancid, thereby preserving the lotion. Secondly, Vitamin E oil offers moisturizing benefits for the skin, aiding in keeping it supple and hydrated.
These ingredients are heat-sensitive, meaning exposure to high temperatures during the lotion-making process can compromise their effectiveness or alter their properties. By adding them during the cool down phase, after the mixture has cooled to a suitable temperature, their integrity and efficacy are preserved.
Essential Equipment for Homemade Lotion Making
Immersion Blender
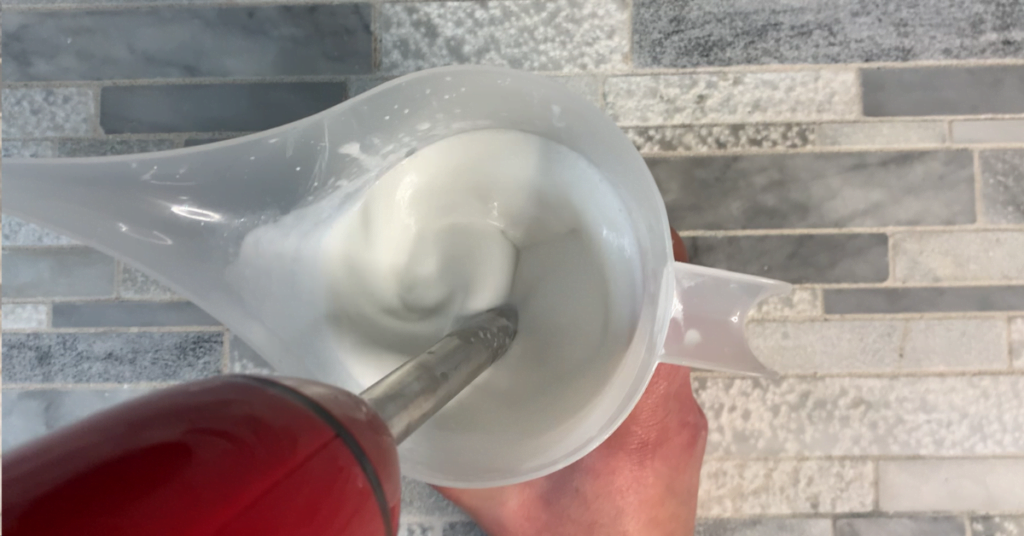
The immersion blender is an essential tool for creating a well-blended lotion. Its role is crucial in achieving a consistent emulsion by effectively breaking down oil droplets into smaller and more uniform sizes. This process ensures a smoother texture and greater stability in the lotion. Unlike a hand mixer, the immersion blender’s higher shear mixing capability guarantees a superior emulsion, resulting in a lotion with optimal quality and uniformity.
Precision Scale
Accurate measurements are non-negotiable in lotion making. Using a scale that measures to .01 ounce becomes imperative, especially for small batch formulations. Cups and teaspoons won’t suffice for the precision needed in creating a balanced and effective lotion.
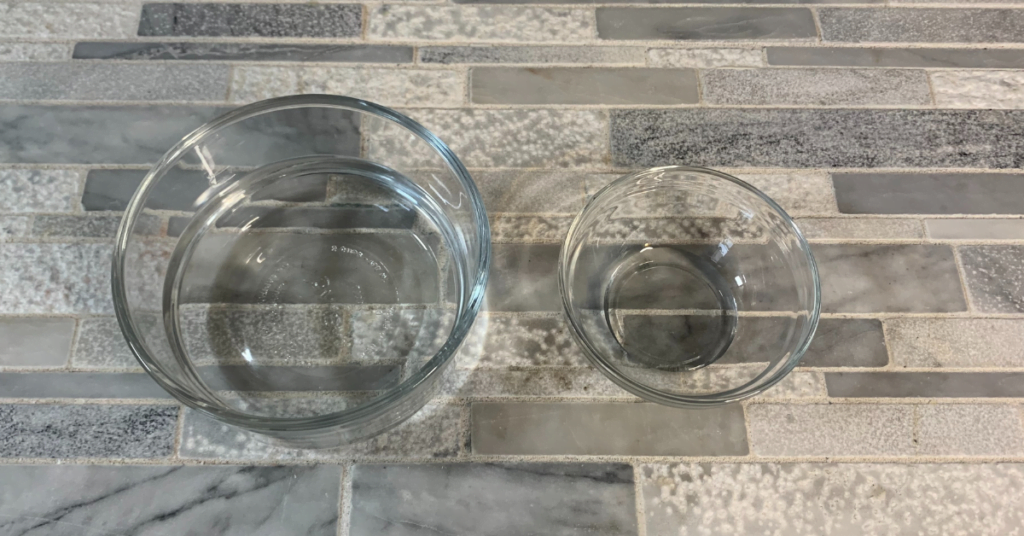
Heat-Safe Containers
Considering the heating process involved in combining ingredients, selecting containers capable of withstanding heat becomes essential. Heat-safe containers ensure a safe and efficient blending process without risking damage to the containers or compromising the lotion’s quality.
Packaging
Choosing appropriate bottles or containers for storing the lotion is vital. Containers with flip-top lids are convenient, but the key is to select packaging that prevents contamination. Opt for containers that allow dispensing without the need for direct hand contact, maintaining hygiene and extending the lotion’s shelf life.
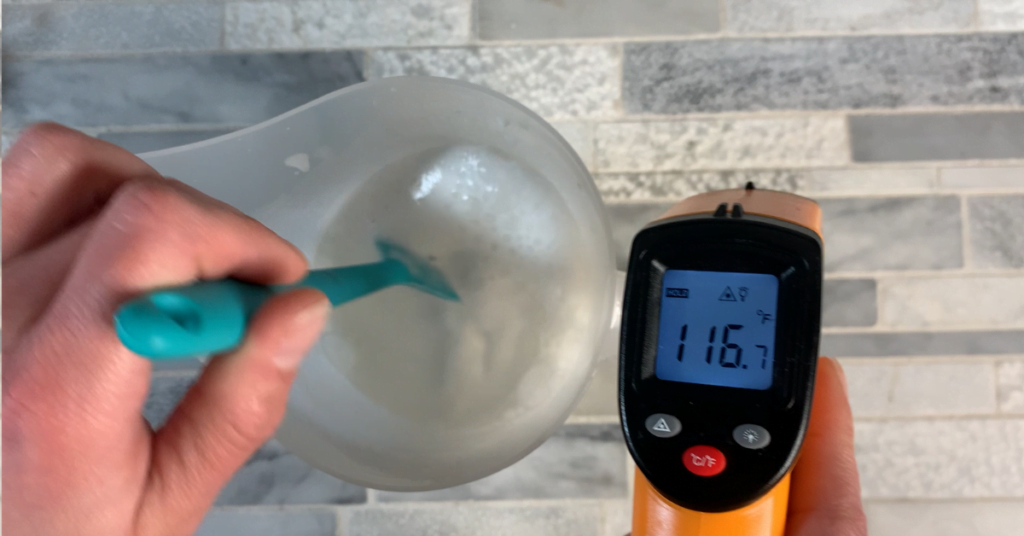
Optional: Infrared Thermometer
While not mandatory, an infrared thermometer can aid in ensuring the ingredients cool down efficiently. However, if unavailable, allowing ingredients to naturally reach room temperature suffices for the lotion-making process.
Prioritize cleanliness and accuracy by utilizing these essential tools and containers, elevating your lotion-making experience while guaranteeing a high-quality end product.
e, you can certainly just allow your ingredients to cool down to room temperature.
Making Your Customized Lotion
- Weighing Ingredients:
- Measure all ingredients accurately using a scale, ensuring the right ratios for a balanced lotion formula.
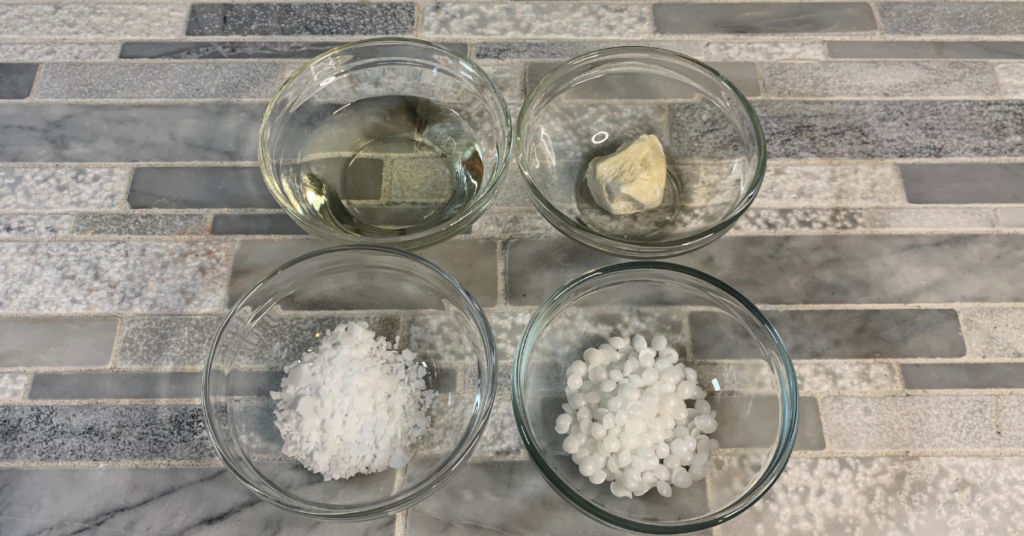
- Prepare Water and Oil Phases:
- Place distilled water and vegetable glycerin in a heat-safe container. In another container, combine hazelnut oil, emulsifying wax, stearic acid, and cocoa butter.
- Set up a double boiler by placing the containers on low heat in a saucepan filled with water, preventing excessive container movement using a silicone mat.
- Melting the Oil Phase:
- Melt the oil phase components gently until fully melted. Carefully wipe the container exteriors to avoid any water from the double boiler from getting into the lotion.
- Combining Phases:
- Pour the water phase into a high-profile mixing container to minimize splashing.
- Combine the oil phase with the water phase.
- Emulsification Process:
- Using an immersion blender to mix thoroughly, starting with gentle pulses and gradually increasing speed for a consistent emulsion. This step is crucial for a smooth and stable lotion.
- Incorporate Cool Down Ingredients:
- Once the temperature drops below 122°F, add germall plus, vitamin E oil, and fragrance oil.
- Blend again with the immersion blender to ensure uniform distribution of added ingredients.
- Packaging and Final Touches:
- Transfer the lotion into preferred containers for storage and use. For easy filling, consider using a plastic baggie as a makeshift piping bag if needed.
Troubleshooting Common Lotion Issues:
- Lotion Separation:
- Ensure similar temperatures for both water and oils before blending. Utilize an immersion blender for a proper emulsion. Inadequate use of emulsifying wax might cause separation issues.
- Speckles of Color:
- Handle color speckling by incorporating liquid colorants for a seamless blend. Alternatively, omit colorants for a natural, white lotion. Use mica powder and blend thoroughly to prevent settling or speckling.
- Pump Clogging:
- Thick lotions can clog pump bottles. Opt for flip-top containers as an alternative for smoother dispensing, accommodating thicker textures effectively and preventing pump-related issues.
How to get thick lotion into Container
Crafting Luxurious Homemade Lotions: A Step-by-Step Guide for Silky Smooth Skin
Equipment
- Scale
Ingredients
Water Phase
- 6.75 ounce | 75% Distilled Water
- 0.27 ounce | 3% Vegetable Glycerin
Oil Phase
- 0.27 ouce | 3% Cocoa Butter
- 0.90 ounce | 10% Hazelnut Oil
- 0.36 ounce | 4% Emulsifying Wax
- 0.18 ounce | 2% Stearic Acid
Cool Down Phase
- 0.05 ounce | 0.5% Germall Plus
- 0.18 ounce | 2% Persephone's Kiss Fragrance Oil
- 0.05 ounce | 2% Vitamin E Oil
Instructions
- Weighing Ingredients: Measure all ingredients accurately using a scale, ensuring the right ratios for a balanced lotion formula.
- Place distilled water and vegetable glycerin in a heat-safe container. In another container, combine hazelnut oil, emulsifying wax, stearic acid, and cocoa butter. Set up a double boiler by placing the containers on low heat in a saucepan filled with water, preventing excessive container movement using a silicone mat.
- Melting the Oil Phase: Melt the oil phase components gently until fully melted. Carefully wipe the container exteriors to avoid any water from the double boiler from getting into the lotion.
- Combining Phases: Pour the water phase into a high-profile mixing container to minimize splashing. Combine the oil phase with the water phase.
- Emulsification Process: Using an immersion blender to mix thoroughly, starting with gentle pulses and gradually increasing speed for a consistent emulsion. This step is crucial for a smooth and stable lotion.
- Incorporate Cool Down Ingredients: Once the temperature drops below 122°F, add germall plus, vitamin E oil, and fragrance oil. Blend again with the immersion blender to ensure uniform distribution of added ingredients.
- Packaging and Final Touches: Transfer the lotion into preferred containers for storage and use. For easy filling, consider using a plastic baggie as a makeshift piping bag if needed.
Tailoring Lotions for Different Skin Types
Dry Skin: Dry skin requires extra nourishment. Adjust the homemade lotions formula by increasing the amount of oils used or selecting carrier oils specifically suited for dry skin. Consider oils like avocado or sweet almond, known for their deeply moisturizing properties. Additionally, adding lanolin can enhance the lotion’s ability to create a protective barrier, effectively locking in moisture and preventing further dehydration.
Oily Skin: Opt for lightweight formulas with oils that absorb quickly. Choose “dry oils” such as grapeseed oil, which sink into the skin rapidly without leaving a greasy residue. These oils help hydrate without exacerbating oiliness, maintaining a balanced moisture level in oily skin types. Fragrance oils can be skipped for those with sensitivity to scents.
Sensitive Skin: For sensitive skin, prioritize gentle ingredients and omit fragrance oils. Consider incorporating jojoba oil due to its similarity to the skin’s natural sebum, making it less likely to cause irritation. Jojoba oil’s balancing properties can help soothe sensitive skin without clogging pores or triggering reactions.
Understanding Ingredient Benefits:
- Avocado Oil: Rich in fatty acids and vitamins, ideal for hydrating and nourishing dry skin.
- Sweet Almond Oil: Easily absorbed, it moisturizes and soothes dry, irritated skin.
- Jojoba Oil: Resembles the skin’s natural oils, suitable for all skin types, especially sensitive skin. It balances oil production and provides gentle hydration.
- Grapeseed Oil: A dry oil that hydrates without feeling heavy, beneficial for oily skin due to its quick absorption.
- Lanolin: Creates a protective barrier, locking in moisture for prolonged hydration, particularly beneficial for dry skin types.
Adapting lotion recipes based on skin type ensures that individuals receive tailored skincare benefits. Understanding these adjustments and ingredient benefits allows for personalized formulations that effectively address specific skin concerns, catering to diverse skincare needs.
Tips for Storage and Shelf Life
Storing your homemade lotions properly is crucial to maintain their freshness and efficacy. Follow these guidelines to ensure your creations stay fresh and safe to use.
Storing Homemade Lotions:
- Container Selection: Opt for containers with flip-top lids instead of jars that require dipping fingers in the lotion. This prevents bacterial contamination, maintaining the lotion’s integrity.
- Location: Store your lotions away from direct sunlight and in a cool place that is not directly in the sunlight.
- Sealing Containers: Always tightly seal the containers after use to prevent air exposure, which can lead to oxidation and degradation of ingredients.
- Sanitize Equipment: Always sanitize the equipment that you will be using and your work area before making your lotion. You want to ensure that there are no germs or bacteria that can contaminate your lotion.
Shelf Life:
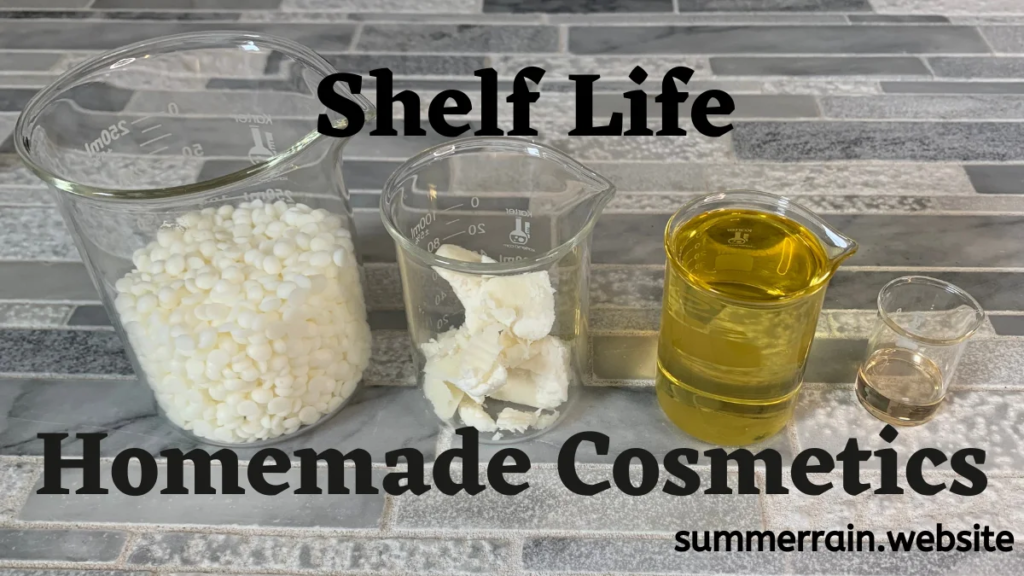
- Typical Shelf Life: Homemade lotions generally have a shelf life of 3 to 6 months. However, this can vary based on the ingredients used. Check out this post How Do You Determine The Shelf Life of Homemade Cosmetics for more details.
Conclusion
Throughout this guide, we’ve explored the art of lotion making, delving into crucial steps and ingredient considerations. Tailoring lotions to specific skin types, whether dry, oily, or sensitive, ensures personalized skincare benefits. From adjusting oil ratios to selecting suitable ingredients, crafting lotions becomes a tailored experience.
Now, it’s your turn to embark on this rewarding journey of creating your own lotions. Experiment, explore, and enjoy the process of customizing skincare that suits your needs perfectly.
Share your experiences, questions, or newfound lotion-making tips in the comments below. Let’s continue this conversation and inspire each other on this exciting skincare adventure!
Summer Rain Community
Don’t miss out on your journey to crafting exceptional skincare at home! Subscribe to my blog for a treasure trove of DIY skincare recipes, insightful tips, and expert guidance.
Subscribe to our newsletter!
Join the community of skincare enthusiasts! Follow us on social media to dive deeper into the world of homemade skincare. Discover exclusive content, behind-the-scenes insights, and connect with like-minded individuals passionate about nurturing their skin naturally.
Facebook: https://facebook.com/summerrain.website/
Pinterest: https://www.pinterest.com/summerrainblog/
Patreon: https://www.patreon.com/Summerraindiy
TikTok: https://www.tiktok.com/@summerraindiy
Let’s embark on this exciting skincare adventure together—subscribe, follow, and elevate your DIY skincare game!


