

If you love a relaxing bubble bath, these foaming bath truffles are such a fun DIY project. They look like little scoops of ice cream, but when you crumble one under running bath water, it creates bubbles, a gentle fizz, and releases fragrance into the bath.
Unlike a traditional bath bomb, which is primarily designed to fizz, these bath truffles are made with a surfactant to create bubbles and foam. They also contain coconut oil and cocoa butter, which give the truffles their soft, moldable texture while adding a conditioning feel to the bath.
The best part is that you don’t need a complicated mold. A small cookie scoop with a release mechanism makes these little truffles surprisingly easy to shape.
This recipe is also a great introduction to understanding how different ingredients work together in a bath product. Once you understand the role of each ingredient, it becomes much easier to troubleshoot the texture, change the fragrance, or create your own variations.
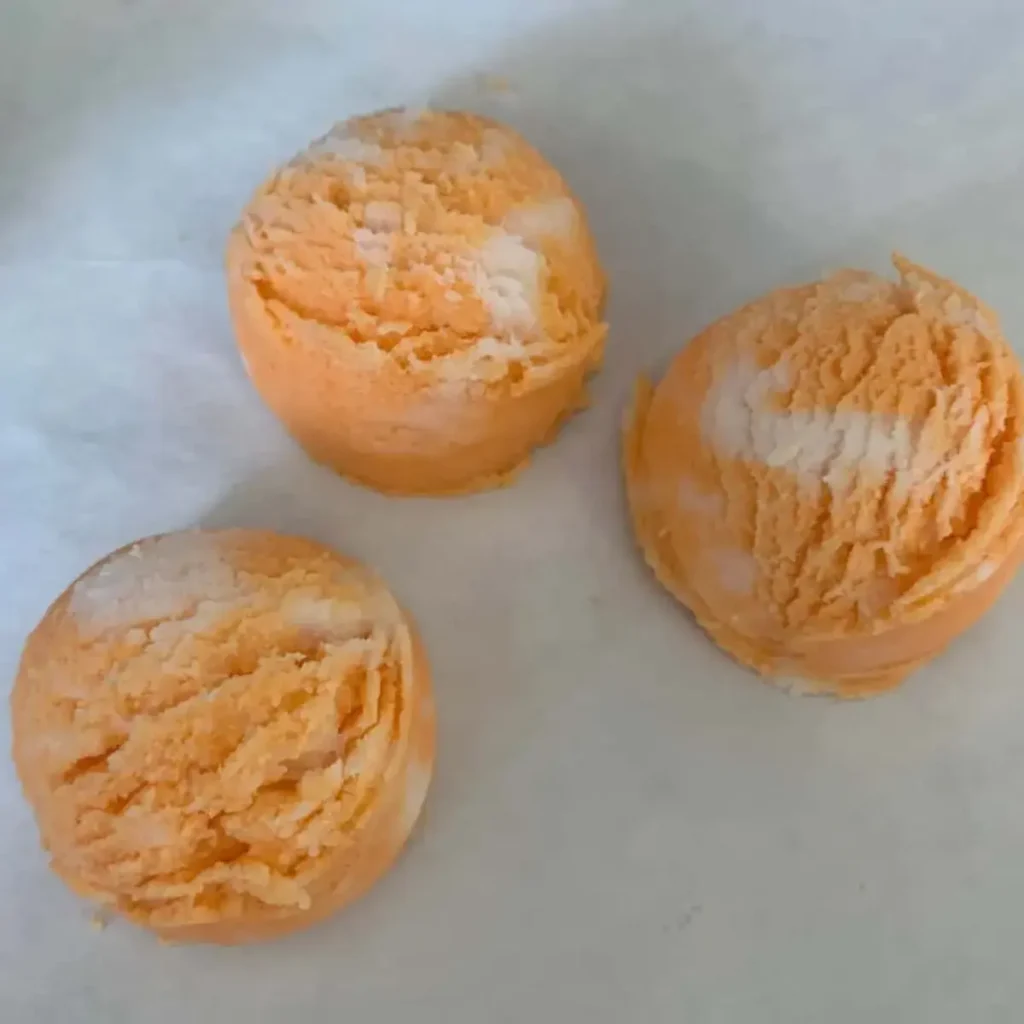
What Is a Foaming Bath Truffle?
A foaming bath truffle is essentially a cross between a bath bomb and a solid bubble bath.
It contains the familiar baking soda and citric acid combination found in bath bombs, so it will fizz when it comes into contact with water. But it also contains SLSa, a powdered surfactant that creates foam and bubbles.
The oils and butter give the mixture a moldable, dough-like consistency and make the finished truffles feel more luxurious.
When you use one, simply crumble it under the running bath water. The water activates the fizzing ingredients while the SLSa creates the bubbles.
Prefer to watch this project instead of reading it?
Some links are “affiliate links”, because I am an Amazon associate and I earn from qualifying purchases. There is no additional cost to you, the price of this item is the same whether it is an affiliate link or not.
Bath truffle vs. bath bomb vs. bubble bar
It can be confusing when several bath products look similar, so here’s the simple distinction:
Bath bombs: Primarily fizz and dissolve in the bath.
Bubble bars: Primarily create bubbles and foam when crumbled under running water.
Foaming bath truffles: Combine the two ideas. They fizz because of the baking soda and citric acid, while the SLSa produces bubbles.
The result is a fun bath product that gives you both fizz and foam.
If you enjoy making bath products, you may also want to try my DIY solid bubble bath recipe. It uses a different approach and is specifically designed to create lots of bubbles.
Why This Recipe Works
Every ingredient in this formula has a job.
Rather than simply throwing everything into a bowl, it helps to understand why each ingredient is there. That knowledge will also help you troubleshoot the recipe if your mixture isn’t behaving the way you expect.
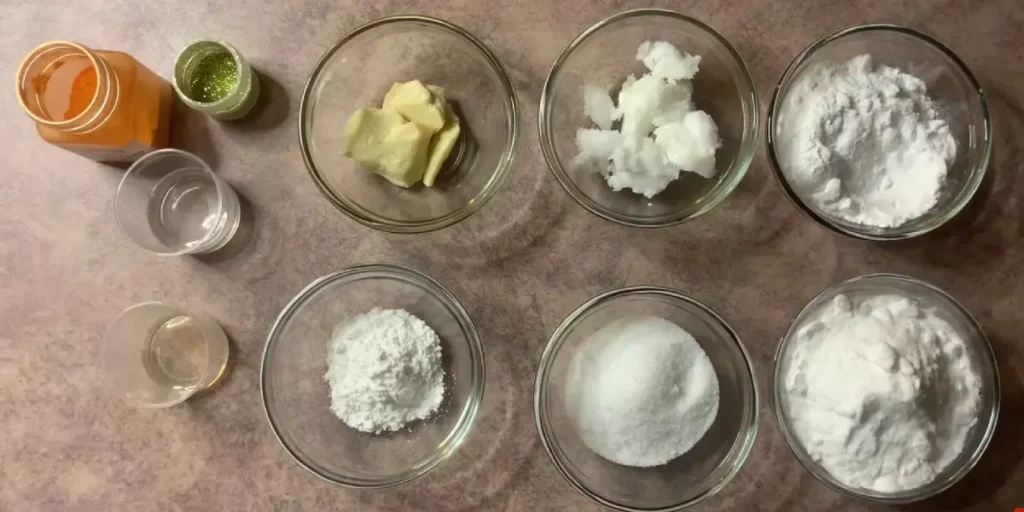
Baking Soda
Baking soda forms the largest portion of the dry ingredients.
When it comes into contact with citric acid and water, it participates in the acid-base reaction that creates the familiar bath bomb fizz.
It also contributes to the texture of the dry mixture.
Citric Acid
Citric acid is the other half of the fizzing reaction.
When the dry ingredients are mixed together, nothing happens because the ingredients need water to activate the reaction.
Once you crumble the truffle into the bath, the water activates the baking soda and citric acid, producing the fizz.
Cream of Tartar
Cream of tartar helps contribute to the structure and texture of the dry mixture.
It is commonly used in bath bomb and bath product formulas as part of the dry base.
SLSa
SLSa stands for sodium lauryl sulfoacetate.
This is the ingredient responsible for the bubbles.
It is a powdered surfactant, which means it helps create foam when the bath truffle is exposed to running water.
Because SLSa is a very fine powder, it is important to avoid creating unnecessary dust while measuring and mixing it. Wear a suitable mask and work carefully in a well-ventilated area.
Don’t confuse SLSa with SLS. They are different ingredients.
Coconut Oil
Coconut oil is part of the oil phase of this recipe.
It helps give the bath truffle a softer, more workable texture and contributes an emollient feel to the finished bath.
Because coconut oil is solid at cooler room temperatures, it also helps the truffles hold their shape once they have completely cooled.
Cocoa Butter
Cocoa butter provides structure and firmness.
It is especially helpful in a recipe like this because the finished mixture needs to be soft enough to scoop but firm enough to hold its shape.
Cocoa butter also contributes a rich, conditioning feel to the bath.
If you’re interested in learning more about how oils, butters, and other cosmetic ingredients function in formulations, my guide on what each ingredient does in skincare formulation is a good place to start.
Polysorbate 80
Polysorbate 80 is an important ingredient in this recipe even though you’re only using a small amount.
The formula contains oils and butter, while the finished product is being used in water. Polysorbate 80 helps disperse those oils throughout the bath water instead of allowing them to simply float on the surface.
This is particularly important with bath products because a large amount of undispersed oil can leave the tub slippery.
It does not make the product completely non-slip, so always use care when getting in and out of the bath.
Fragrance Oil
Fragrance oil gives the bath truffles their scent.
Choose a fragrance specifically approved by the supplier for use in bath and body products, and always follow the supplier’s recommended usage rate and IFRA restrictions for the intended product category.
The 4% fragrance level shown in the original version of this recipe should not automatically be treated as a universal fragrance recommendation. Fragrance usage rates vary from one fragrance to another.
If your fragrance supplier lists a lower maximum usage rate, use the lower amount.
Mica
Mica adds color without necessarily turning your bath water into a strongly colored bath.
That makes it a good choice when you want colorful bath truffles without adding a large amount of water-soluble dye.
Always use a cosmetic-grade colorant intended for bath and body products.
You can also use a bath-safe colorant if you specifically want the bath water to change color.
Biodegradable Glitter
Glitter is completely optional.
If you want to add sparkle, use a product specifically intended for cosmetic or bath use.
Avoid ordinary craft glitter. It is not designed to be used in bath products and can introduce plastic particles into your wastewater.
For the simplest version of this recipe, you can skip glitter altogether.
Foaming Bath Truffle Formula
This recipe makes approximately 7.5 ounces.
| Ingredient | Percentage | Weight |
|---|---|---|
| Baking Soda | 43% | 3.23 oz |
| Citric Acid | 14% | 1.05 oz |
| Cream of Tartar | 6% | 0.45 oz |
| SLSa | 17% | 1.28 oz |
| Coconut Oil | 9% | 0.68 oz |
| Cocoa Butter | 6% | 0.45 oz |
| Polysorbate 80 | 1% | 0.08 oz |
| Fragrance Oil | 4% | 0.30 oz |
| Total | 100% | 7.5 oz |
The original recipe makes about three scoop-shaped bath truffles, depending on the size of your scoop.
Why I Recommend Weighing the Ingredients
If you’re making bath products, a digital scale is one of the most useful pieces of equipment you can own.
Measuring by cups and teaspoons isn’t very reliable because powders and butters have different densities. A scale lets you reproduce the same formula every time.
It also makes scaling a recipe much easier.
For example, if you wanted to make a 500-gram batch, you could multiply each percentage by 500.
If you’re new to working with cosmetic formulas, my guide to percentages versus grams explains exactly how this works.
Equipment You’ll Need
You don’t need a lot of equipment for this project.
You’ll need:
- Digital scale
- Heat-safe container
- Double boiler or water bath
- Mixing bowl
- Spoon or spatula
- Small cookie scoop with a release mechanism
- Freezer paper or parchment paper
- Disposable gloves
- Suitable mask or respirator for working with fine SLSa powder
A cookie scoop with a release mechanism is especially helpful because it gives the bath truffles their rounded shape.
A scoop without the release mechanism can make removing the truffles much more difficult.
Before You Start: Protect Yourself From Powder Dust
There is one step I don’t recommend skipping.
SLSa is an extremely fine powder, and powdered surfactants can be irritating if inhaled.
When you’re measuring and mixing the dry ingredients:
- Work slowly.
- Avoid dumping powders into the bowl from a height.
- Keep your face away from the bowl.
- Wear a suitable mask or respirator.
- Work in an area with good ventilation.
- Avoid creating a cloud of powder.
Once everything has been combined with the melted oils, the mixture is much easier to work with.
How to Make Foaming Bath Truffles
Step 1: Weigh Everything
Begin by weighing all of your ingredients.
Because this is a percentage-based formula, a scale is much more accurate than measuring by volume.
Set your ingredients aside so everything is ready before you begin mixing.
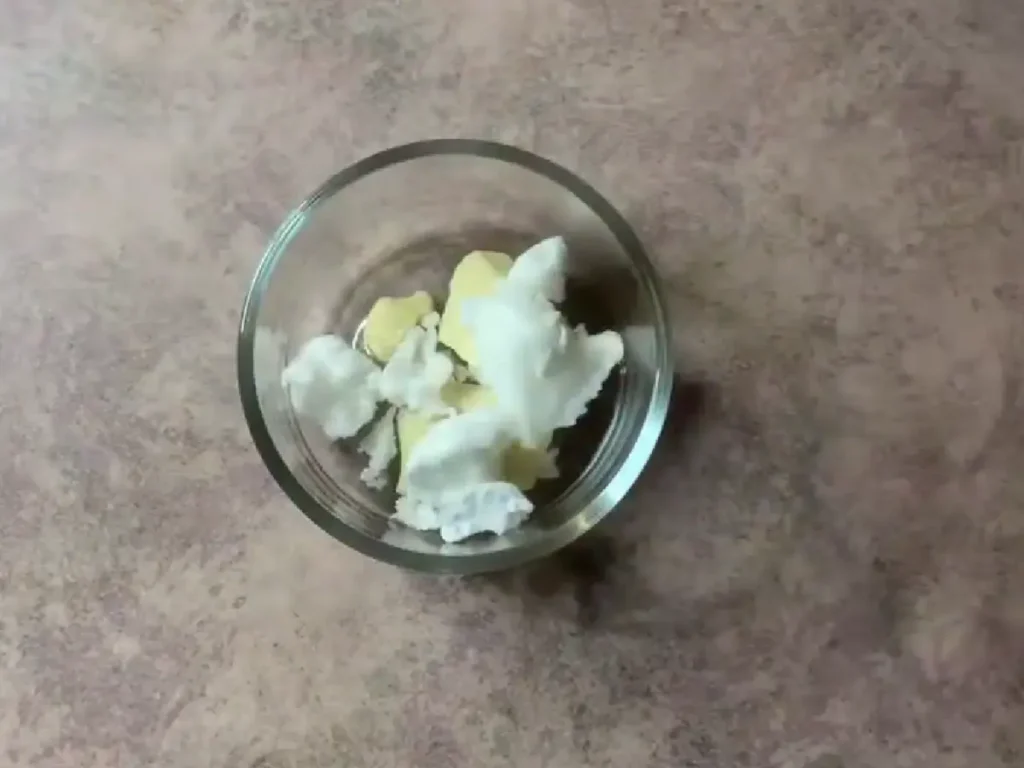
Step 2: Melt the Cocoa Butter and Coconut Oil
Place the cocoa butter and coconut oil into a heat-safe container.
Gently heat them using a double boiler until both ingredients are completely melted.
Stir them while they are heating. As soon as the butter and oil have melted together, remove them from the heat.
Step 3: Combine the Dry Ingredients
Add the following to a large mixing bowl:
- Baking soda
- Citric acid
- Cream of tartar
- SLSa
Mix carefully.
Take your time here. You don’t want to create a cloud of fine powder.
Make sure the ingredients are evenly distributed before adding the melted oils.
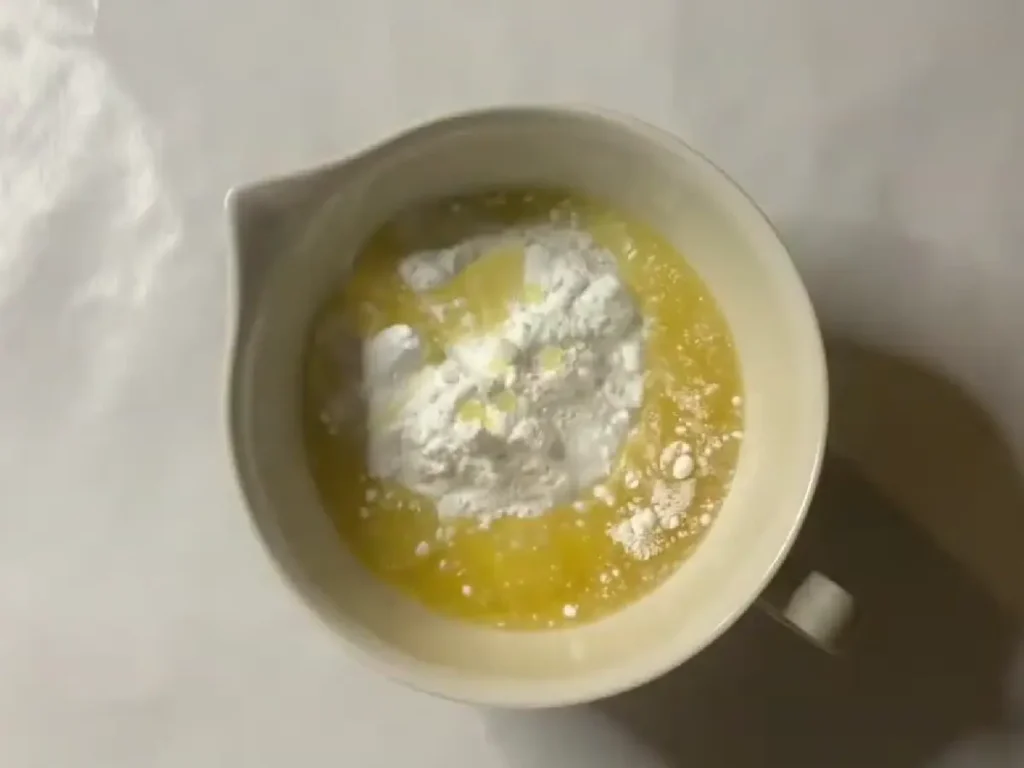
Step 4: Add the Melted Oils
Pour the melted cocoa butter and coconut oil into the dry mixture.
Stir thoroughly.
At first, the mixture may look uneven or slightly crumbly. Keep mixing until the oils are distributed throughout the dry ingredients.
The goal isn’t to create a wet mixture. You want everything evenly coated.
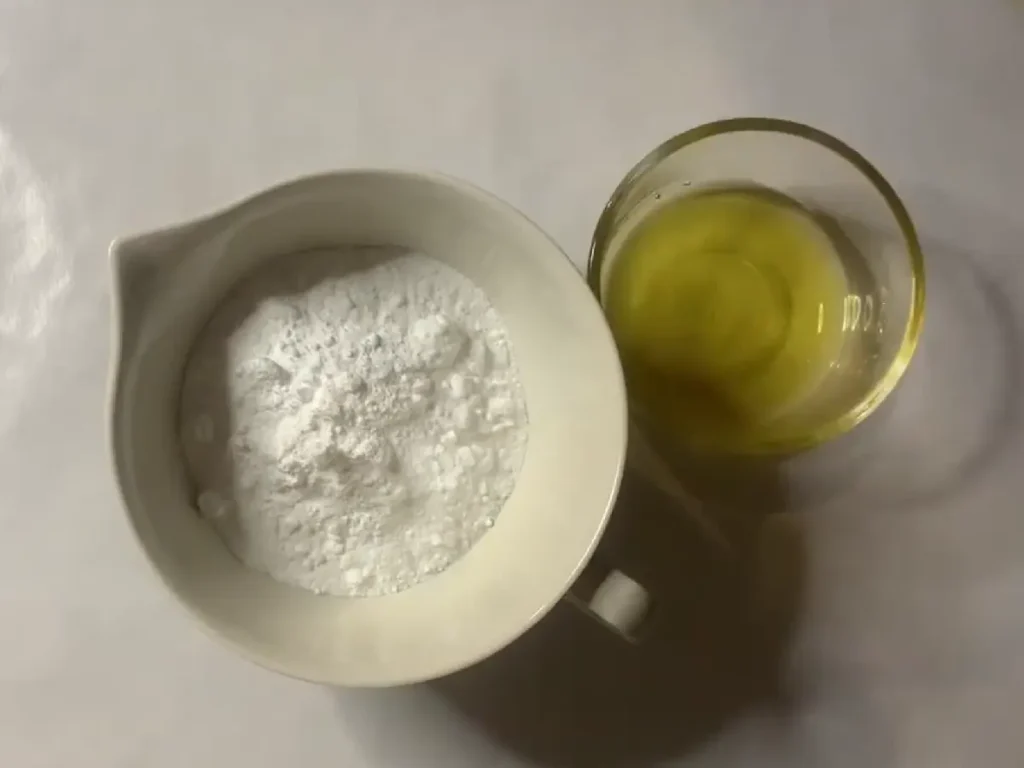
Step 5: Add the Polysorbate 80 and Fragrance
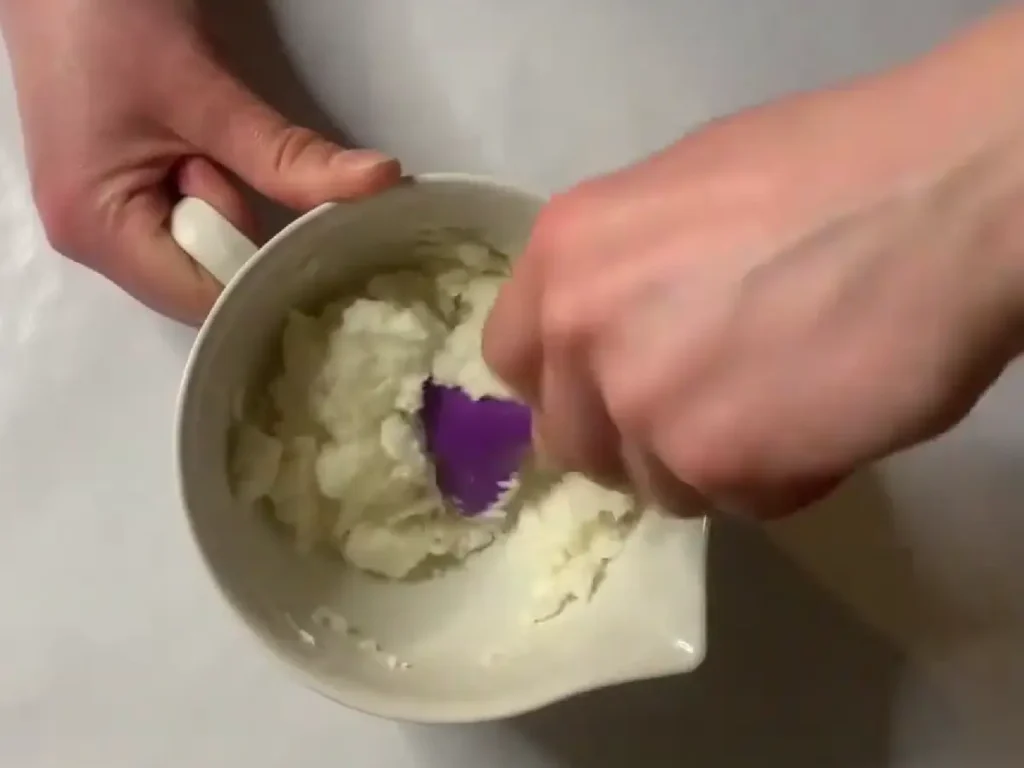
Add the Polysorbate 80 and your fragrance oil.
Mix thoroughly again.
Step 6: Add Your Color
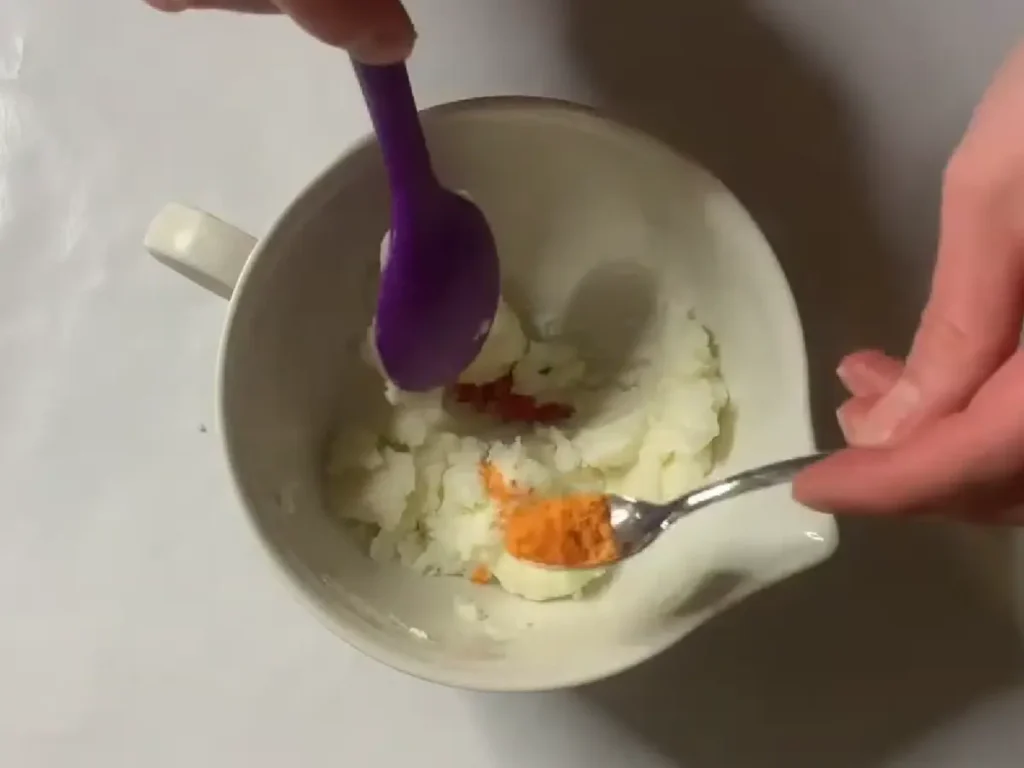
If you’re making a layered or two-color design, divide the mixture into two bowls.
Leave one portion uncolored.
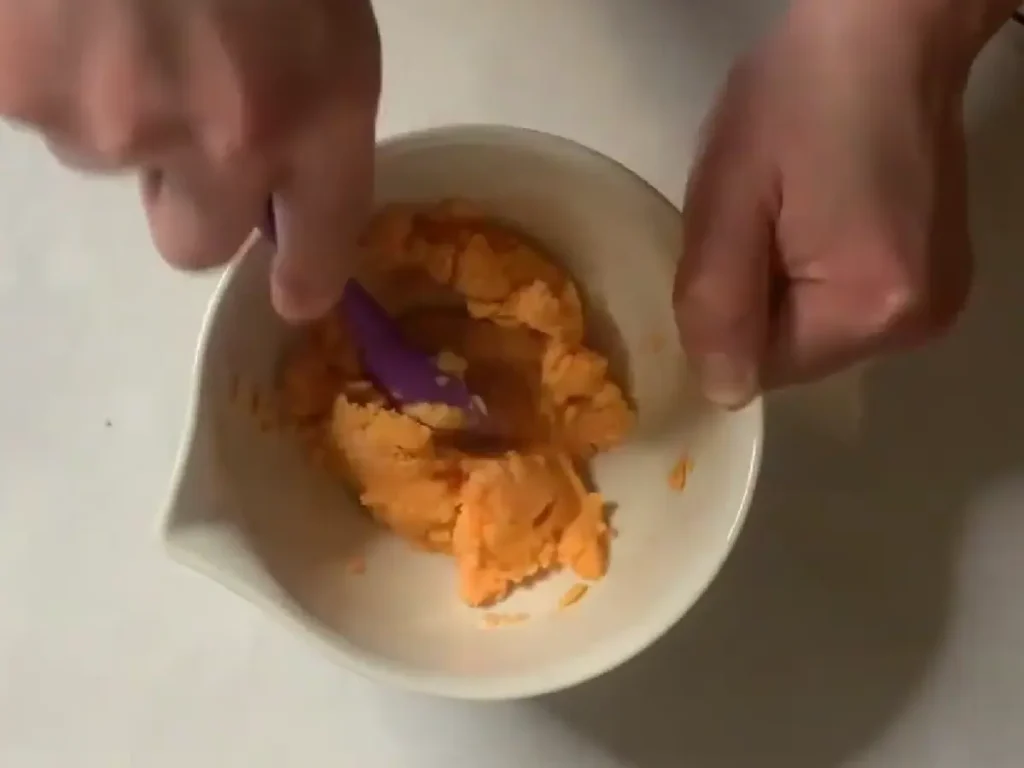
Add your chosen mica to the second portion and mix until the color is evenly distributed.
You can make the entire batch one color, create two colors, or experiment with several shades.
Just remember that adding too much powdered colorant can change the texture of the mixture.
What Should the Bath Truffle Mixture Feel Like?
This is one of the most important parts of the recipe.
Traditional bath bomb mixtures are usually similar to damp sand.
This mixture should be softer and more moldable than a bath bomb because of the oils and butter.
Think of a texture somewhere between soft playdough and a firm cookie dough.
When you squeeze it in your hand, it should hold together.
When you pack it into the scoop, it should stay together when released.
If the mixture is too dry
If you can’t pack the mixture firmly into the scoop and it immediately falls apart, it needs a little more binding.
Do not immediately add a large amount of liquid.
Instead, add a very small amount of melted cocoa butter at a time and mix thoroughly before deciding whether you need more.
Adding too much oil or butter can make the finished truffles soft and greasy.
If the mixture is too wet or oily
Give it some time to cool.
The cocoa butter will continue to firm as it cools, so the texture can change considerably while you’re working.
If it still feels too soft after cooling, you can gradually work in a small amount of baking soda.
The important thing is to make changes slowly. It is much easier to add a little than to try to correct a mixture that has become too wet.
How to Create a Marbled Color Effect
For a pretty marbled effect, don’t completely mix your colors together. The goal is to create little sections of orange and white throughout the mixture so the colors remain distinct after you shape the bath truffles.
Start by taking small amounts of your orange mixture and flattening them into thin sections. They don’t need to be perfect or the same size.
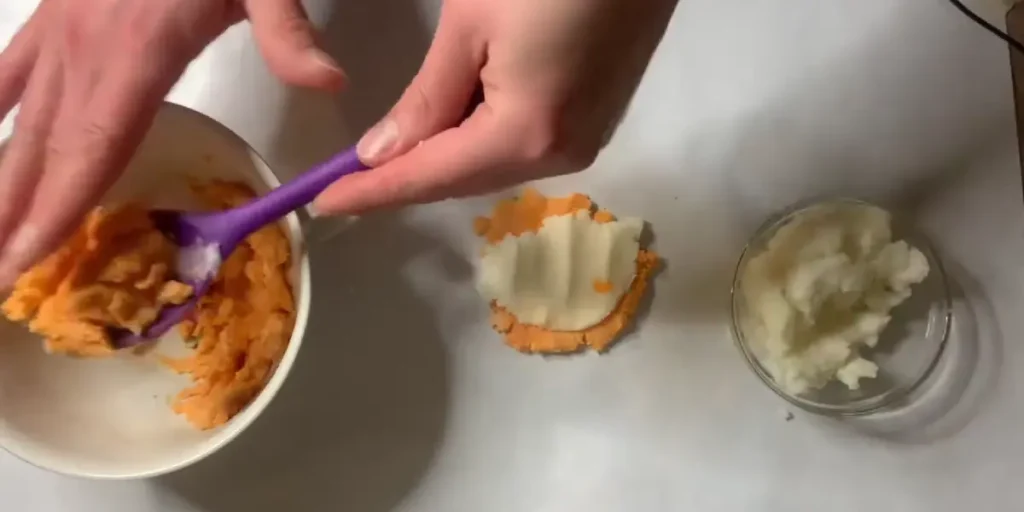
Add a layer of white mixture, then another few pieces of orange. Continue alternating the colors, creating little flat sections of orange surrounded by white.
Once you’ve layered enough of the mixture, gently break the layers apart with your fingers and stack them together. You want the colors to move into each other while still leaving visible pieces and streaks of orange and white.
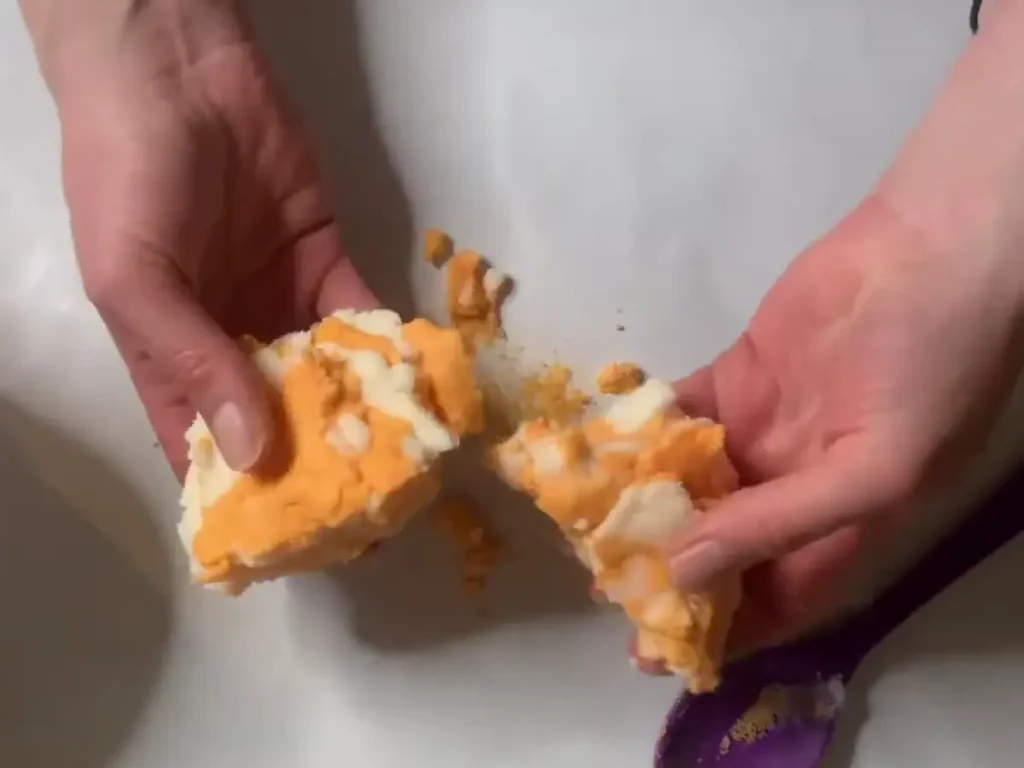
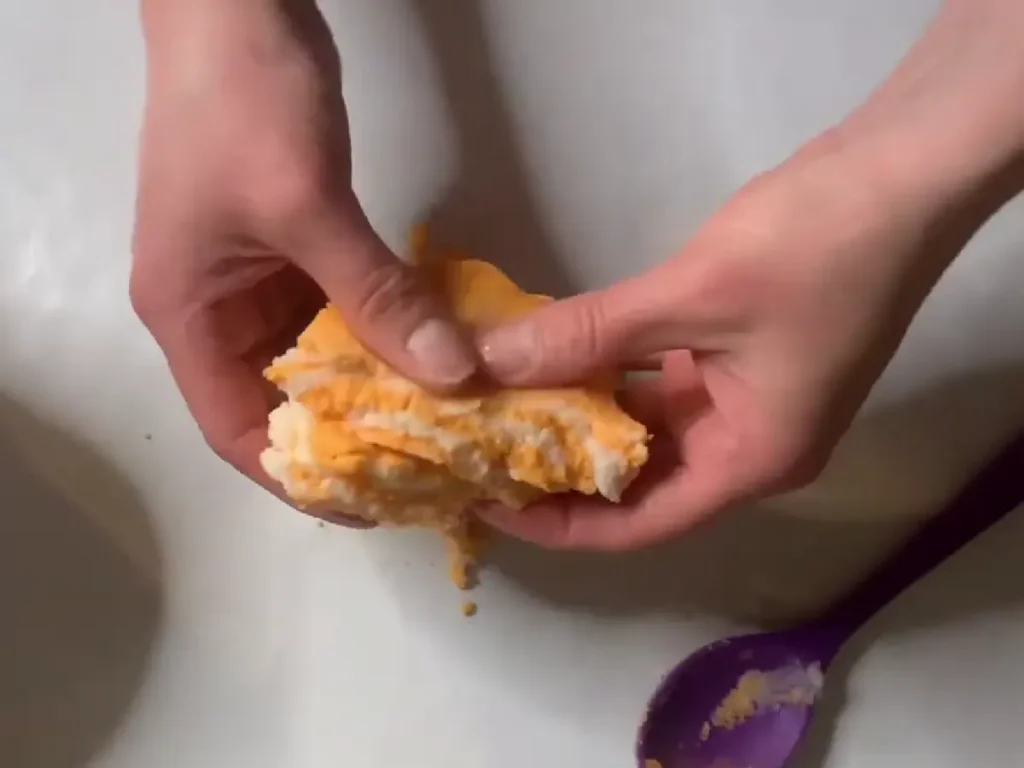
Don’t mix until the colors are completely combined. If you work the mixture too much, the orange and white will blend into a single color and you’ll lose the marbled effect.
The trick to getting a good marble
The less you mix, the more defined your color sections will be. A little more mixing creates softer streaks and a more blended marble.
Once you’re happy with the pattern, scoop the mixture immediately. Try not to continue working the remaining mixture while you’re making each truffle, since continued mixing will gradually blend the colors together.
Every scoop will have a slightly different pattern, which is part of what makes these bath truffles so pretty.
How to Shape the Bath Truffles
Once you have the right consistency, it’s time for the fun part.
Line your work surface with freezer paper or parchment paper.
If you’re creating a layered look, alternate small amounts of your different colored mixtures as you fill the scoop.
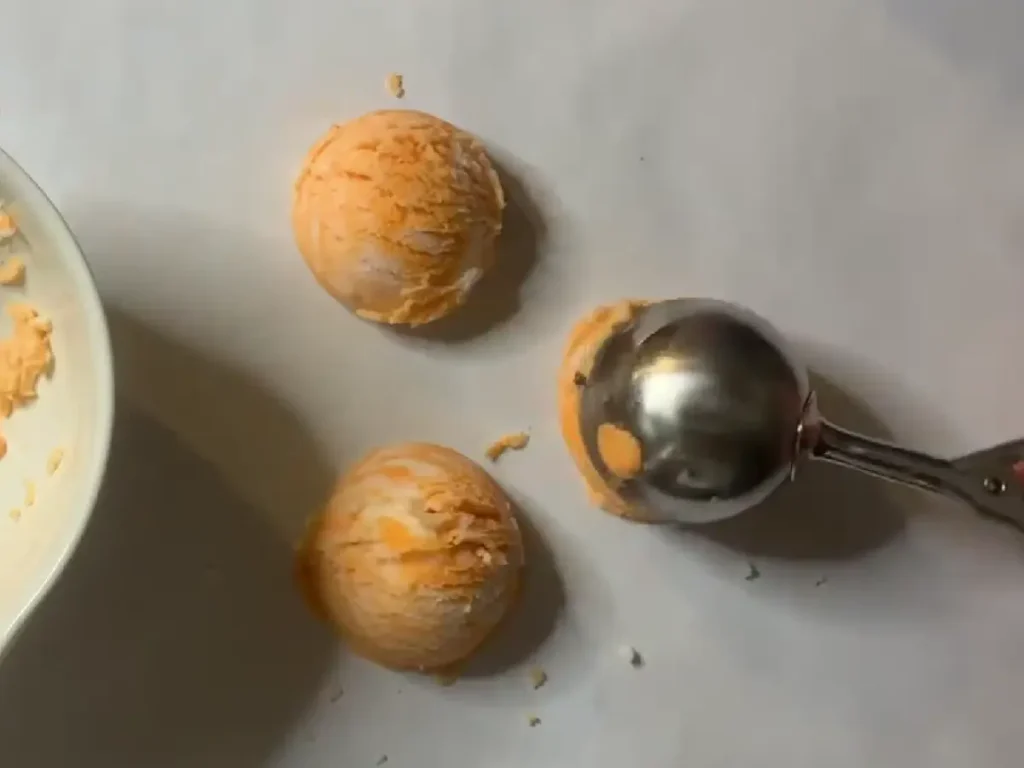
Pack the scoop firmly
This is the trick that makes the biggest difference.
Fill your cookie scoop and press the mixture firmly into it.
You want to eliminate loose pockets so the truffle holds together when you release it.
Scrape or wipe the excess mixture from the edge of the scoop so you have a clean, rounded shape.
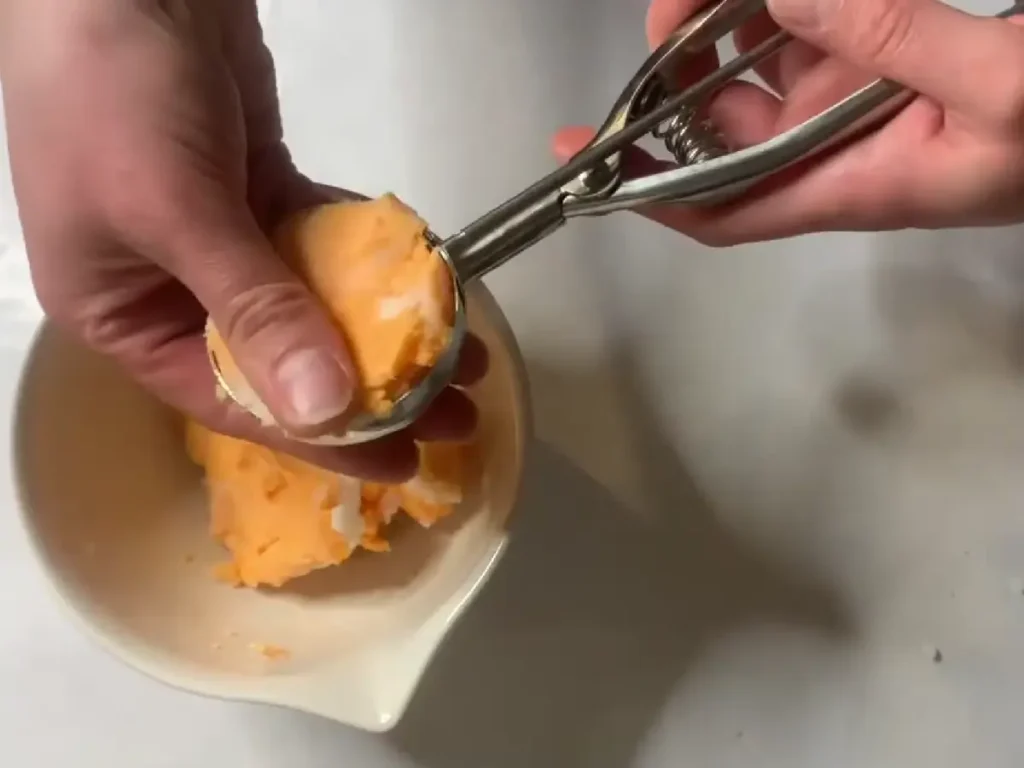
Release the truffle close to the surface
Hold the scoop just above your lined work surface.
Use the release mechanism to drop the bath truffle onto the paper.
Don’t release it from several inches above the surface.
The truffles are still relatively soft at this point, and dropping them can cause them to crack or break apart.
If one breaks, don’t panic.
Simply put the mixture back into the bowl, pack it into the scoop again, and try another one.
Add Glitter If You Want It
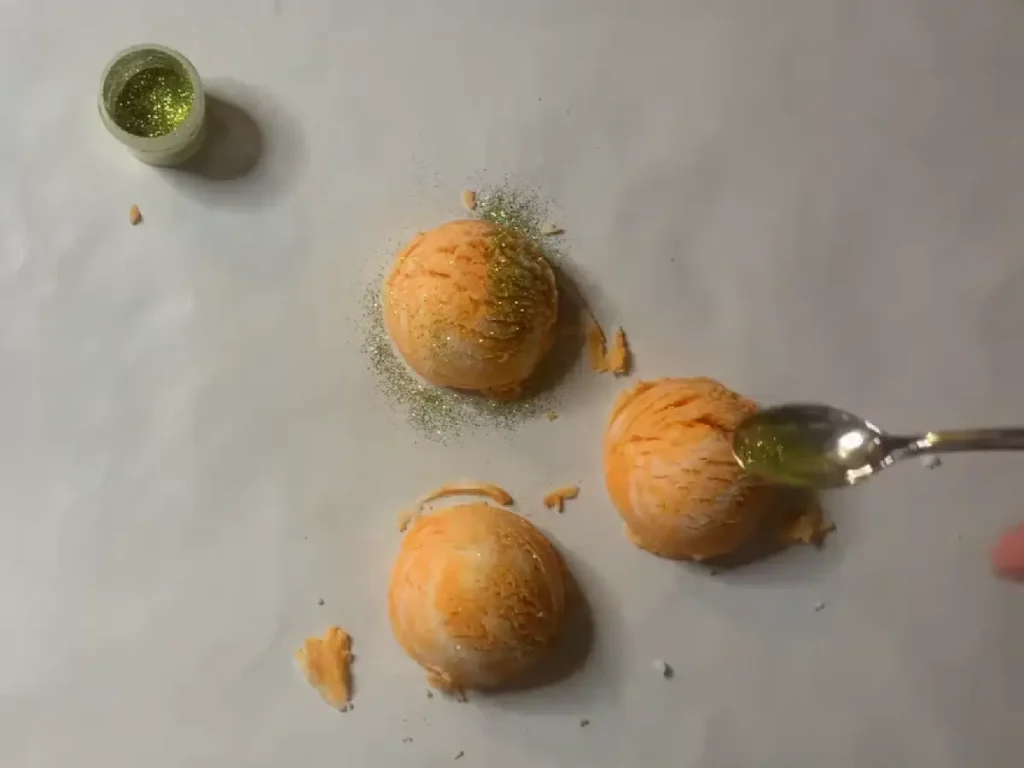
If you’re using biodegradable cosmetic glitter, sprinkle a small amount over the top while the truffles are still fresh.
This is completely optional.
Personally, I think they look beautiful without glitter too, especially when you use two contrasting colors.
Let the Bath Truffles Dry
Leave the finished truffles uncovered in a dry area until they have firmed up completely.
The original recipe recommends allowing them to dry overnight.
Humidity can affect bath products, particularly products containing baking soda and citric acid.
If your home is particularly humid, give them additional drying time.
They should feel firm before you package them.
How to Use a Foaming Bath Truffle
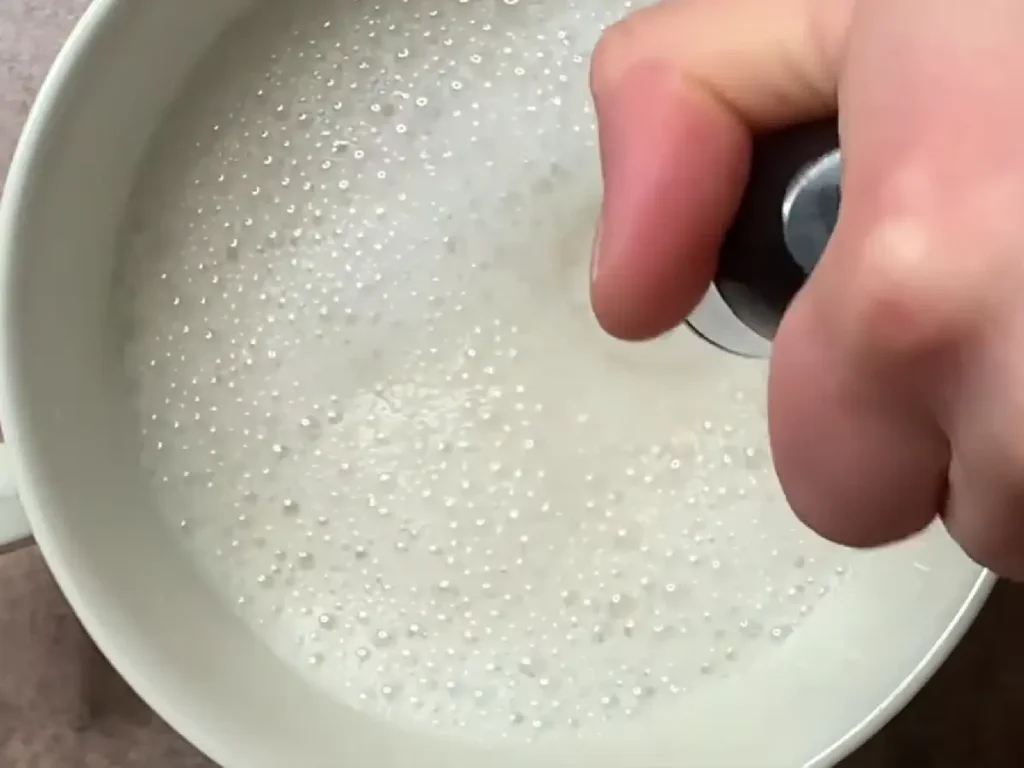
When you’re ready to take a bath, turn on the water and allow the tub to begin filling.
Take one bath truffle and crumble it under the running water.
The running water helps activate the SLSa and create bubbles.
You can also move the crumbled product around underneath the stream of water to help distribute it.
Once the truffle is in the water, the baking soda and citric acid will begin reacting, creating fizz while the SLSa produces foam.
How much should you use?
The amount you need depends on the size of your truffles and how much foam you want.
Start with one.
If you make larger truffles, you can also break off a portion rather than using the entire thing at once.
Because these products are activated by water, avoid getting an unused truffle wet. Keep the rest of your batch dry until you’re ready to use them.
Why Aren’t My Bath Truffles Making Many Bubbles?
You’re not using enough running water
SLSa creates foam when it is exposed to water, and running water helps create much more foam than simply dropping the truffle into a filled tub.
Try crumbling it directly underneath the faucet.
Too much oil can reduce the foaming experience
The oils and butter are there for texture and skin feel, but adding additional oil just because the mixture feels dry isn’t always the best solution.
Make small adjustments rather than adding large amounts.
Why Did My Bath Truffles Fall Apart?
This is one of the most common problems with this type of project.
Usually, the mixture wasn’t compacted enough or the texture was too dry.
Try these fixes:
Pack the scoop more firmly.
The mixture needs pressure to hold together.
Check the consistency.
If it feels crumbly instead of moldable, it may need a very small amount of additional melted cocoa butter.
Release the truffle close to the surface.
A short drop is much less likely to break the truffle.
Allow enough time for the cocoa butter to firm.
The truffles become more stable as they cool.
Why Are My Bath Truffles Too Soft?
If your truffles aren’t holding their shape, don’t immediately assume the recipe has failed.
Temperature can make a big difference.
Cocoa butter is solid at room temperature, but it becomes softer when warm.
If your mixture is still warm from melting the oils, give it some time to cool before making adjustments.
If the mixture remains too soft, check that you measured the ingredients accurately.
Adding extra oil or fragrance can also make a truffle softer than intended.
Can I Change the Fragrance?
Absolutely.
You can use a different fragrance oil to create almost any scent combination you like.
Vanilla, lavender, citrus, floral, fruity, minty, and spa-inspired fragrances can all work beautifully.
Just make sure the fragrance is approved for the intended bath and body application.
Most importantly, don’t assume every fragrance can be used at 4%.
Always check the supplier’s usage rate and IFRA documentation for your specific fragrance.
Can I Use Essential Oils Instead?
You can formulate bath products with essential oils, but they aren’t automatically safer simply because they are natural.
Essential oils are highly concentrated and have their own usage restrictions.
If you want to replace the fragrance oil with essential oils, calculate the appropriate usage rate for the finished product rather than simply swapping them gram-for-gram.
Also consider the specific essential oil you’re using because some have additional skin-safety considerations.
Can I Use a Different Oil?
The coconut oil can potentially be replaced with another cosmetic oil, but changing an ingredient can change the texture of the finished product.
For example, liquid oils will behave differently from coconut oil because coconut oil contributes structure when it is solid.
If you substitute a liquid oil, you may need to adjust the formula rather than simply replacing it at the same percentage.
This is one reason percentage-based formulation is so useful: you can make controlled changes instead of guessing.
Can I Replace the Cocoa Butter?
You can experiment with other solid butters, but again, expect the texture to change.
Cocoa butter is doing more than simply conditioning the skin. It also contributes to the firmness and structure of the truffle.
A softer butter may produce a softer finished product.
A firmer butter may create a harder mixture.
When making substitutions, change one ingredient at a time so you can tell exactly what caused the difference.
Can I Make These Without Glitter?
Yes.
Glitter is purely decorative and can be left out completely.
The bath truffles will still fizz and foam without it.
How Should I Store Foaming Bath Truffles?
Moisture is the enemy of bath products containing baking soda and citric acid.
Store your finished bath truffles somewhere cool and dry and protect them from humidity.
An airtight container works well.
If you’re packaging them as gifts, use packaging that helps keep moisture out.
I would not recommend storing them uncovered in a steamy bathroom. Every time the bathroom fills with humidity from a shower or bath, you’re exposing the truffles to moisture.
Keep unused truffles dry until you’re ready to use them.
How Long Do Foaming Bath Truffles Last?
Because this recipe does not contain added water, it does not have the same preservation considerations as a water-based lotion or cream.
However, that doesn’t mean the truffles will remain perfect indefinitely.
Over time, fragrance can change, oils can oxidize, and humidity can cause the baking soda and citric acid to react prematurely.
For the best results, make sure the truffles are completely dry before packaging them and store them in an airtight container away from moisture and excessive heat.
When you’re determining how long a homemade cosmetic or bath product should be kept, the age and condition of the individual ingredients also matter.
Tips for Making Beautiful Bath Truffles Every Time
A few small details can make a big difference.
Use a release-style cookie scoop
This gives you a consistent shape and makes releasing the truffles much easier.
Don’t rush the mixing
Especially with SLSa, slow and thorough mixing is better than aggressively stirring and creating airborne powder.
Don’t add too much liquid
These are not supposed to have a wet, paste-like consistency.
The goal is a moldable dough.
Pack the scoop firmly
Loose mixture is much more likely to crumble.
Release them close to the surface
The shorter the drop, the less likely they are to crack.
Give them enough drying time
Don’t package them while they’re still soft.
Protect them from humidity
A beautiful batch can start fizzing prematurely if moisture gets into the package.
Easy Ways to Customize Your Bath Truffles
Once you’ve made the basic recipe, there are lots of ways to make it your own.
Try different colors
Make one-color truffles for a simple look or combine two shades for a layered appearance.
You could also make seasonal combinations such as:
- Pink and white
- Purple and white
- Blue and white
- Peach and cream
- Green and white
Change the fragrance
The fragrance is one of the easiest ways to completely change the finished product.
Try a relaxing floral for a spa-inspired bath or a bright citrus fragrance for something more refreshing.
Change the shape
You don’t have to use a cookie scoop.
You can experiment with silicone molds or other shapes as long as the mixture can be packed firmly enough to hold together.
The scoop method is particularly nice because the finished truffles look like tiny scoops of ice cream.
Foaming Bath Truffle FAQ
Do bath truffles fizz like bath bombs?
Yes. The baking soda and citric acid react when they come into contact with water, producing fizz. The addition of SLSa also creates foam and bubbles.
Do bath truffles make bubbles?
Yes. SLSa is the primary foaming ingredient in this recipe. For the most bubbles, crumble the truffle directly underneath running bath water.
Do bath truffles need a preservative?
This particular formula does not contain added water, so it does not require a conventional broad-spectrum preservative in the same way a water-based lotion does.
However, you still need to keep the finished product dry and prevent water from getting into your unused batch.
Why do I need Polysorbate 80?
Polysorbate 80 helps disperse the oils in the bath water instead of allowing them to simply sit on the surface.
It can help reduce the amount of free oil left behind in the tub, but you should still use caution because bath products containing oils and butters can make surfaces slippery.
Can I use regular glitter?
No. Don’t use ordinary craft glitter in bath products.
If you want sparkle, choose a cosmetic-grade or bath-safe glitter that is appropriate for the intended use.
Why did my bath truffle crumble?
The mixture may be too dry, or it may not have been packed firmly enough.
Try squeezing the mixture tightly in the scoop before releasing it. If it still won’t hold together, make a very small texture adjustment rather than adding a large amount of oil.
Why are my truffles greasy?
Too much oil or butter can make the mixture greasy and interfere with the texture.
Measure carefully and don’t add extra oil simply because the mixture initially looks crumbly.
Remember that cocoa butter will firm as it cools.
Can I make these ahead of time?
Yes. Once they have completely dried and hardened, package them in an airtight container and protect them from moisture.
Can I give these as gifts?
Absolutely. Their ice-cream-scoop appearance makes them especially cute for gifts.
Package them individually or arrange several different fragrances and colors together in a gift box.
Just make sure the packaging protects them from moisture and include the fragrance or ingredient information so the recipient knows what they’re getting.
Foaming Bath Truffle Printable Recipe
These foaming bath truffles are one of those DIY projects that look much more complicated than they actually are.
Once you understand the basic formula, the process is straightforward: combine the dry ingredients, mix in the melted oils and butter, add your fragrance and color, adjust the texture if necessary, and scoop.
The most important part is getting the consistency right.
You want a mixture that is soft enough to pack into your scoop but firm enough to hold its shape after you release it. Once you find that texture, making these becomes much easier.
And because the formula is written in percentages, you can also start experimenting with your own variations rather than being limited to one specific batch size.
If you’re interested in learning more about how ingredients work together in DIY formulations, continue with my guides on Skincare Formulation for Beginners and What Each Ingredient Does in Skincare Formulation. Understanding ingredient function is one of the best ways to move beyond simply following recipes and start making informed changes to your own formulas.

Bath Truffle
Equipment
- Scale
- Double boiler
- Face mask
- Cookie scoop
- Freezer paper
Ingredients
- 3.23 ounce | 43% Baking soda
- 1.05 ounce | 14% Citric acid
- 0.45 ounce | 6% Cream of tartar
- 1.28 ounce | 17% SLSa
- .68 ounce | 9% Coconut oil
- 0.45 ounce | 6% Cocoa butter
- 0.08 ounce | 1% Polysorbate 80
- 0.30 ounce | 4% Mango fragrance oil
- Orange mica powder
- Biodegradable glitter
Instructions
- Weigh out all ingredients.

- Put the cocoa butter and coconut oil in a heat safe container. Place on a double boiler until melted.
- Put the baking soda, citric acid, cream of tartar and SLSa in a bowl. *When working with SLSa, be sure to wear a face mask as the fine powder can be an irritant
- After your oils have melted, pour them into the dry mixture from step 3. Mix well
- Add polysorbate 80 and fragrance oil, then mix well
- Separate into two separate containers.
- Add orange mica powder to one of the containers and mix well.
- Line your work area with freezer paper.
- Stack the mixture with orange mix, then white, then orange and so on.
- Place the stacked mixture back into your bowl.
- Scoop the bath truffles onto the freezer paper. Be sure to pack the mixture into the scoop. I like to go back and forth between the two colors to create a layered effect.
- Sprinkle biodegradable glitter on the top of the bubble truffles.
- Allow to dry overnight.
- Package and enjoy!
Hi! Your article rocks and is really a very good understand!