
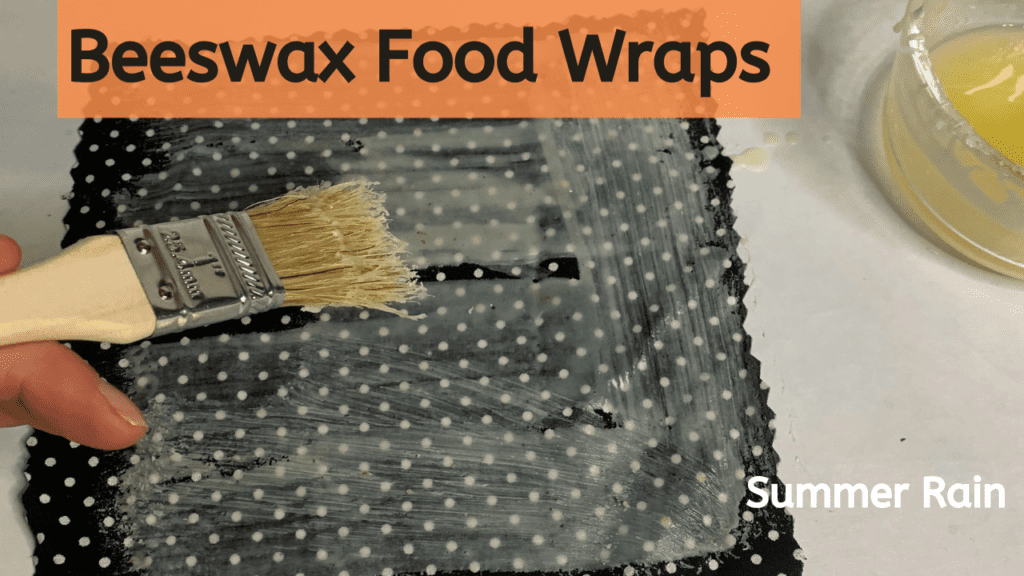
If you’re looking for a way to reduce single-use plastic in your kitchen, making your own beeswax food wraps is a fun and practical project to try. These reusable wraps can cover bowls, keep certain foods wrapped between uses, and fold into simple sandwich or snack pouches.
I like the idea of replacing something disposable with an item I can wash and use again. Instead of reaching for plastic wrap every time I need to cover a bowl, I can reach for a handmade beeswax wrap.
This recipe uses four materials: 100% cotton fabric, beeswax, pine rosin, and jojoba oil. The beeswax coats the fabric, the pine rosin helps the wrap cling to itself and containers, and the jojoba oil helps keep the finished fabric more flexible.
The process is straightforward, although getting the coating evenly distributed takes a little practice. I’ll walk you through choosing the fabric, preparing the wax mixture, applying it evenly, folding your finished wraps, and troubleshooting common problems.
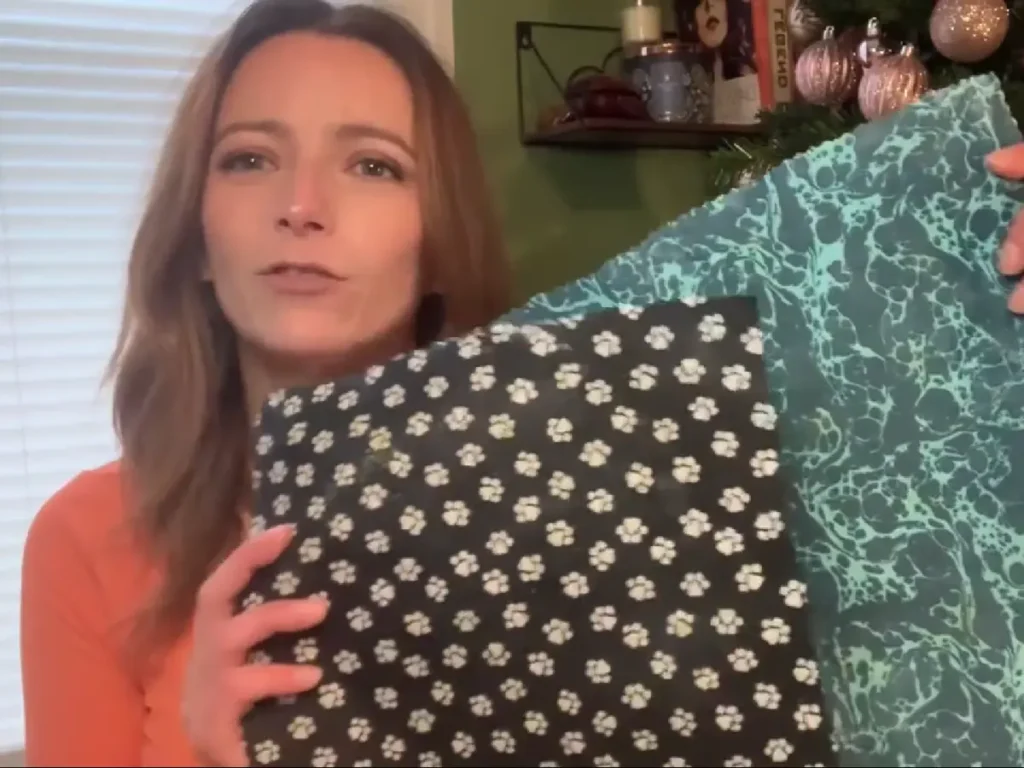
A quick note before you begin: Beeswax wraps are not suitable for every food or storage situation. They should not be used with hot food, raw meat, or raw fish, and they are not a replacement for refrigeration or other food-safety practices. Always use clean wraps and follow appropriate food-storage guidelines.
What Are Beeswax Food Wraps?
Beeswax food wraps are pieces of fabric coated with a mixture that helps them become flexible, slightly tacky, and reusable. The warmth of your hands softens the coating enough for the fabric to conform around a bowl, plate, or piece of food.
Unlike disposable plastic wrap, these wraps can be washed gently and used repeatedly. They can also be folded into small pouches for certain dry snacks or sandwiches.
Adding pine rosin is particularly helpful because it gives the finished wrap a tackier surface. Without enough tack, a wrap may cover a bowl but struggle to stay in place.
These wraps are not airtight, and they should not be treated as a substitute for a sealed food-storage container. They are best used for suitable foods and containers where a flexible cover is useful.
What Can You Use Beeswax Food Wraps For?
Once you’ve made your wraps, there are several ways to use them around the kitchen.
- Covering bowls: Press a wrap around the outside rim of a cooled bowl to help hold it in place.
- Covering plates: Use a suitably sized wrap to cover a plate of cooled food.
- Wrapping sandwiches: Fold a square into a pouch to hold a sandwich for transport.
- Holding dry snacks: Fold a smaller wrap into a pouch for appropriate dry snacks.
Choose the size that fits the job. A small square is handy for individual items, while a larger piece is better for covering a bowl or folding into a sandwich pouch.
Prefer to Watch Video Tutorial Making Beeswax Wraps?
Affiliate disclosure: This post may contain affiliate links. If you purchase something through one of these links, I may earn a small commission at no additional cost to you. These commissions help support Summer Rain and allow me to continue creating free tutorials and recipes.
How to Use Beeswax Food Wraps
Using a beeswax wrap is simple once you get the hang of it.
- Choose a clean, dry wrap that is large enough to cover the item.
- Position the wrap over the cooled bowl, plate, or suitable food.
- Gently press the fabric around the rim or against itself.
- Hold it in place for a few seconds. The warmth from your hands helps soften the coating so the wrap conforms to the shape.
If the wrap doesn’t cling, check that it is not too cold, that the surface is clean and dry, and that the wrap has enough of the wax mixture.
Do not use the wraps in a microwave, oven, dishwasher, or with hot food. Heat can soften or melt the coating and may damage the wrap.
Recommended Beeswax Wrap Sizes
The best size depends on what you want to cover or carry. I recommend starting with a few different sizes rather than making every wrap identical.
| Size | Dimensions | Best Uses |
|---|---|---|
| Small | 7 × 7 inches | Small items and snack pouches |
| Medium | 10 × 10 inches | Sandwiches and smaller bowls |
| Large | 13 × 13 inches | Larger bowls, plates, and bigger wraps |
These are starting points, not strict rules. You can adjust the dimensions to fit your containers and the foods you commonly store.
If you’re making a batch for the first time, cut one or two pieces in each size and see which ones you reach for most often.
Ingredients for Beeswax Food Wraps
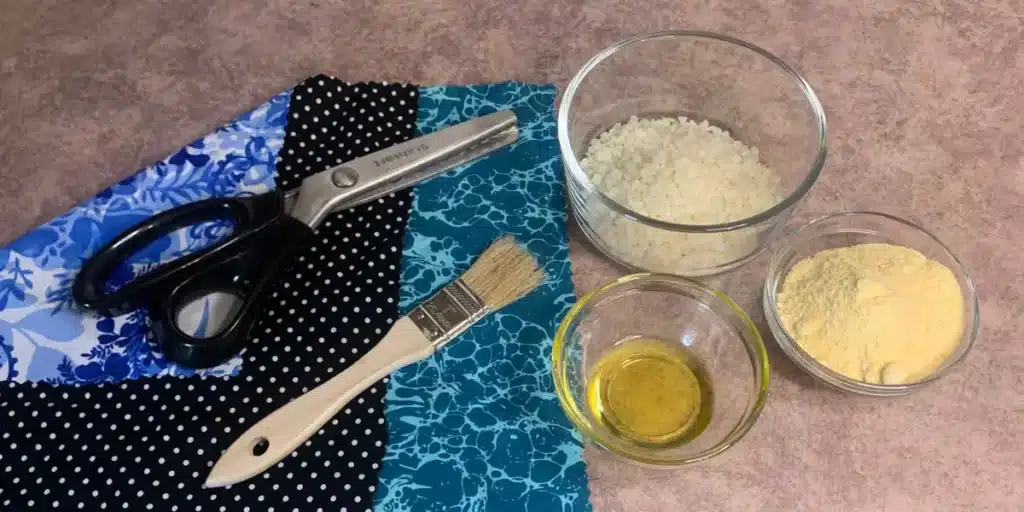
This recipe uses three measured ingredients for the coating, plus 100% cotton fabric.
Beeswax
Beeswax forms the main coating on the fabric. Once it cools, it helps give the wrap structure while allowing it to remain flexible enough to fold around a container.
Too much beeswax can leave the fabric stiff, while too little can result in thin or uneven coverage.
Use beeswax from a supplier that identifies it as suitable for your intended food-contact use.
Pine Rosin
Pine rosin is the ingredient that helps give these wraps their tacky feel. It improves the wrap’s ability to cling to itself and conform around a container.
Rosin can cause skin sensitization or allergic reactions in some people. Avoid inhaling dust while handling it, keep it away from children and pets, and use it only with suitable ventilation and care.
If you know you are sensitive to rosin, this recipe may not be suitable for you.
Jojoba Oil
Jojoba oil helps soften the coating and improve flexibility. In this recipe, it balances the beeswax so the finished fabric is less likely to feel overly stiff.
Fabric
I recommend using clean, 100% cotton fabric. Lightweight cotton is easy to fold and generally works well for this project.
Wash and dry the fabric before applying the coating to remove dirt, sizing, and other residues. Avoid fabrics with metallic decorations, plastic coatings, or finishes that are not suitable for the intended use.
Choose fabric with a tight, even weave, and make sure it is completely dry before you start.
Equipment You’ll Need
Gather everything before heating the ingredients. The coating begins to cool as you work, so having your supplies ready makes application easier.
- Double boiler or a heat-safe bowl set over a saucepan
- Digital scale
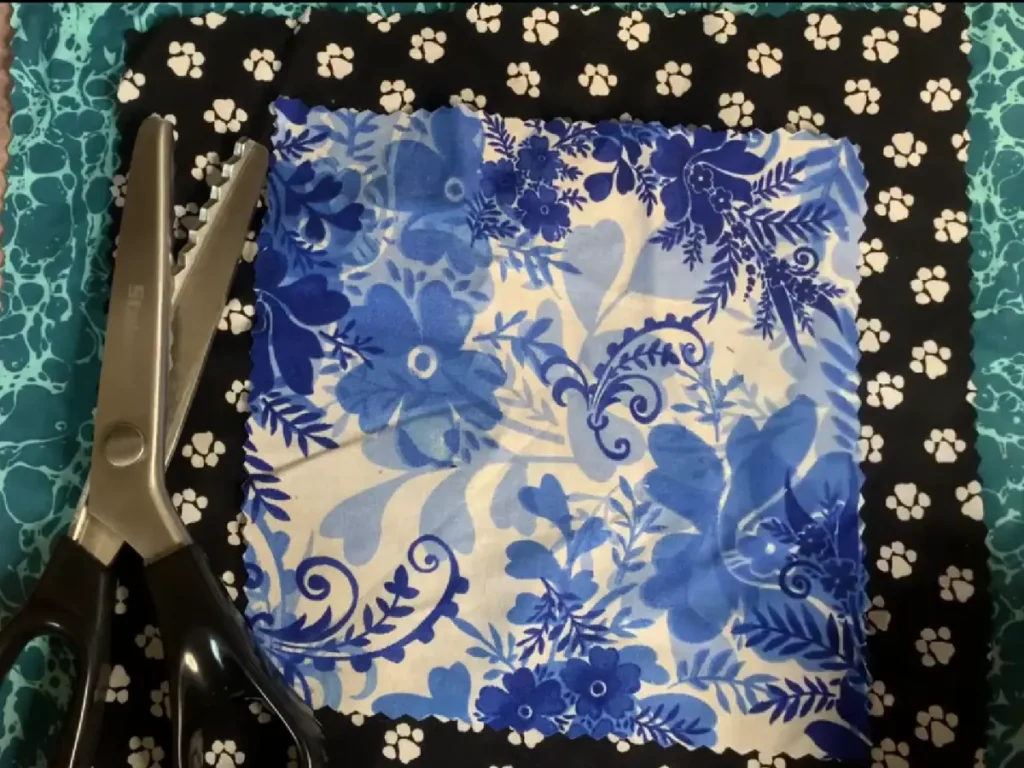
- Pinking shears
- Small paintbrush dedicated to this project
- Parchment paper
- Iron
- Heat-safe work surface
- Silicone spatula or suitable mixing utensil
Keep your equipment separate from your regular food-preparation tools where practical. Dedicate the brush and mixing tools to this project, and protect the iron and work surface from wax and resin residue.
Pinking shears are optional, but I like them because the zigzag edge helps reduce fraying. If you only have regular scissors, they will work too.
Parchment paper helps contain the coating and makes cleanup easier. Cover a heat-safe surface, and keep the work area away from children, pets, and anything that could be damaged by heat.
Beeswax Food Wrap Recipe
This recipe makes 3 ounces of coating mixture, which you can use across several pieces of fabric. The amount of mixture needed will depend on the fabric, its dimensions, and how heavily you coat it.
Ingredients
| Ingredient | Percentage | Weight |
|---|---|---|
| Beeswax | 73% | 2.19 oz |
| Pine rosin | 18% | 0.54 oz |
| Jojoba oil | 9% | 0.27 oz |
| Total coating mixture | 100% | 3.00 oz |
You’ll also need enough 100% cotton fabric for the wraps you want to make.
Weigh the ingredients rather than relying on volume measurements. The coating can be difficult to distribute evenly if the ingredient proportions change significantly.
How to Make Beeswax Food Wraps with Pine Rosin
Step 1: Wash and Cut the Fabric
Wash and dry your cotton fabric before cutting it into squares. This helps remove any residue from the manufacturing process and gives you a clean starting point.
Cut your fabric into the sizes you want to make:
- Small: 7 × 7 inches
- Medium: 10 × 10 inches
- Large: 13 × 13 inches
Use pinking shears if you have them. Otherwise, ordinary fabric scissors are fine.
Step 2: Prepare Your Work Area
Cover your work surface with parchment paper and, if possible, place the paper on a heat-safe tray.
Lay one piece of fabric flat on the parchment paper. Keep the remaining pieces nearby so you can move on to the next wrap while the coating is warm.
Make sure you have enough space to place a second sheet of parchment over the fabric when it is time to iron.
Step 3: Melt the Beeswax and Jojoba Oil
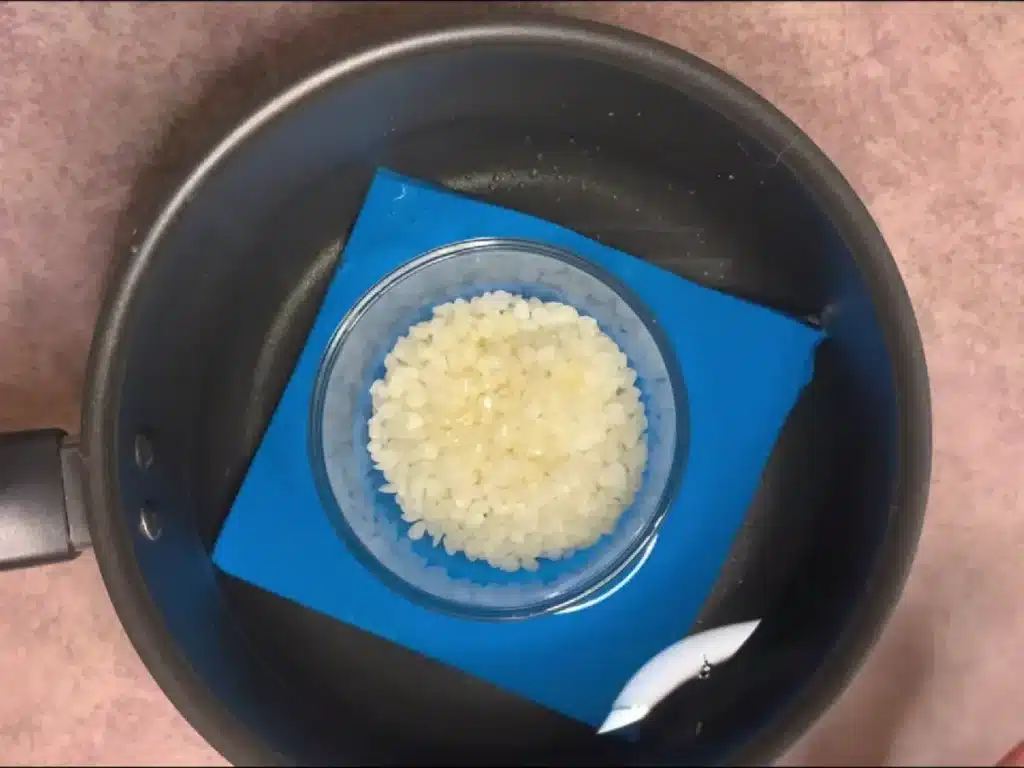
Weigh the beeswax and jojoba oil into a heat-safe container.
Place the container over a double boiler and heat gently until the beeswax has melted completely. Stir occasionally to help distribute the jojoba oil throughout the melted wax.
Step 4: Add the Pine Rosin
Once the beeswax has melted, remove the container from the heat.
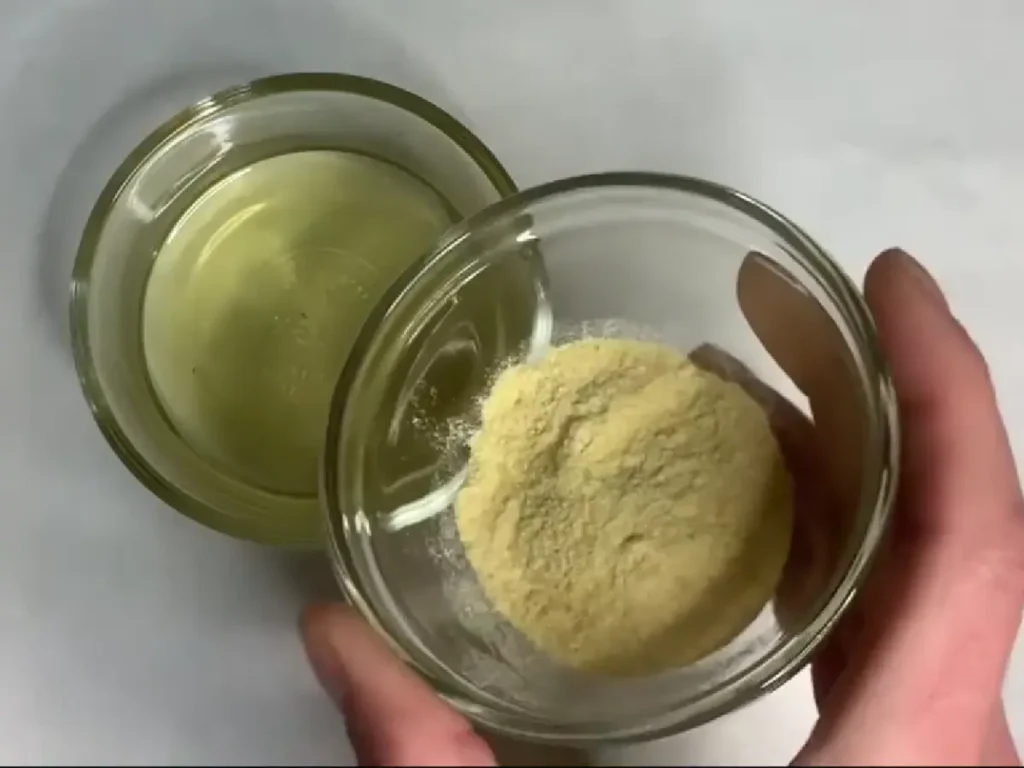
Add the measured pine rosin carefully and stir thoroughly. The goal is to distribute the rosin throughout the mixture as evenly as possible.
Rosin can be stubborn and may form small clumps instead of blending smoothly. Work carefully and avoid creating airborne dust when handling it.
If the mixture becomes too cool to apply, warm it gently over the double boiler again.
Step 5: Brush the Mixture onto the Fabric
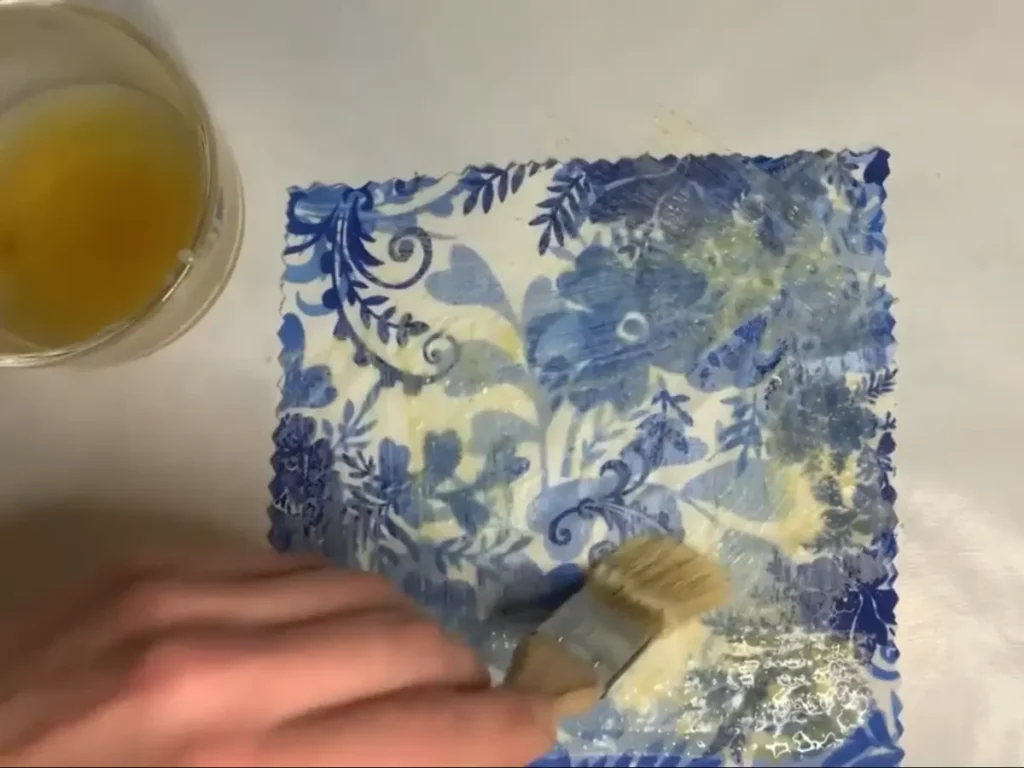
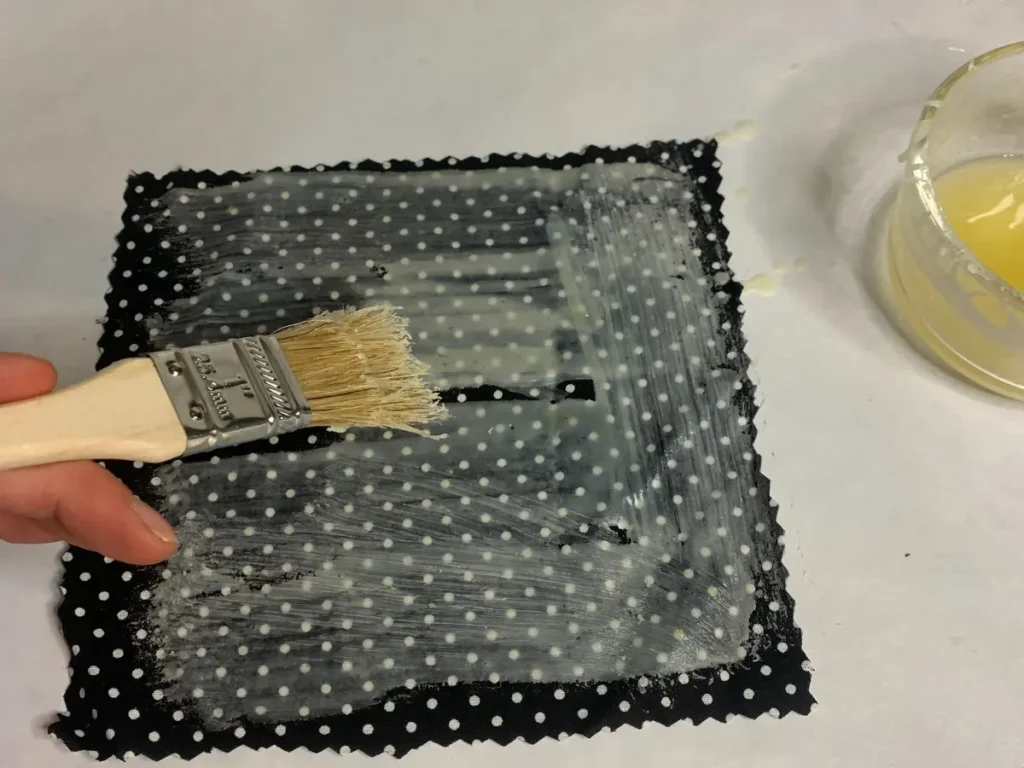
Using your dedicated paintbrush, apply a thin layer of the melted mixture over the fabric.
Try to cover the entire surface, including the edges, without leaving thick pools of wax. A thin, even coating is more useful than a heavy layer that makes the fabric stiff.
Work from the center toward the edges and pay attention to any dry-looking patches.
You may find it easier to coat one piece at a time so the mixture stays workable.
Step 6: Use an Iron to Distribute the Coating
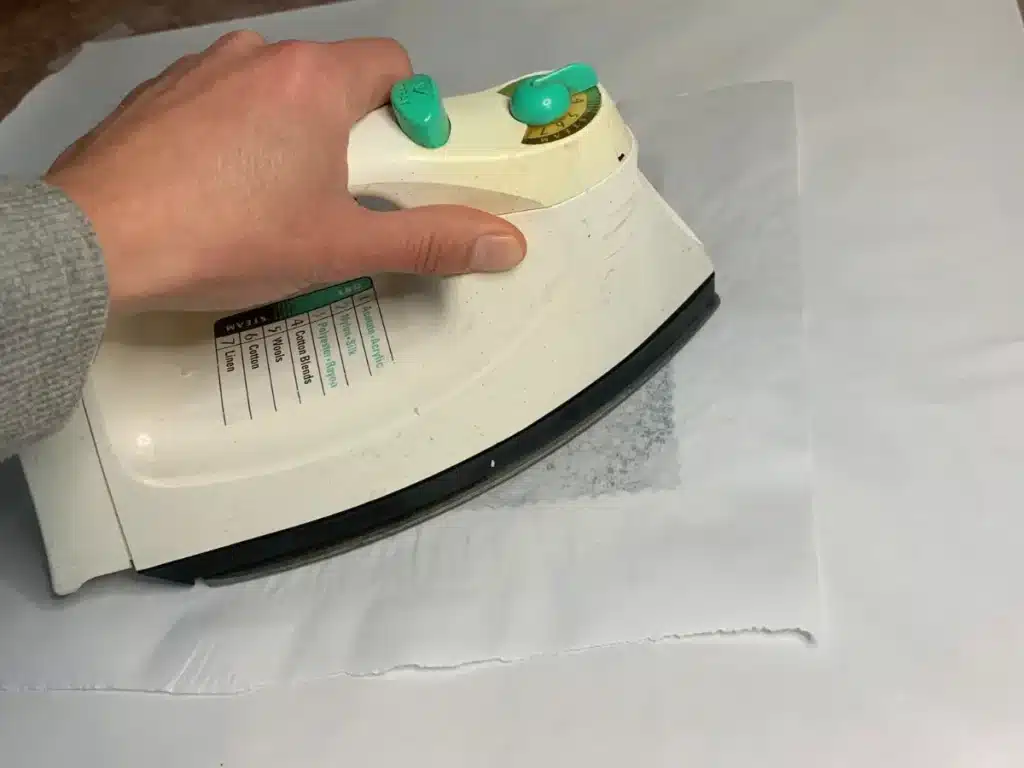
Place another sheet of parchment paper over the coated fabric.
Set your iron to a low heat setting appropriate for the materials and use the parchment as a protective barrier. Move the iron gently across the surface to help the mixture melt and spread through the fabric.
Keep the iron moving, and avoid allowing melted wax to escape from the edges of the parchment. Follow the iron manufacturer’s instructions and keep wax away from the iron’s steam openings.
Lift the parchment carefully and check the fabric. The goal is an even coating across the entire piece, without bare patches or thick, waxy areas.
If you find a dry spot, add a small amount of the mixture and repeat the process.
Step 7: Remove the Parchment and Cool
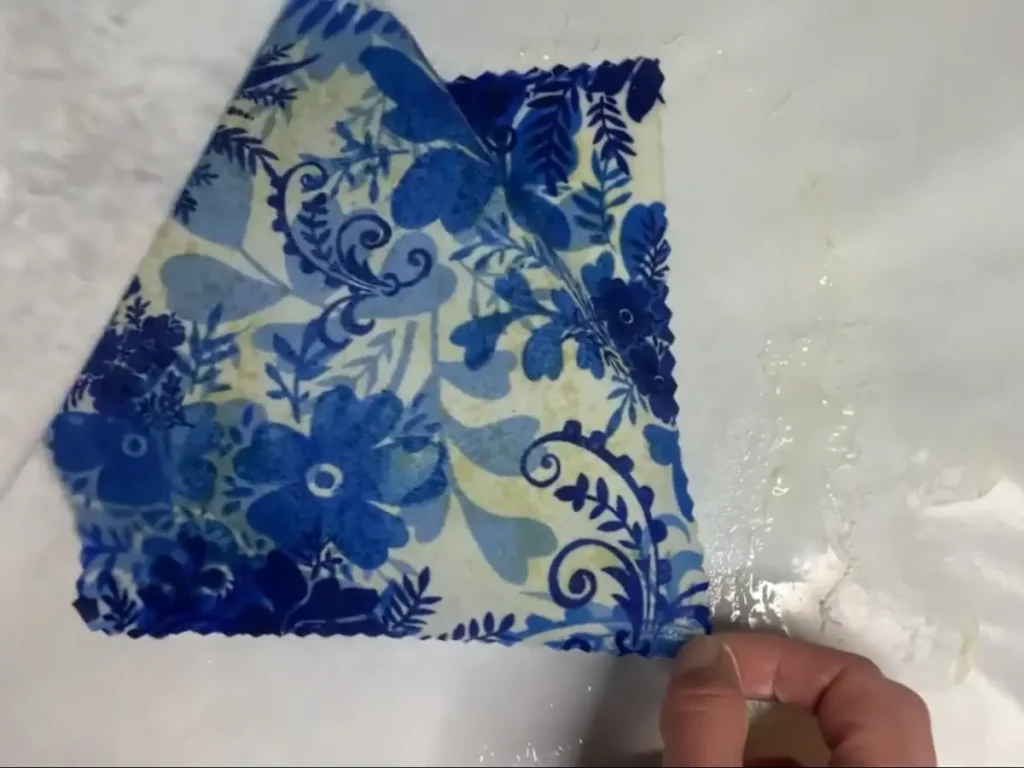
Carefully separate the fabric from the parchment while the coating is still workable, taking care not to burn yourself.
Hold the wrap up or hang it from a suitable line until it has cooled and the coating has set. This generally takes only a short time for a small piece.
Avoid placing the warm wrap directly onto another wrap or folding it while the coating is still soft.
Step 8: Check the Finished Wrap
Once cool, gently bend the fabric and check its surface.
A finished wrap should be flexible enough to fold and have an even coating without obvious dry patches. It should feel slightly tacky, but it shouldn’t be dripping with wax or heavily oily.
If you notice a problem, use the troubleshooting guide below before making the rest of your batch.
Step 9: Prepare the Wrap for Its First Use
Gently crumple the cooled wrap a few times in your hands, then unfold it. This can help loosen the fabric and make it easier to shape around a bowl or into a pouch.
Check that the wrap is clean and intact before using it with suitable food or containers.
How to Clean Beeswax Food Wraps
One of the advantages of making reusable wraps is that you can clean and reuse them instead of throwing them away after a single use.
After use, rinse the wrap with cool water and gently wash it with a small amount of mild dish soap. Avoid scrubbing aggressively, wringing the fabric, or using hot water, as these can damage the coating.
Rinse away the soap, then hang the wrap or lay it over a suitable rack so it can air-dry completely before you store it.
A few important cleaning reminders:
- Use cool water rather than hot water.
- Avoid the dishwasher and washing machine.
- Do not use bleach or harsh cleaning products.
- Do not reuse a wrap that has been contaminated with raw meat or raw fish.
- Replace a wrap if it develops persistent odors, mold, or damage that prevents it from being cleaned properly.
Keeping your wraps clean and allowing them to dry fully between uses will help you get more life out of them.
How to Store Beeswax Food Wraps
Once the wraps are completely dry, store them somewhere clean and away from direct heat.
You can:
- Hang them from a hook or clip.
- Roll them loosely and place them in a drawer.
- Fold them and store them flat.
I prefer a storage method that lets me see the wraps easily, so I can grab the right size without having to unfold the entire stack.
Keep them away from radiators, hot appliances, and sunny windowsills. Warm conditions can soften the coating and make the wraps sticky.
How Long Do Beeswax Food Wraps Last?
In my experience, these wraps can last for many uses. I’ve found that they can often be used around 120 times, although the actual lifespan depends on how frequently you use them, how you wash them, and how well the coating holds up.
Over time, the coating may become less tacky, the fabric may develop creases, or some areas may lose their wax.
Inspect your wraps regularly. If a wrap becomes difficult to clean, develops mold, or is too damaged to use safely, replace it rather than continuing to use it.
Some wraps can be refreshed with additional coating, but a refresh won’t make a contaminated or badly damaged wrap safe to use again.
How to Dispose of Old Beeswax Wraps
Because these wraps are made with cotton and a mixture of beeswax, pine rosin, and jojoba oil, they contain materials that may be more compatible with some disposal options than conventional plastic wrap.
However, don’t assume a finished beeswax wrap is automatically suitable for home composting. The wax and resin coating may affect how readily the fabric breaks down, and local composting facilities have different requirements.
Check your local composting guidelines before adding an old wrap to a compost pile. If composting isn’t appropriate, dispose of the wrap according to local waste guidelines.
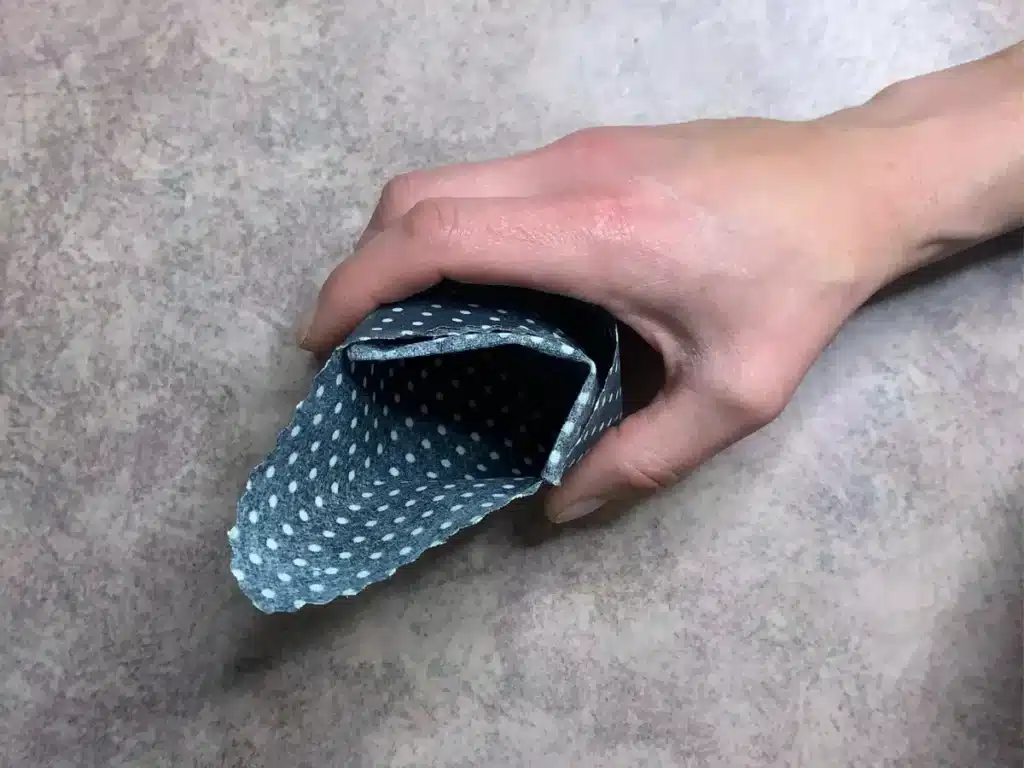
How to Fold a Beeswax Wrap into a Sandwich or Snack Pouch
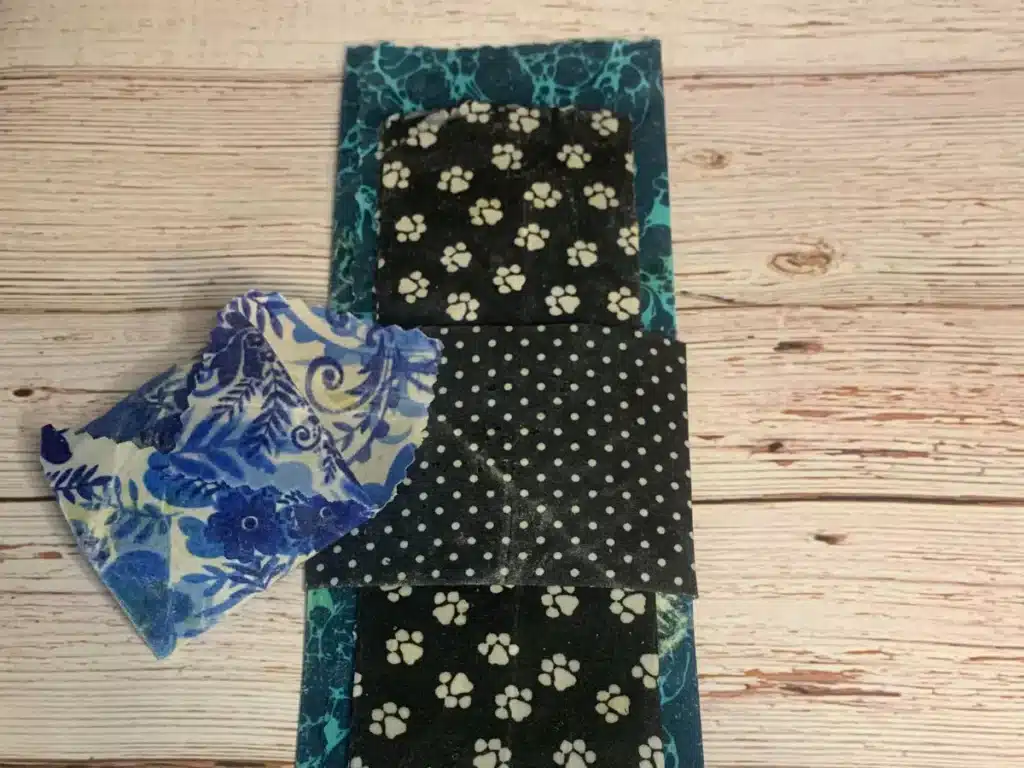
One of my favorite things about making square wraps is that you can fold them into a pouch without sewing anything.
For this fold, start with a square piece of finished beeswax wrap.
Position the square. Place the wrap in front of you with one corner pointing toward you, so it looks like a diamond.
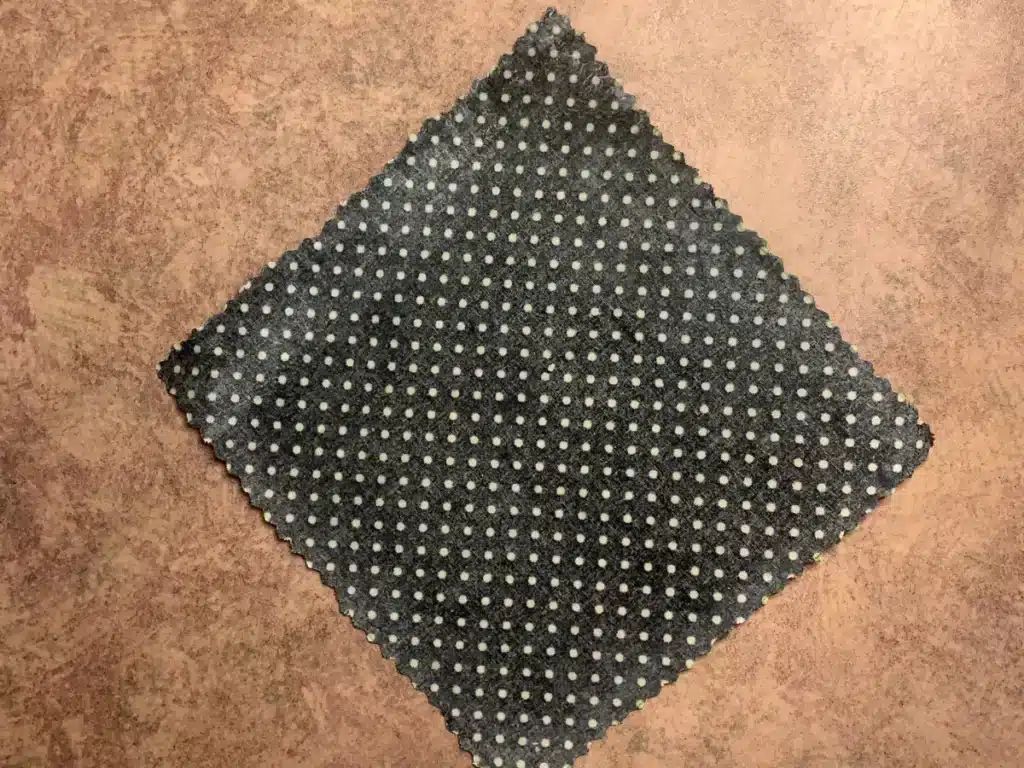
Fold it in half. Bring the bottom corner up to meet the top corner. You should now have a triangle.
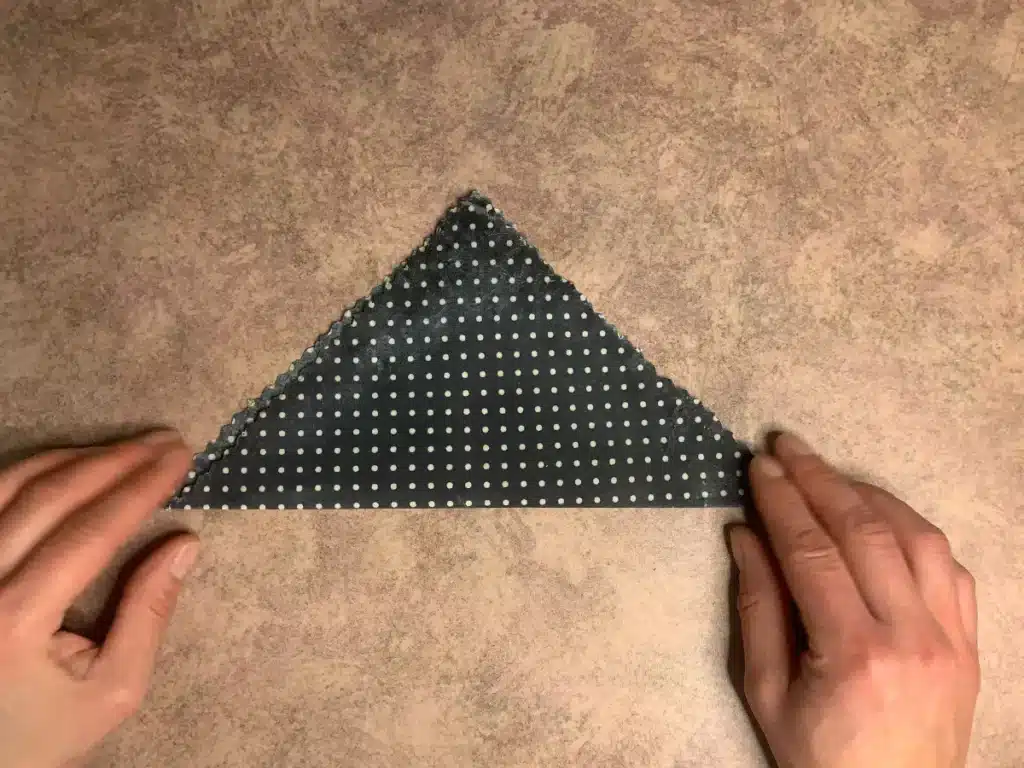
Mark the thirds. Fold the right side toward the middle, then the left side toward the middle, just enough to create creases that divide the triangle into roughly three sections. Unfold if needed.
Fold the right side inward. Bring the right side over the middle along the crease you made.
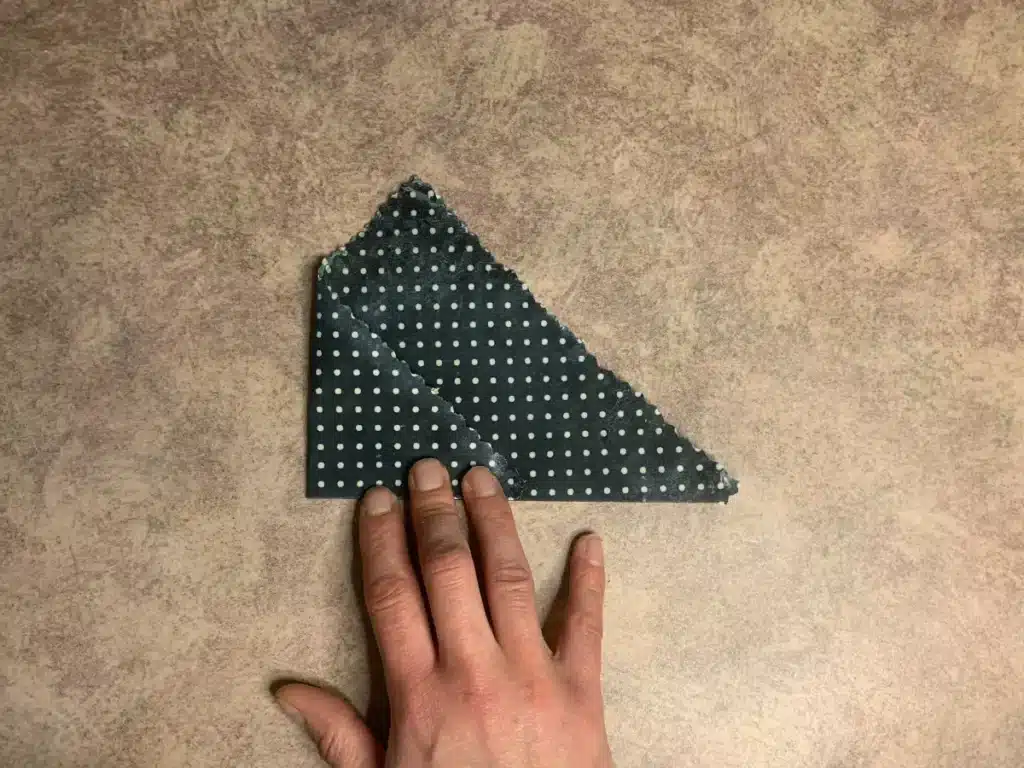
Fold the left side inward. Bring the left side over the right side so the two sections overlap.
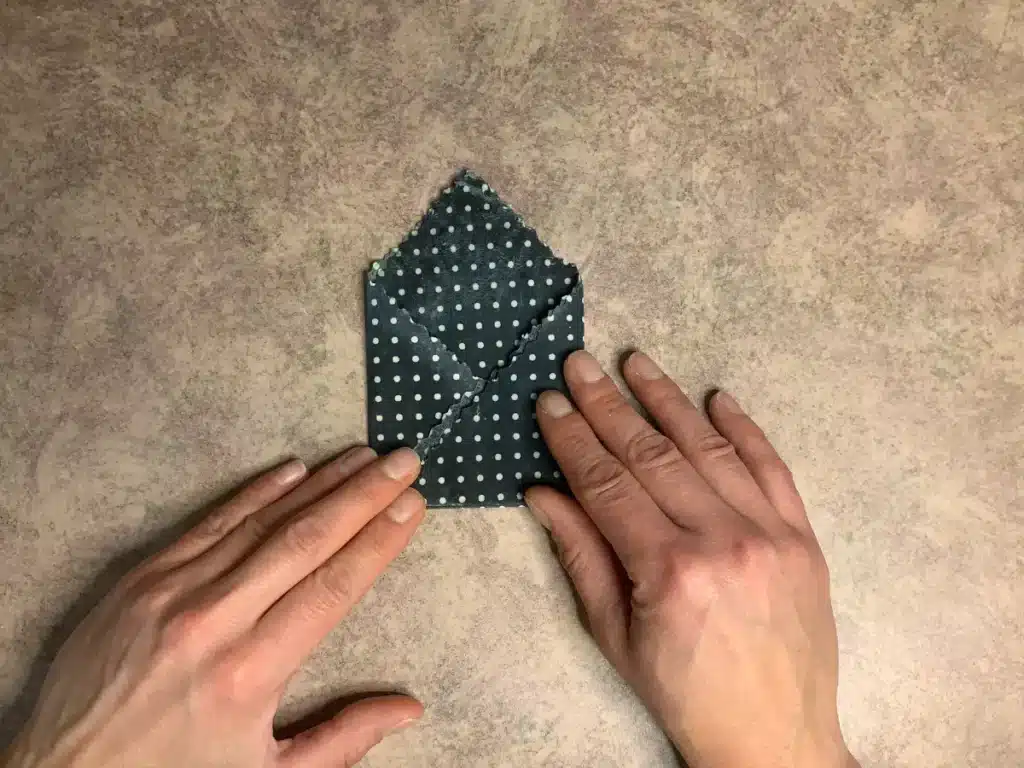
Tuck the fabric. Slip the edge of one side into the opening formed by the overlapping fabric. Tuck it securely so the pouch holds its shape.
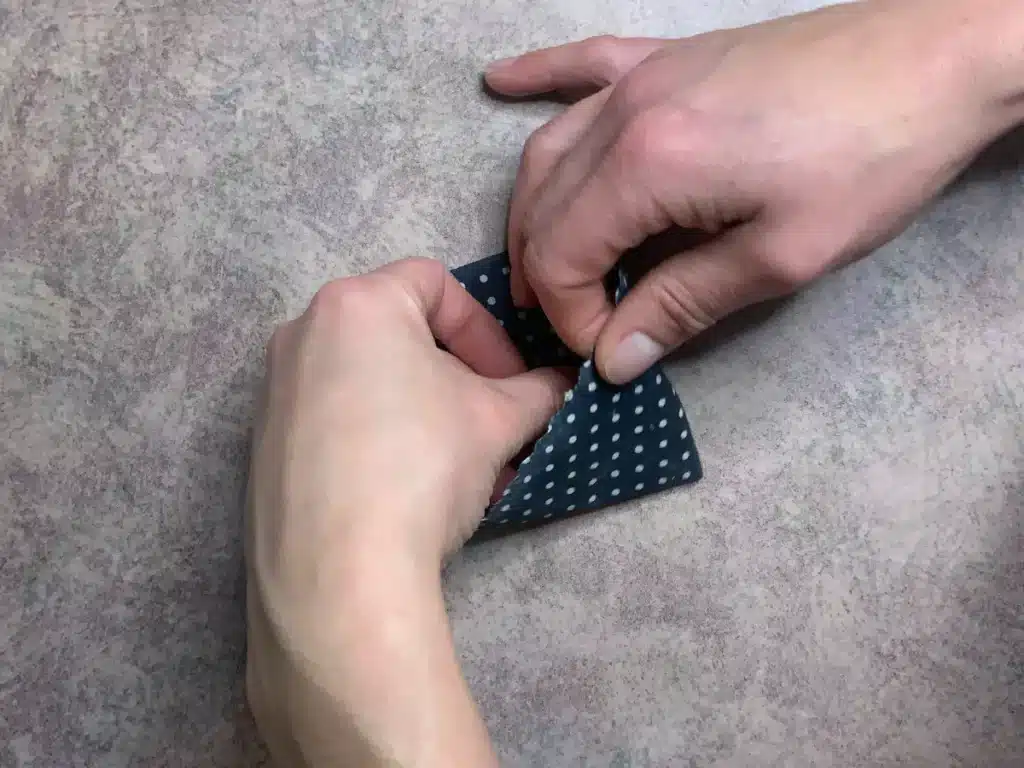
Adjust the folds as needed for your particular fabric and coating. The finished pouch should hold its shape without needing tape or fasteners.
Troubleshooting Beeswax Food Wraps
Small adjustments can make a difference in how your wraps feel and perform. When troubleshooting, change one thing at a time so you can identify what actually helps.
The Wrap Doesn’t Stick
If the wrap won’t cling to itself or stay around a container, it may have too little coating, uneven coverage, or insufficient tack.
First, check for bare spots and try warming the wrap gently between your hands. If it still doesn’t cling, you may need to apply a little more of the coating mixture.
Place the wrap between parchment paper and use gentle heat to distribute the added mixture. Let it cool fully before testing again.
Add the mixture gradually. It’s easier to add a little more than to correct a wrap that has become too heavily coated.
The Wrap Is Too Stiff
A wrap that feels rigid or difficult to fold may have too much beeswax or too thick a coating. You can go over it with the iron to remove some of the excess product.
The Wrap Feels Too Oily
An oily or greasy surface may indicate that the coating mixture is not balanced or that too much mixture has been applied.
Check that the ingredients were weighed accurately and that the coating is distributed evenly. If you’re adjusting the recipe for another batch, make small test pieces rather than changing the full batch immediately.
Adding jojoba oil is not automatically the right solution for an oily wrap; more oil may make the surface feel even greasier.
There Are Creases or Lines in the Wrap
Creases can develop naturally as you fold and use the fabric. A few lines do not necessarily mean the wrap is unusable.
If the coating appears uneven around a crease, you can try gently warming the wrap between parchment paper and allowing it to cool flat.
Use low heat, keep the iron moving, and inspect the wrap as you work. Avoid overheating the coating or leaving the iron in one place.
The Pine Rosin Isn’t Mixing Properly
Pine rosin can form clumps, making it difficult to achieve a uniform mixture.
Remove the container from direct heat before adding the rosin, then stir thoroughly. If the mixture cools too much, warm it gently again.
Avoid sprinkling loose rosin powder directly onto the fabric or creating dust. The goal is to distribute the rosin through the coating mixture rather than leave loose particles on the finished wrap.
If the mixture remains clumpy or uneven, pause and correct the mixture before continuing.
I Have Leftover Wax Mixture
It’s difficult to predict exactly how much coating you’ll need because different fabrics and sizes absorb different amounts.
If you have leftovers, allow the mixture to cool in a suitable, clearly labeled container or mold. Store it safely away from children and pets.
You can gently remelt it for a future batch, provided the mixture has been kept clean and you can identify its contents. Avoid heating it repeatedly or using a mixture that has become contaminated.
Can You Make Beeswax Wraps Without Pine Rosin?
Pine rosin is included in this recipe to give the wraps their tacky feel. Without it, the finished wrap may still have a wax coating, but it may not cling as effectively to itself or a container.
If you want to avoid rosin because of a sensitivity or allergy, don’t simply assume that removing it will give you the same results. You would need a different recipe designed for a rosin-free wrap and should test the performance separately.
Frequently Asked Questions
Are homemade beeswax wraps reusable?
Yes. With gentle cleaning, proper drying, and appropriate use, they can be used repeatedly. Inspect them regularly and replace them if they become contaminated, moldy, or too damaged to clean properly.
Can I use beeswax wraps with hot food?
No. Heat can soften or melt the coating. Let food cool before covering it, and never use the wraps in the microwave, oven, or dishwasher.
Can I wrap raw meat in beeswax wraps?
No. Avoid using them with raw meat or raw fish because they cannot be cleaned and sanitized in the same way as suitable food-storage containers.
Can I use any fabric?
I recommend clean, lightweight 100% cotton fabric. Avoid synthetic fabrics, plastic-coated materials, and fabrics with finishes that are not suitable for food contact.
Why is pine rosin included?
Pine rosin helps give the coating its tackiness, allowing the wrap to cling to itself and conform around a container.
How do I know when a wrap needs replacing?
Replace a wrap if it develops mold, persistent odors, contamination, or damage that prevents you from cleaning it properly. A worn coating may sometimes be refreshed, but cleaning and food safety should always come first.
Can I compost old beeswax wraps?
Not automatically. The cotton, beeswax, and pine rosin coating may not break down readily under every composting system. Check local guidance before composting them.
Final Thoughts
Making your own beeswax food wraps is a useful way to try a reusable alternative to disposable plastic wrap. The ingredients are straightforward, and once you get the hang of applying a thin, even coating, you can make different sizes for different uses.
The biggest trick is finding the right balance: enough coating to make the fabric tacky, but not so much that it becomes stiff or greasy. Start with a few pieces, test how they fold and cling, and make small adjustments if needed.
If you enjoy making practical household products, you might also like my How to Make Natural Beeswax Furniture Polish tutorial.
Happy making!
Beeswax Food Wraps with Pine Rosin
Equipment
- Double boiler
- Scale
- Parchment paper
- Pinning shears
- Paint brush
- Iron
Ingredients
- 100% cotton fabric
- 2.19 ounce | 73 % Beeswax
- 0.54 ounce | 18% Pine rosin
- 0.27 ounce | 9% Jojoba oil
Instructions
Prepare Fabric
- Wash and dry your 100% cotton fabric. Cut fabric into desired sizes. I recommend: small 7×7, medium 10×10 and large 13×13.
Prepare Work Area
- Put parchment or wax paper over the counter. (You can place this on a cookie sheet to ensure you do not get any of it on your counter). Place the cut fabric on top of the parchment paper.
Heat Ingredients
- Place beeswax and jojoba oil a heat safe container. Then place in a double boiler. (For a double boiler, I use a sauce pan with a bit of water and a silicone mat on the bottom). Heat on a low to medium heat until the beeswax is completely melted, mixing occasionally. After it is off the heat add the pine rosin and mix well.
Spreading the Wax Mix
- Using a paint brush, start painting the beeswax food wrap mixture on your fabric.
Iron
- Place another piece of parchment paper on top of the fabric. On a low setting, iron the parchment paper to evenly spread out the beeswax mixture.
Cool
- Peel the fabric off of the parchment paper. Allow to cool for a few seconds.