
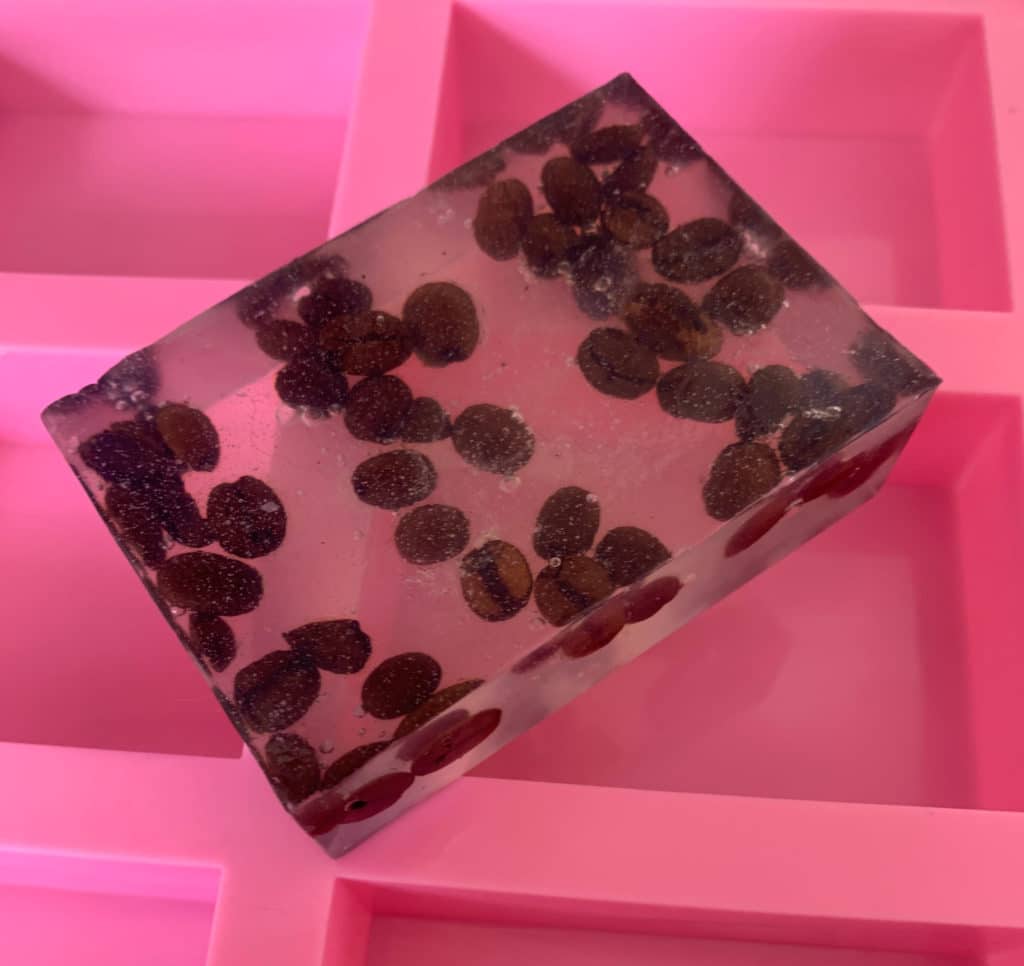
Ok, I don’t know about anyone else but I love everything coffee. Seriously, I can’t get enough coffee! So in the spirit of coffee I decided to make this lovely coffee bean soap. Whole coffee beans not only look appealing in the soap, they also gently massage your hands. There is just something about coffee in a soap that I find so refreshing. I love this coffee bean melt and pour soap way too much!

The cool thing about this soap is that you get to use a few different melt and pour techniques.
Prefer to watch this project instead of reading it?
Layering for Coffee Bean Melt and Pour Soap
For my soap, I really want the coffee beans to be in the center of the center of the soap. By that I mean that I didn’t want the coffee beans on the top or on the bottom of the clear melt and pour soap. Rather, I wanted them right smack in the middle. Since the coffee beans naturally want to float, I decided it was best to use the layering method to keep them right where I wanted them!


If you would like to learn more in depth about Layering Soap, check out this post.
The main thing to remember when you are layering soap, is that rubbing alcohol is a necessity. Think of it like the glue that helps to hold the layers together. It is also the secret to getting rid of bubbles in your soap. Just remember to use it sparingly. (A spray or so will do the trick). If you get to wild with the rubbing alcohol, it can cause the layers to separate.
The second most important thing to remember is that layering is a bit of an art (or juggling act). You want to bottom layer to be cool enough to hold the next layer. However, if you let that layer cool completely your soap might come apart. But…. If you don’t let it cool enough your top layer will bust right through.
I know, I know. This sounds super complex. It’s not. And we have the advantage that we are layering with all the same color. If your layer accidentally breaks through, no one would ever know.
Products you may like:
Some links are “affiliate links”, because I am an Amazon associate and I earn from qualifying purchases. There is no additional cost to you, the price of this item is the same whether it is an affiliate link or not.
Embeds
The second technique that we get to do when we make this soap is embeds. We are going to use the clear melt and pour soap that has the coffee beans as our embed.
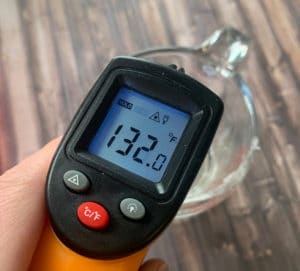
Temperature is very important when you are working with embeds. You want your melt and pour soap to be 125 when you pour it. You do not want it to be too hot or it will melt the embed on you. I have an infrared thermometer that I can check the temperature with.
The second thing to remember is rubbing alcohol. Just like when we used it for layering, it is used here as a glue for the soap.
Fragrance
There is this weird thing that I do. I don’t always have my soaps smell how they look. ( Am I the only one who does this?) There are just some scents that I don’t find enjoyable to wash my hands with. Like I have this chocolate something or another fragrance oil, but I just can’t get behind the idea of using it in soap. Like it’s so weird to smell all chocolatey.
With that being said, I am just going to use …. Fragrance oil in this soap. Feel free to make the scent whatever you want, I just prefer to do it this way. I feel like I get the best of both worlds. Desert / Coffee looking soap and a …. Fragrance.
Wrapping your Coffee Bean Melt and Pour Soap
As always, when your soap is completely cool make sure that your wrap in in cellophane or saran wrap. You want to do this with any melt and pour soap because of the glycerin dew.
Easy Coffee Bean Melt and Pour Soap Recipe
Equipment
- Scale
- Microwave Safe Container
- Spatula
- Rubbing alcohol in a spray bottle
- Silicone mold
- Soap cutter
- Infrared thermometer (optional)
- Skewer stick
Ingredients
- 4 ounces Clear Melt and Pour Soap
- 4 ounces White Melt and Pour Soap
- Whole coffee beans
- 0.24 ounce Fragrance Oil
Instructions
Part 1: Clear Soap Base With Coffee Beans
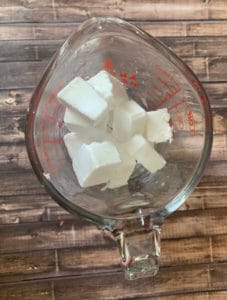
- Cut your clear melt and pour soap base into 1 inch cubes. The cubes can be slightly larger or smaller, the key is to keep the cubes all about the same size.
- Weigh out 1 ounce of the clear soap cubes and place it into a microwave safe container.
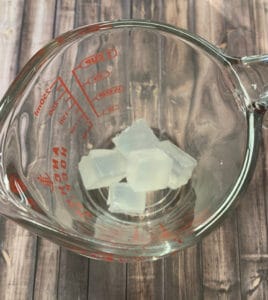
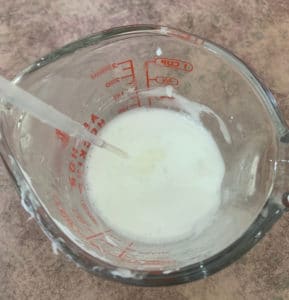
- Place the soap in the microwave to melt it in 20 second intervals. In between each interval you will want to stir the soap well.
- Pour the clear melted soap base in the mold.
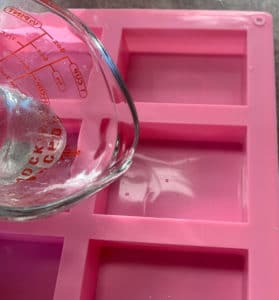
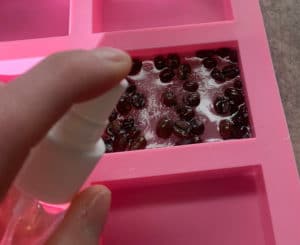
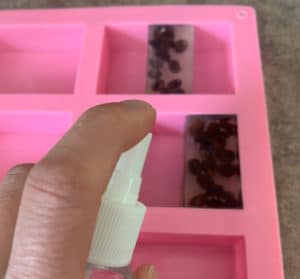
- Spray with rubbing alcohol to get rid of any bubbles.
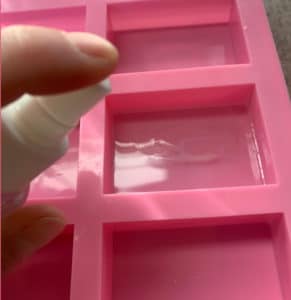
- Allow this to cool slightly. You want there to be a thin layer of cooled soap, but not all the way cooled. (If you are not sure if there is a layer on the top, you can carefully touch it with your finger.
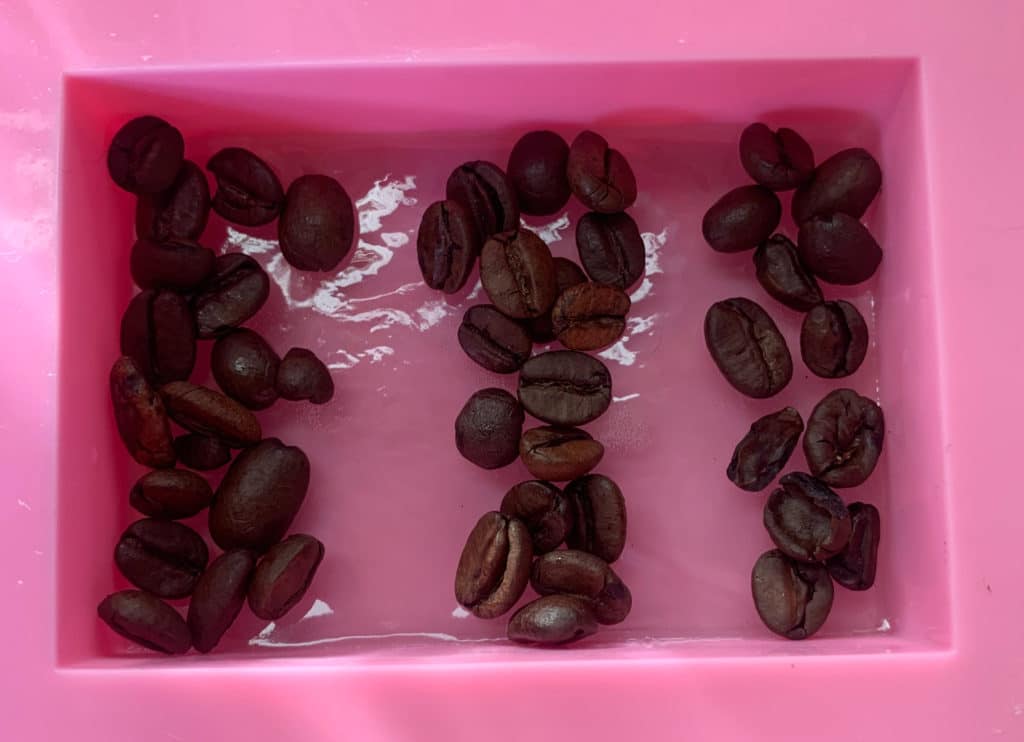
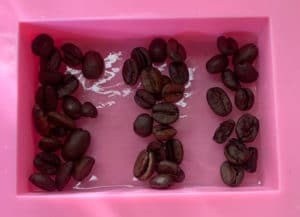
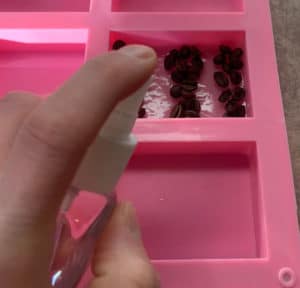
- Grab your whole coffee beans. Gently place the beans on your soap, being careful not to break the thin layer on top. When you are placing them, try to imagine the lines where you will be cutting the finished soap.
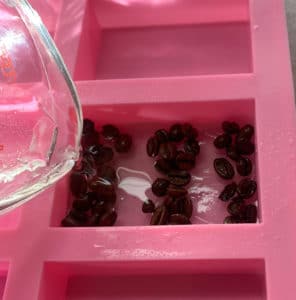
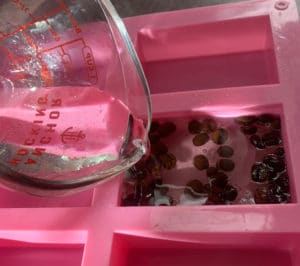
- Weigh out 1.5 ounce of clear soap base and melt in the microwave.
- Stir the soap until it cools to about 130°F
- Spray the coffee beans and the soap they are on with rubbing alcohol.
- Pour the newly melted soap on top of where the coffee beans are.
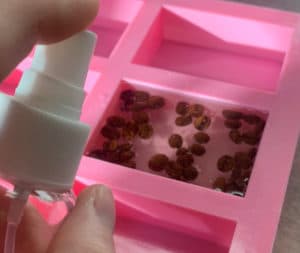
- Spray with rubbing alcohol.
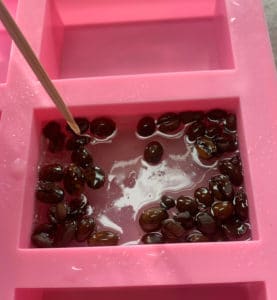
- Use a skewer stick to adjust the coffee beans back to where you want them.
- Allow this to cool until there is a thin layer of soap on the top, but again not all the way cooled.
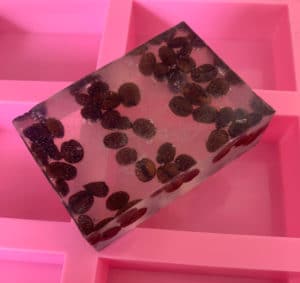
- Weigh out another 1.5 ounce of clear soap base and melt in the microwave.
- Spray the soap with rubbing alcohol.
- Pour the clear melt and pour soap on it.
- Spray again with rubbing alcohol.
- Allow to cool completely.
Part 2: Cutting and Placing Clear Coffee Bean Soap
- After the soap with the coffee bean embeds has cooled completely, remove it from the mold.
- Take a soap cutter and cut the soap into thirds.
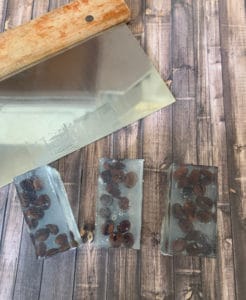
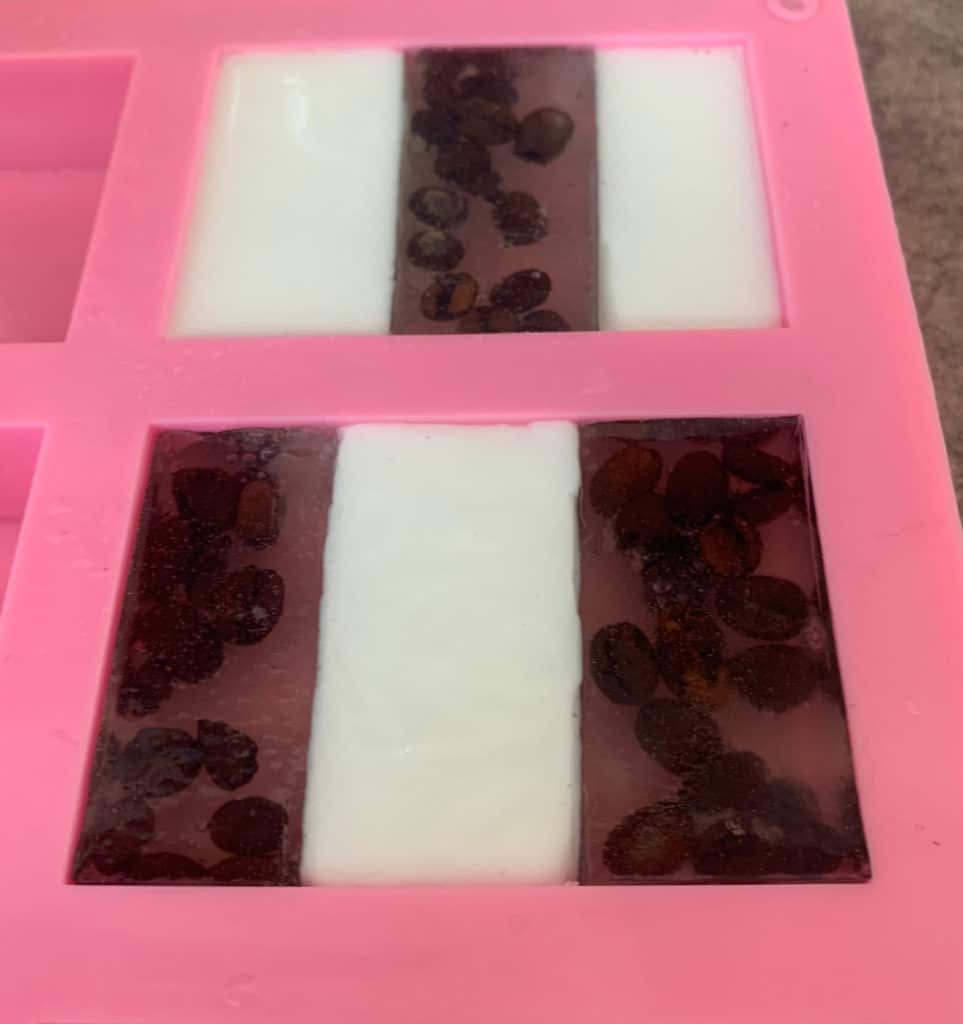
- In 1 soap mold, you are going to place the cut soap directly in the center of the mold.
- In another mold, you are going to place the cut soap on the two ends of the mold, leaving the center open.

Part 3: Adding the White Melt and Pour
- Cut your white melt and pour soap base into 1 inch cubes.
- Weight out 4 ounces and place into a microwave safe container.
- Place the soap in the microwave to melt it in 20 second intervals. In between each interval you will want to stir the soap well.
- After the soap is fully melted, add fragrance oil and mix well.
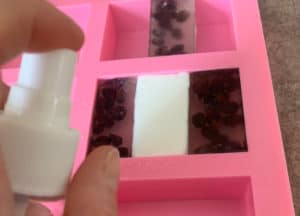
- Spray the mold and the clear melt and pour that is in there with rubbing alcohol.
- Make sure that your soap is melted, but not super hot. (You don’t want to accidentally melt the clear soap when pouring it in). I tend to pour at about 130° F.
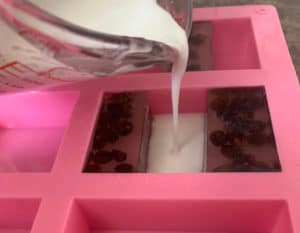
- Pour the white soap into your molds, filling the gaps.
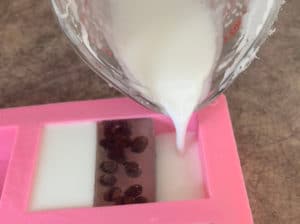
- Spray with rubbing alcohol to pop any bubbles.
- Allow to cool completely and remove from the mold.


3 thoughts on “Easy Coffee Bean Melt and Pour Soap Recipe”
What a great idea! I love coffee too and will be making these. x
Comments are closed.