
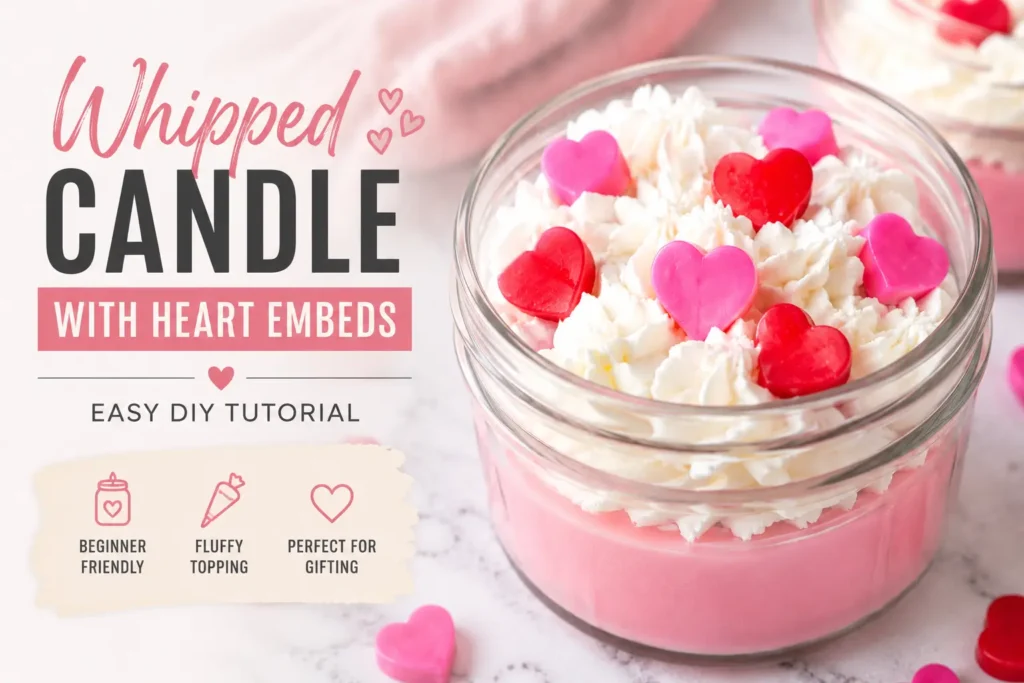
Whipped candles are one of the easiest ways to create a high-end, bakery-style candle at home—and this heart embed version is perfect for beginners. In this tutorial, you’ll learn how to make a whipped candle with heart embeds using a soft pink base, fluffy piped wax, and custom heart shapes that sit beautifully on top.
This step-by-step guide covers everything from making embeds to whipping wax to the perfect consistency, so you can confidently create candles that look professional and gift-ready. If you’ve never whipped candle wax before, I’d recommend checking out my How to Whip Candle Wax guide first — it walks through the whipping stages in more detail and will make Step 4 below feel a lot less intimidating.
Whether you’re making these for yourself, selling them, or just experimenting with new candle designs, this is a fun and beginner-friendly project with stunning results.
Quick Info
- Difficulty: Beginner
- Time: 1.5–2 hours
- Cure Time: 2–3 weeks
- Yield: 4 candles
What You’ll Need
- Soy wax (for base + whipped topping)
- Tart/Embed wax
- Fragrance oil (I used champagne)
- Candle dye (pink)
- Small mason jars
- Candle wicks
- Hot glue gun
- Mixing bowl
- Hand mixer
- Piping bag
- Piping Tip
- Thermometer
- Silicone heart mold
New to candle wicks? I’ve got a full breakdown on assembling tabbed wicks from a spool if you want to buy in bulk and prep your own instead of pre-tabbed ones.
Video Tutorial on How Make a Whipped Candle with Heart Embeds
Some links on this website are affiliate links, meaning I may earn a small commission if you click and make a purchase. This comes at no additional cost to you.
Step 1: Make the Heart Embeds
We’ll start with the embeds so they have time to fully cool.
Ingredients (Embeds – 30 g Batch)
| Ingredient | % | Weight |
|---|---|---|
| Tart Wax | 92% | 30 g |
| Fragrance Oil | 8% | 2.4 g |
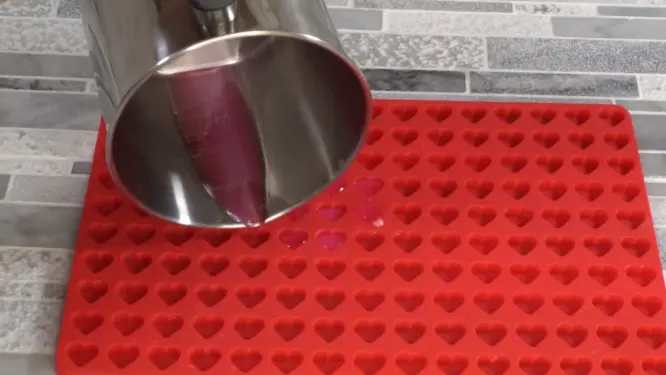
Melt your tart wax, then add fragrance oil.
Mix well and pour into your heart mold.
This wax hardens quickly, so work while it’s still hot and fluid. You can always pop it back on the double boiler if it starts to solidify on you.
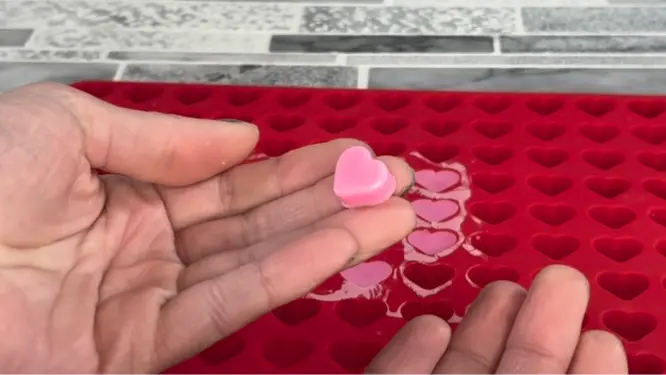
Allow the embeds to fully cool, then remove from the mold and set aside.
Step 2: Prep Your Containers
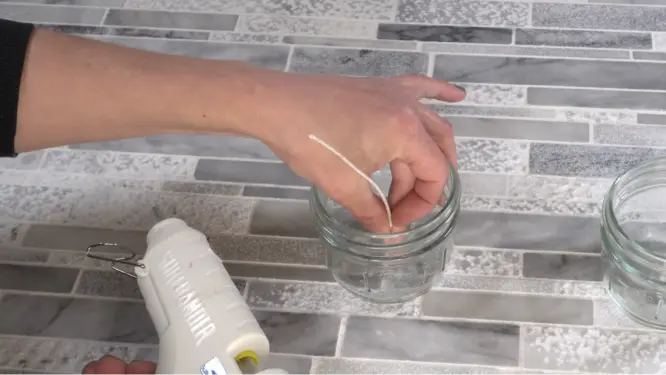
Clean your jars using rubbing alcohol and a paper towel to remove dust and residue.
Attach your wick using hot glue, making sure it’s centered.
If this is your very first candle, my beginner candle guide covers container prep and wick sizing in more depth.
Step 3: Make the Candle Base
Ingredients (Base – 4 Jars)
| Ingredient | % | Weight |
|---|---|---|
| Soy Wax | 92% | 372 g |
| Fragrance Oil | 8% | 29.8 g |
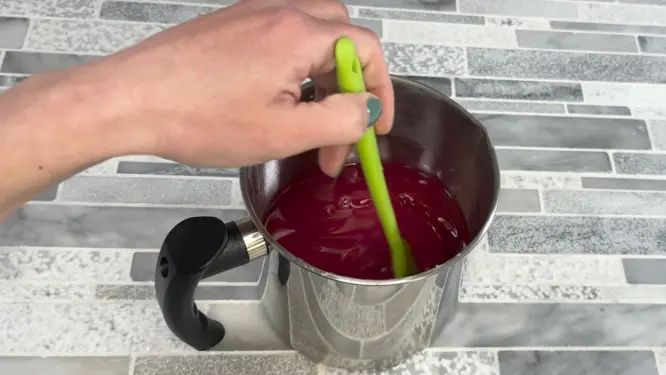
Melt your soy wax using a double boiler, stirring as it melts.
Once melted, remove from heat and allow it to cool.
Add your pink dye and mix until evenly colored.
When the temperature drops below 140°F (60°C), add your fragrance oil and mix thoroughly for at least 2 minutes.
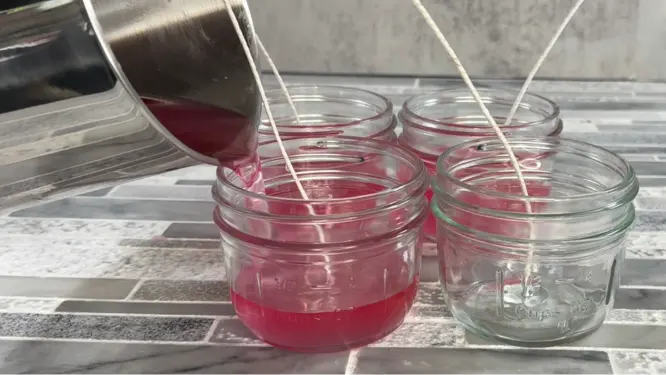
Pour into your jars, keeping the fill level even across all containers.
Re-center your wick if needed.
Step 4: Make the Whipped Wax Topping
Ingredients (Whipped Topping)
| Ingredient | % | Weight |
|---|---|---|
| Soy Wax | 92% | 300 g |
| Fragrance Oil | 8% | 24 g |
Melt your wax, then allow it to cool below 140°F before adding fragrance oil.
Mix well and transfer to a mixing bowl.
Let it sit and begin cooling.
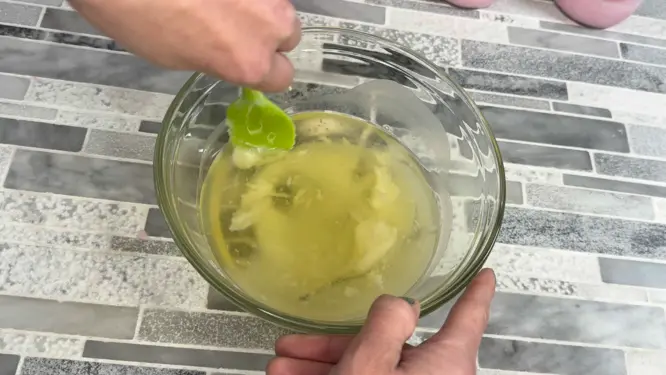
As it cools, wax will harden along the sides and bottom of the bowl—scrape this into the center.
This is the same whipping process I use in my Whipped Candle Frosting tutorial — if you want to see the stages up close before diving in, that post has extra detail on getting the texture right.
Using a hand mixer, begin whipping.
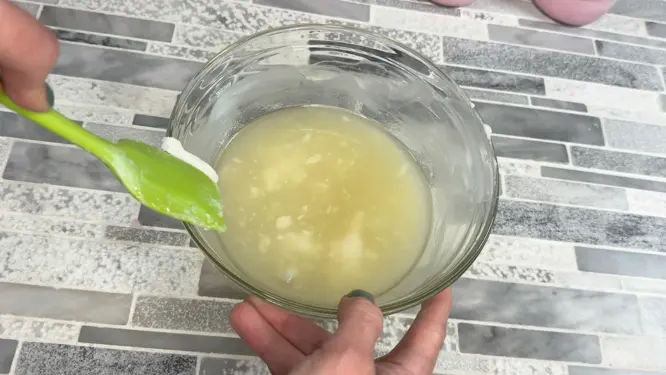
You’ll notice stages:
- liquid (soupy)
- thickened (clumpy)
- mashed potato consistency
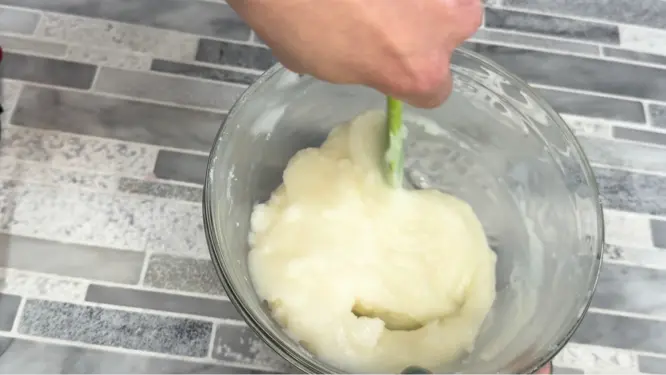
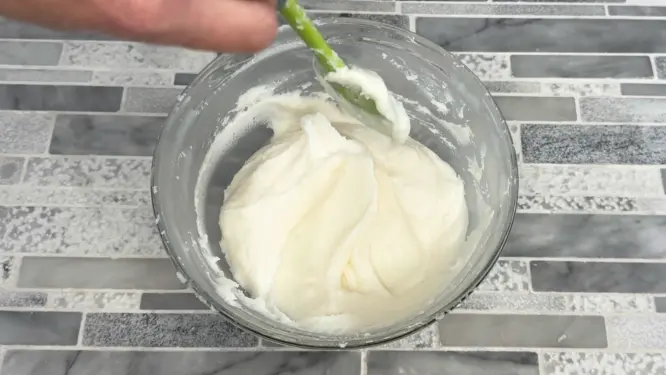
Continue mixing until the wax:
- becomes thick
- holds its shape
- and does not easily fall off a spatula
Step 5: Pipe and Decorate
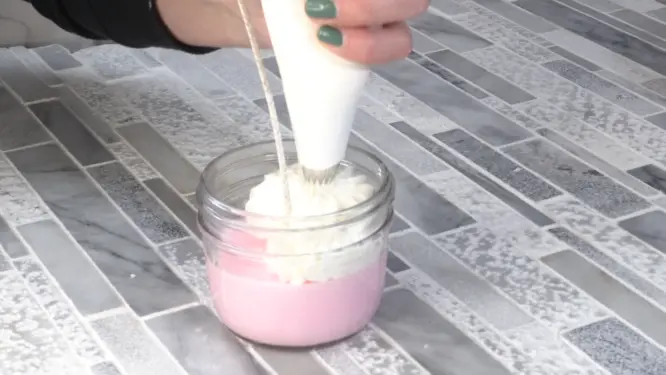
Transfer the whipped wax into a piping bag.
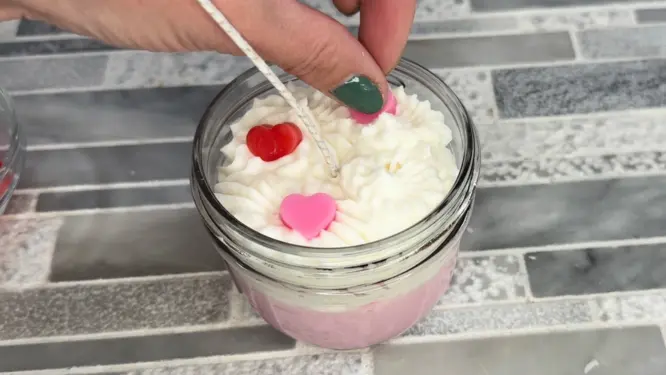
Pipe onto your candle surface—I used small blobs for a soft, fluffy look.
**Don’t pipe too high if you plan to use lids.
As you pipe, place your heart embeds on top.
Step 6: Cool, Trim, and Cure
Allow the candles to cool completely.
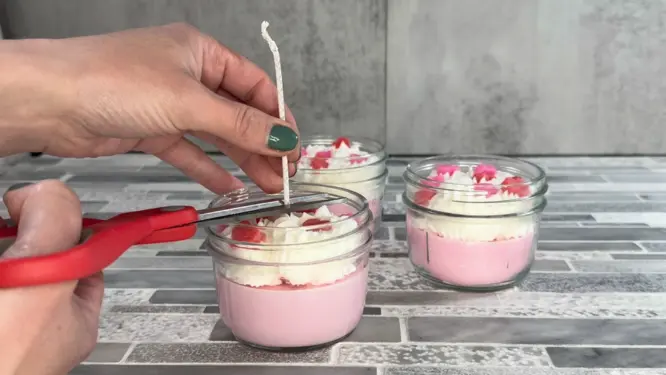
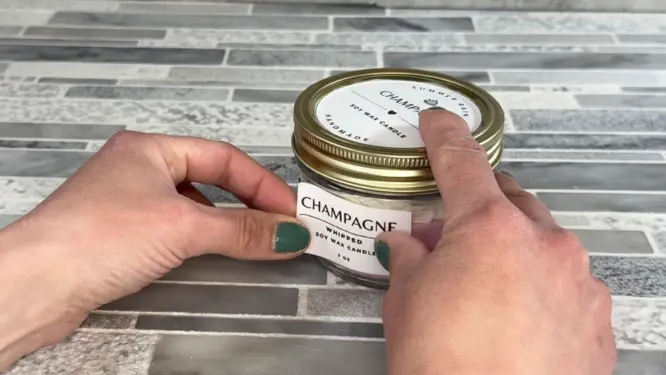
Trim your wick and add labels if desired.
Let your candles cure for 2–3 weeks before burning for the best performance.
Common Mistakes to Avoid
- Not working quickly with embed wax (it hardens fast)
- Adding fragrance oil at too high of a temperature
- Not mixing fragrance long enough
- Skipping scraping during whipping (affects texture)
- Overpiping so lids won’t fit
Frequently Asked Questions
Why is my whipped wax not thickening?
Your wax may still be too warm. Let it cool longer and continue scraping the sides of the bowl.
Can I use regular soy wax for embeds?
You can, but tart/embed wax holds shapes much better and gives cleaner results.
How do I know when whipped wax is ready?
It should be thick, hold its shape, and not easily fall off your spatula.
How long should I cure candles before burning?
At least 2–3 weeks for the best scent throw and performance.
Final Thoughts
This whipped candle with heart embeds is a simple way to create a candle that looks high-end and eye-catching.
Once you get comfortable with the whipped texture, you can customize this design with different colors, shapes, and scents.
Looking for your next project? Try my Chocolate and Toffee Whipped Candle for a totally different flavor profile, or go all-in on relaxation with a Whipped Massage Oil Candle.
Heart Candle Printable Recipe
Whipped Candle with Heart Embeds Recipe
Equipment
- Piping Tip
Ingredients
Heart Embeds
- 30 grams Tart Wax
- 2.4 grams Fragrance Oil
Candle Base
- 372 grams Soy Wax
- 29.8 grams Fragrance Oil
Whipped Wax Topping
- 300 grams Soy Wax
- 24 grams Fragrance Oil
Instructions
Step 1: Make the Heart Embeds
- Melt your tart wax, then add fragrance oil.
- Mix well and pour into your heart mold.
- This wax hardens quickly, so work while it’s still hot and fluid. You can always pop it back on the double boiler if it starts to solidify on you.
- Allow the embeds to fully cool, then remove from the mold and set aside.
Step 2: Prep Your Containers
- Clean your jars using rubbing alcohol and a paper towel to remove dust and residue.
- Attach your wick using hot glue, making sure it’s centered.
Step 3: Make the Candle Base
- Melt your soy wax using a double boiler, stirring as it melts.
- Once melted, remove from heat and allow it to cool.
- Add your pink dye and mix until evenly colored.
- When the temperature drops below 140°F (60°C), add your fragrance oil and mix thoroughly for at least 2 minutes.
- Pour into your jars, keeping the fill level even across all containers.
- Re-center your wick if needed.
- Step 4: Make the Whipped Wax Topping
- Melt your wax, then allow it to cool below 140°F before adding fragrance oil.
- Mix well and transfer to a mixing bowl.
- Let it sit and begin cooling.
- As it cools, wax will harden along the sides and bottom of the bowl—scrape this into the center.
- Using a hand mixer, begin whipping.You’ll notice stages:liquid (soupy)thickened (clumpy)mashed potato consistency
- Continue mixing until the wax:becomes thickholds its shapedoes not easily fall off a spatula
Step 5: Pipe and Decorate
- Transfer the whipped wax into a piping bag.
- Pipe onto your candle surface—I used small blobs for a soft, fluffy look.
- **Don’t pipe too high if you plan to use lids.
- As you pipe, place your heart embeds on top.
Step 6: Cool, Trim, and Cure
- Allow the candles to cool completely.Trim your wick and add labels if desired.Let your candles cure for 2–3 weeks before burning for the best performance.