
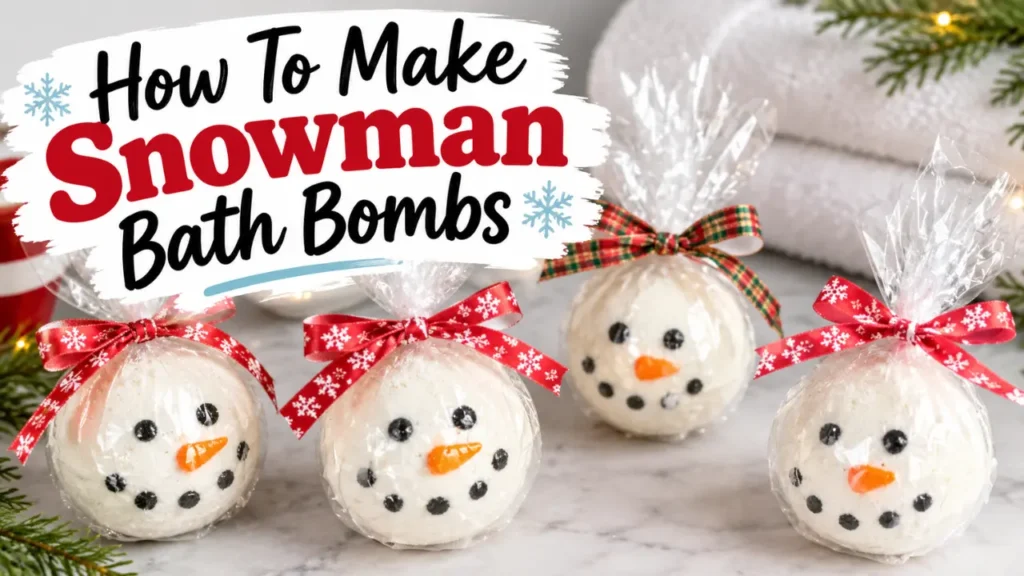
These snowman bath bombs look much harder to make than they actually are.
The snowman shape makes them look like an advanced bath bomb project, but the formula itself is beginner-friendly. Once you have the basic bath bomb technique down, the fun part is turning them into adorable little snowmen.
Drop one into your bath and watch it fizz while the sweet, festive Berry Balsam fragrance fills the room.
The best part is that you don’t need a complicated technique to make them look special. A little orange mica for the nose and some activated charcoal for the eyes and mouth is all it takes to turn a basic bath bomb into a snowman.
If you’ve never made bath bombs before, don’t worry. I’ll walk you through the formula, how to get the right consistency, how to unmold them without breaking them, and how to paint the faces.
Why You’ll Love These Snowman Bath Bombs
These are such a fun DIY project for the holiday season.
- Beginner-friendly bath bomb formula
- No complicated equipment
- Makes adorable Christmas bath bombs
- Easy to customize with different fragrances
- Great for homemade gifts
- The snowman shape makes them extra fun
- You can make them in about 20 minutes, plus drying time
And once you understand the basic bath bomb technique, you can use the same process to make all kinds of shapes and designs.
Prefer to Watch This Project Instead?
If you’d rather watch me make these snowman bath bombs, I’ve got you covered.
The video is especially helpful if you’re new to bath bombs because the consistency of the mixture is much easier to understand when you can actually see it.
Affiliate Disclosure: This post may contain affiliate links. If you purchase something through one of these links, I may earn a small commission at no additional cost to you. I only recommend products and supplies that I personally use, trust, or believe would be helpful for this project.
Before You Make Snowman Bath Bombs
There is a little bit of a learning curve when you first start making bath bombs.
The ingredients are simple, but getting the moisture level right takes some practice.
You want the mixture to be moist enough to hold together when you press it into the mold, but not so wet that the bath bomb starts reacting before you are ready.
Once you’ve made a few batches, you’ll start to recognize the texture almost immediately.
Until then, these tips will save you some frustration.
Always Weigh Your Ingredients
If you’re new to making bath bombs, this is probably the most important tip I can give you.
Use a digital scale instead of cups and tablespoons.
Bath bombs are surprisingly sensitive to small changes in the amount of each ingredient. Too much moisture can cause them to start fizzing before they ever make it into the bath. Too little moisture can leave you with bath bombs that crumble or won’t hold their shape.
Weight also makes it possible to easily scale your recipe up or down.
If you’re getting more interested in DIY formulation, this is a habit worth developing for all of your recipes.
Start With a Simple Formula
Bath bombs aren’t difficult, but they do have a learning curve.
If this is your first time making them, I recommend learning the basic technique before trying elaborate designs.
Once you understand what the mixture should feel like, you can start experimenting with colors, embeds, shapes, decorations, and different formulas.
These snowmen are a fun next step because the formula is simple while the finished product looks much more complicated.
Be Careful With Fragrance Oils Containing Vanilla
This is one I learned the hard way.
If your fragrance oil contains vanillin, it can cause your bath bombs to discolor over time.
That can be especially noticeable with a white bath bomb.
Your beautiful white snowmen may look perfect when you make them and then gradually turn beige or brown after a few days or weeks.
So if you’re making white bath bombs, check the fragrance oil’s documentation for vanillin content before you use it.
For these snowmen, I’m using Berry Balsam Christmas because it gives them that festive holiday scent without taking away from the white snowman look.
Shop This Project
Ready to make your own snowman bath bombs?
Snowman Bath Bomb Ingredients
Here’s what each ingredient does in this formula.
| Ingredient | What It Does |
|---|---|
| Baking soda | Creates the fizzing reaction |
| Citric acid | Reacts with baking soda to create fizz |
| Epsom salt | Adds bulk and dissolves in the bath |
| Kaolin clay | Helps give the bath bomb structure |
| Avocado oil | Adds oil to the bath bomb formula |
| Polysorbate 80 | Helps disperse the oil in bath water |
| Fragrance oil | Adds scent |
| Witch hazel | Provides the small amount of moisture needed to mold the bombs |
Baking Soda
Baking soda is one half of the fizzing reaction.
When baking soda and citric acid come into contact with water, they react and produce carbon dioxide gas.
Those bubbles are what create the fizzing effect we love in bath bombs.
Citric Acid
Citric acid is the other half of our fizzing reaction.
When it combines with baking soda and water, the acid-base reaction produces carbon dioxide, which creates all those bubbles.
Epsom Salt
I use Epsom salt in many of my bath recipes because it is an easy way to add another bath-time ingredient to the formula.
It also adds bulk to the bath bombs.
Kaolin Clay
Kaolin clay is a very fine cosmetic clay.
I’m using a small amount here because it helps give the bath bombs some additional structure.
That’s especially helpful for these snowmen because we’re going to handle them again when we paint their faces.
Avocado Oil
You could technically make a bath bomb without adding oil, but I like having a small amount in the formula.
The oil adds a little extra conditioning to the bath experience.
Polysorbate 80
This is an important ingredient when you’re adding oil to a bath bomb.
Polysorbate 80 helps disperse the oil throughout the bath water rather than allowing it to simply sit on the surface or leave a heavy oily ring around your tub.
Fragrance Oil
For these snowmen, I wanted something festive.
I’m using Berry Balsam fragrance oil, which gives the bath bombs a sweet holiday scent.
Always check your fragrance supplier’s recommended usage rate and make sure the fragrance is approved for the intended application.
The Bath Bomb Ratio
The two ingredients responsible for the fizz are baking soda and citric acid.
For this recipe, we’re using a 2:1 ratio of baking soda to citric acid.
That means we’re using twice as much baking soda as citric acid by weight.
When the dry ingredients are mixed together, nothing exciting happens.
Once water is introduced, however, the baking soda and citric acid dissolve and react. That reaction produces carbon dioxide gas, which is what creates the familiar bath bomb fizz.
The important part is keeping water out of the mixture until you’re ready for it.
That’s why we add the witch hazel slowly rather than pouring in a large amount all at once.
Bath Bomb Formula
| Ingredient | Amount | Percentage |
|---|---|---|
| Baking Soda | 5.4 oz | 54% |
| Citric Acid | 2.7 oz | 27% |
| Epsom Salt | 0.9 oz | 9% |
| Kaolin Clay | 0.3 oz | 3% |
| Avocado Oil | 0.2 oz | 2% |
| Polysorbate 80 | 0.2 oz | 2% |
| Berry Merry Christmas Fragrance Oil | 0.3 oz | 3% |
| Total | 10 oz | 100% |
Consistency Is Key
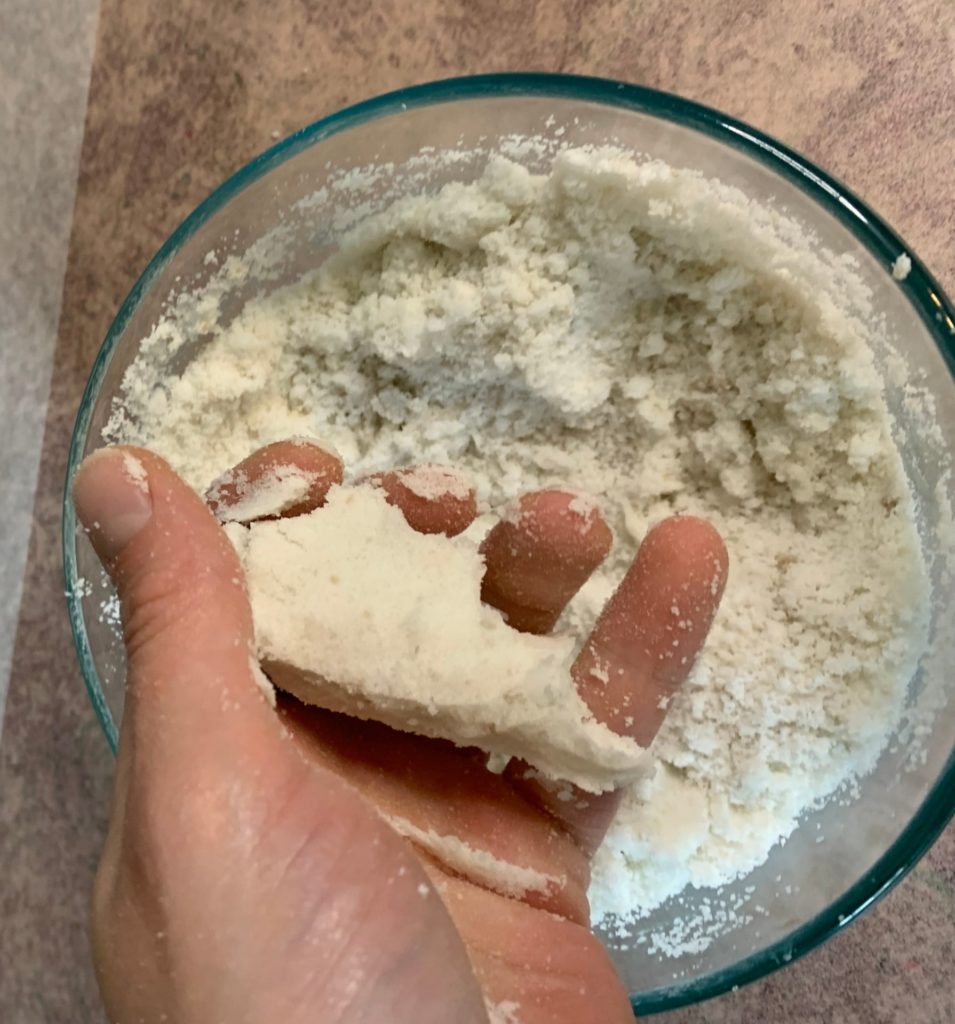
If there is one thing that will make or break your bath bombs, it is the consistency of the mixture.
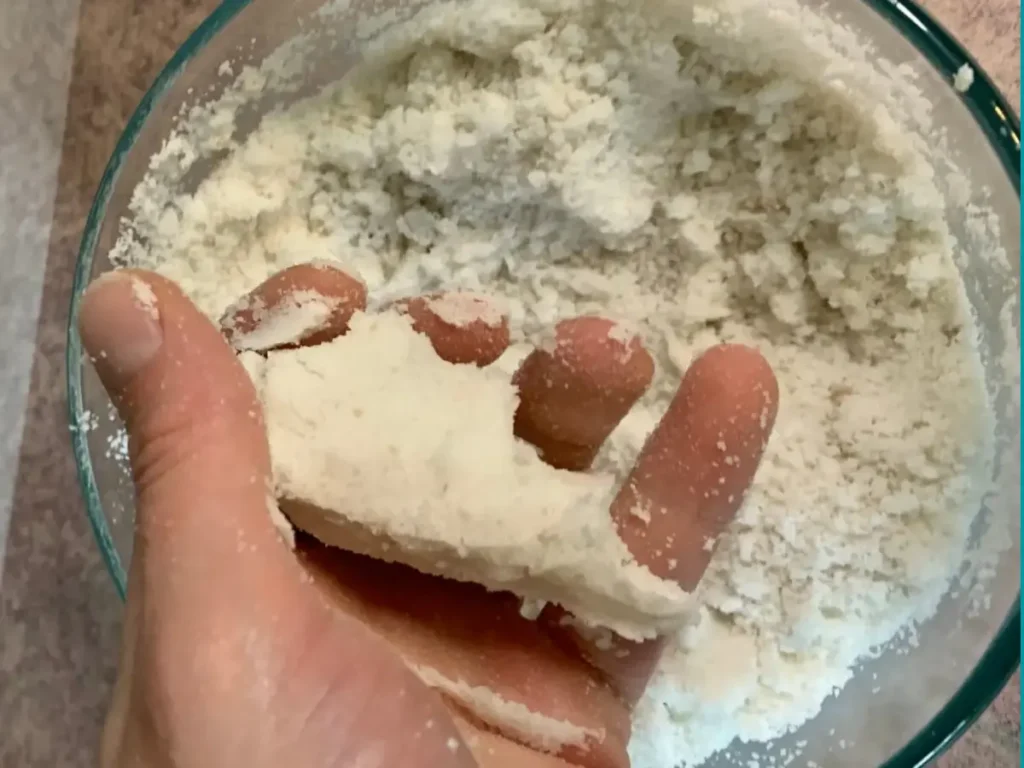
You are looking for something similar to damp or wet sand.
It should hold together when you squeeze it, but it shouldn’t be so wet that it feels soggy.
Here’s my favorite way to test it.
Take a handful of the mixture and squeeze it firmly into a ball.
Then drop the ball from a few inches above your mixing bowl.
If it stays together, you’re ready to mold your bath bombs.
If it breaks apart, give the mixture another light spray of witch hazel, mix thoroughly, and test it again.
Don’t add a lot of witch hazel at once.
A little goes a long way.
How to Make Snowman Bath Bombs
Once your mixture has the right consistency, it’s time to start molding.
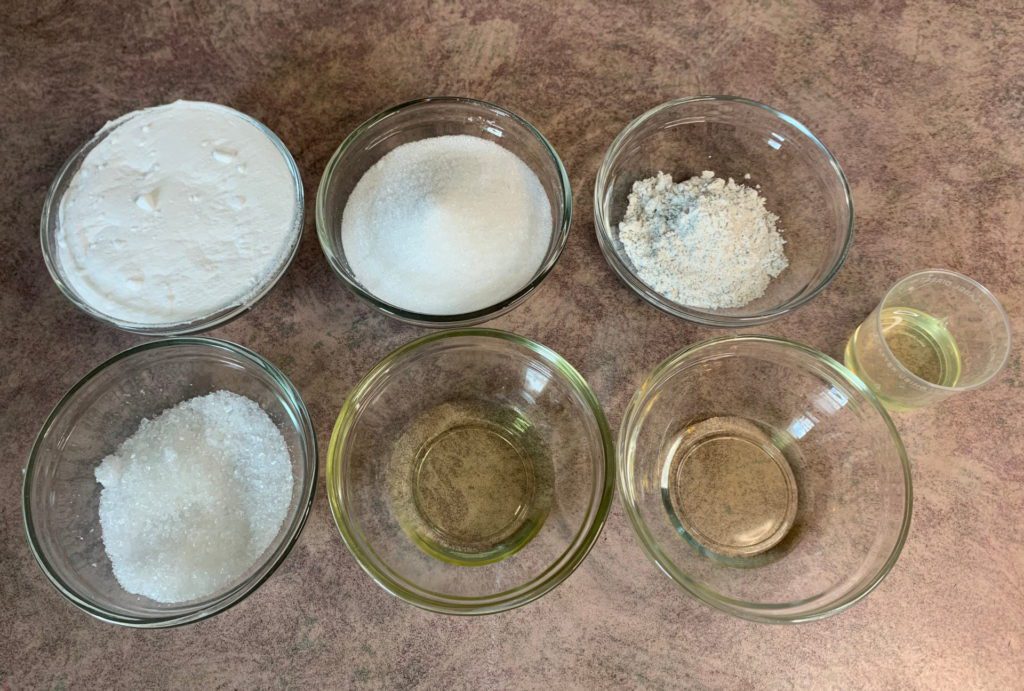
Weigh Your Ingredients
Weigh all of your ingredients using a digital scale.
Have everything ready before you begin mixing.
Prepare Your Work Area
Set out a piece of wax paper or another suitable surface where you can place your finished bath bombs.
You want somewhere flat where the bath bombs can sit undisturbed while they dry.
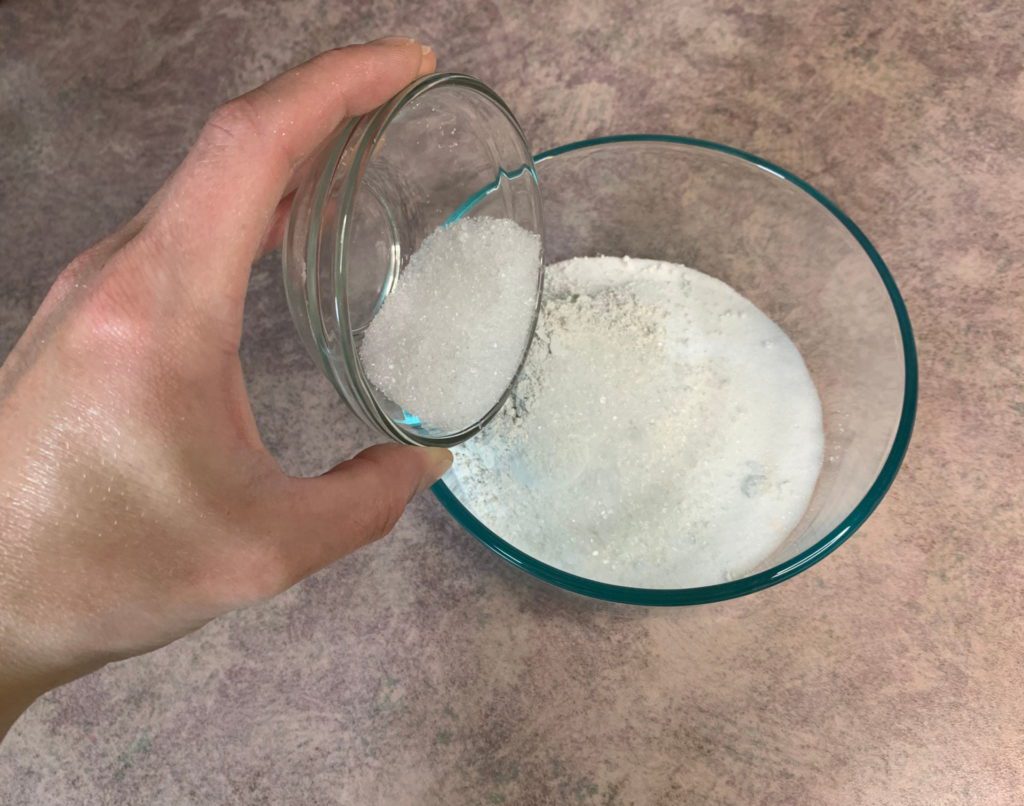
Mix the Dry Ingredients
Add the baking soda, citric acid, Epsom salt, and kaolin clay to a mixing bowl.
Mix thoroughly.
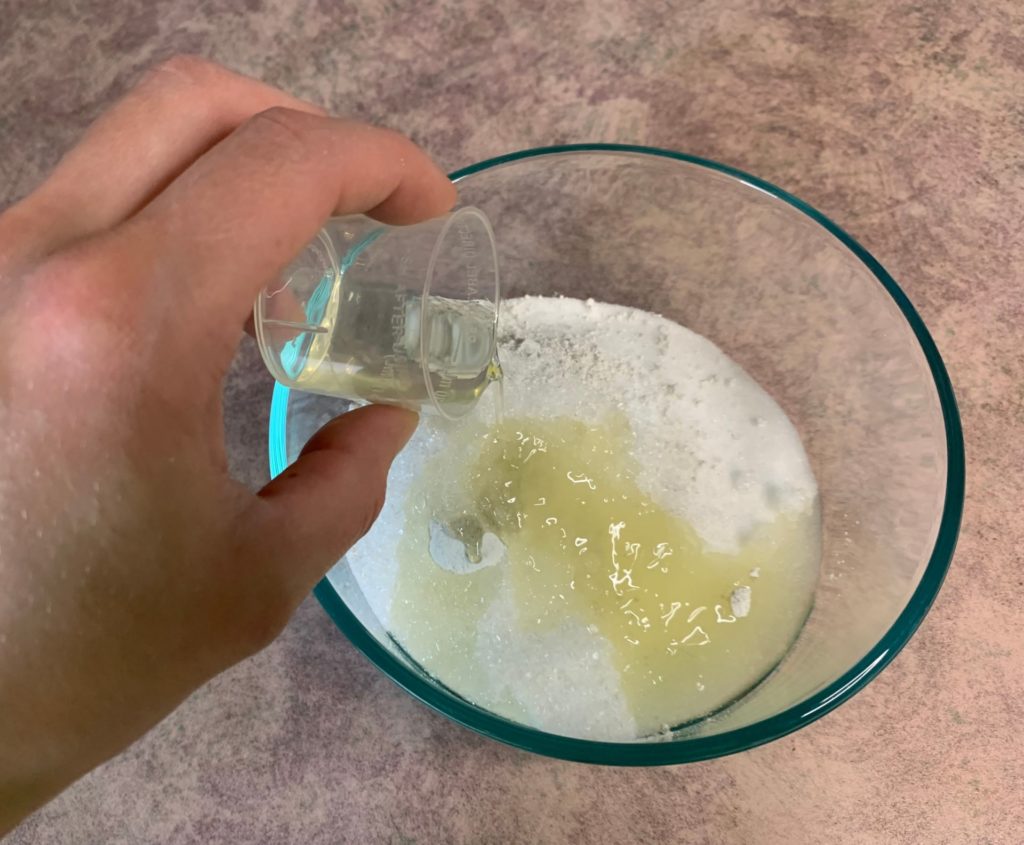
Add the Wet Ingredients
Add the avocado oil, polysorbate 80, and fragrance oil.
Mix thoroughly.
I like to use my hands for this part because it makes it much easier to distribute the oil and fragrance throughout the dry ingredients.
Add Witch Hazel
Lightly spray the mixture with witch hazel while mixing.
Keep mixing as you spray.
You are looking for that damp-sand consistency.
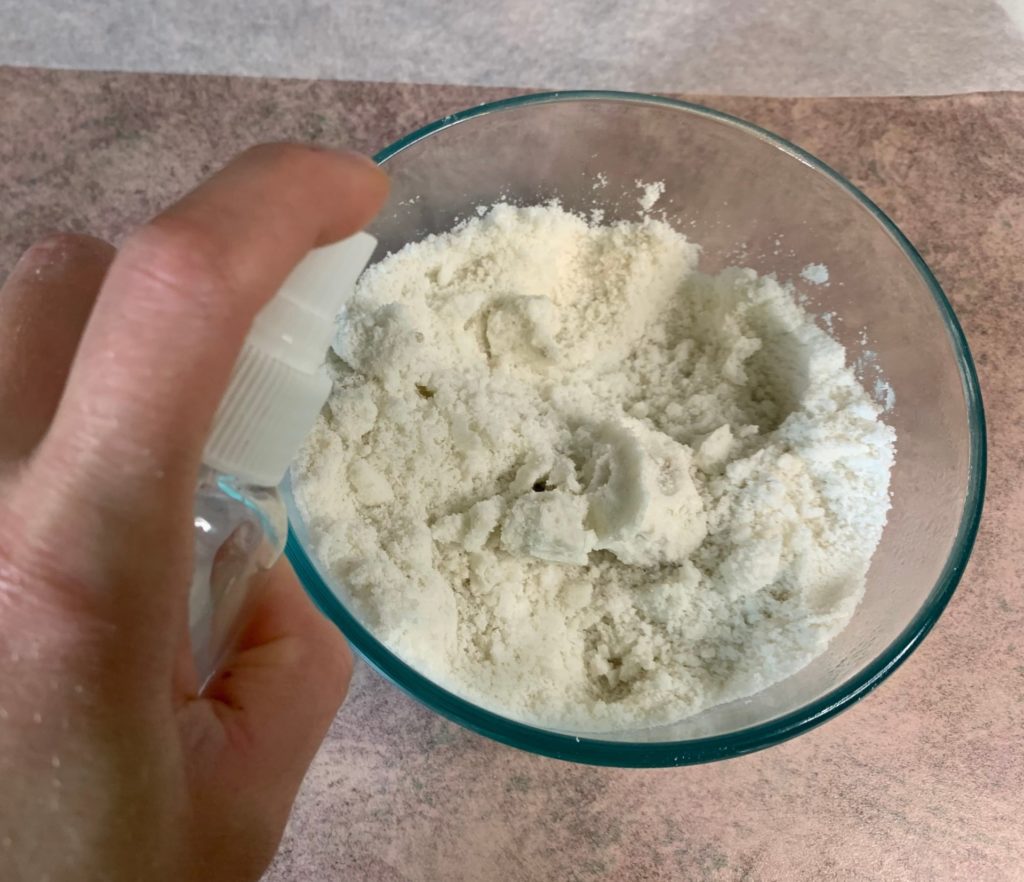
Remember: you can always add more witch hazel, but you can’t easily take it back out.
Fill the Mold
Scoop a heaping amount of the mixture into each half of your snowman mold.
Don’t be afraid to slightly overfill the halves.
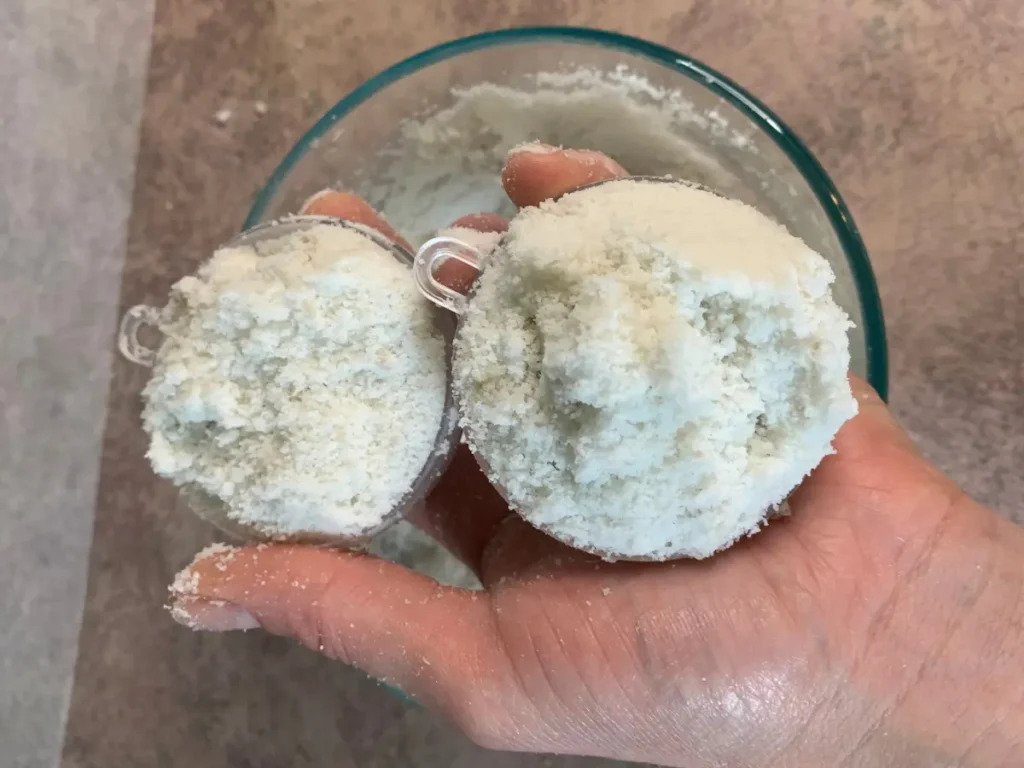
Press the Mold Together
Firmly press the two halves of the mold together.
You want enough pressure to compact the bath bomb mixture so that it holds its shape.
Remove the Top Half
Slowly remove the top half of the mold.
I found that gently squeezing the mold can help release the bath bomb rather than pulling aggressively.
Take your time here.
This is one of those steps where rushing can turn a perfectly good snowman into a pile of bath bomb crumbs.
Release the Snowman
Turn the mold upside down and gently release the bath bomb onto your wax paper.
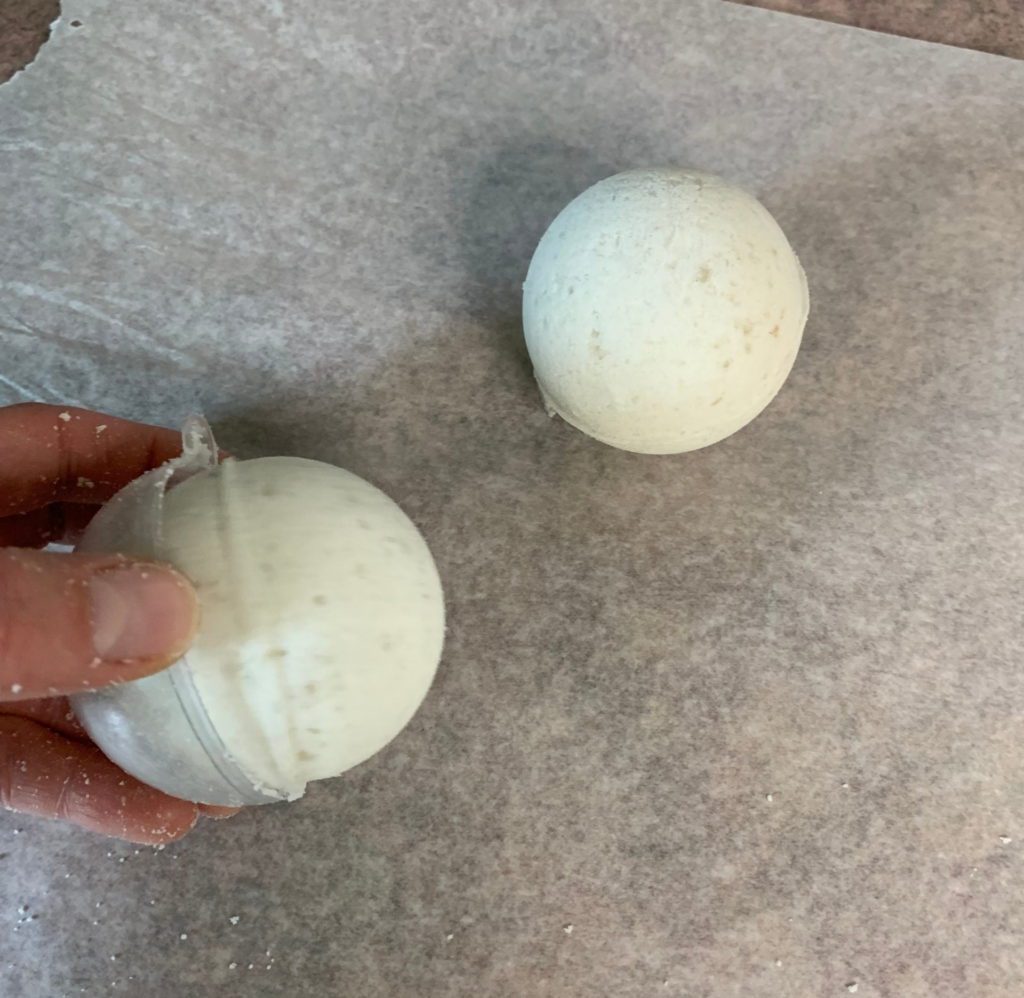
If a bath bomb cracks when you remove it, don’t panic.
The mixture may need slightly more moisture or more pressure when molding.
Let Them Dry
Allow the bath bombs to dry for approximately 24 hours before painting and packaging them.
Once they’re completely dry, they’re ready for the fun part.
How to Paint Snowman Bath Bombs
You only need a couple of ingredients to turn the plain white bath bombs into snowmen.
Paint Ingredients
Orange Mica
You’ll need a small amount of orange mica for the snowman’s nose.
Activated Charcoal
Activated charcoal works well for the black eyes and mouth.
You could also use a black cosmetic mica if that’s what you have on hand.
Witch Hazel
Witch hazel is used to wet the powders and turn them into something you can paint onto the bath bombs.
Painting the Snowman Faces
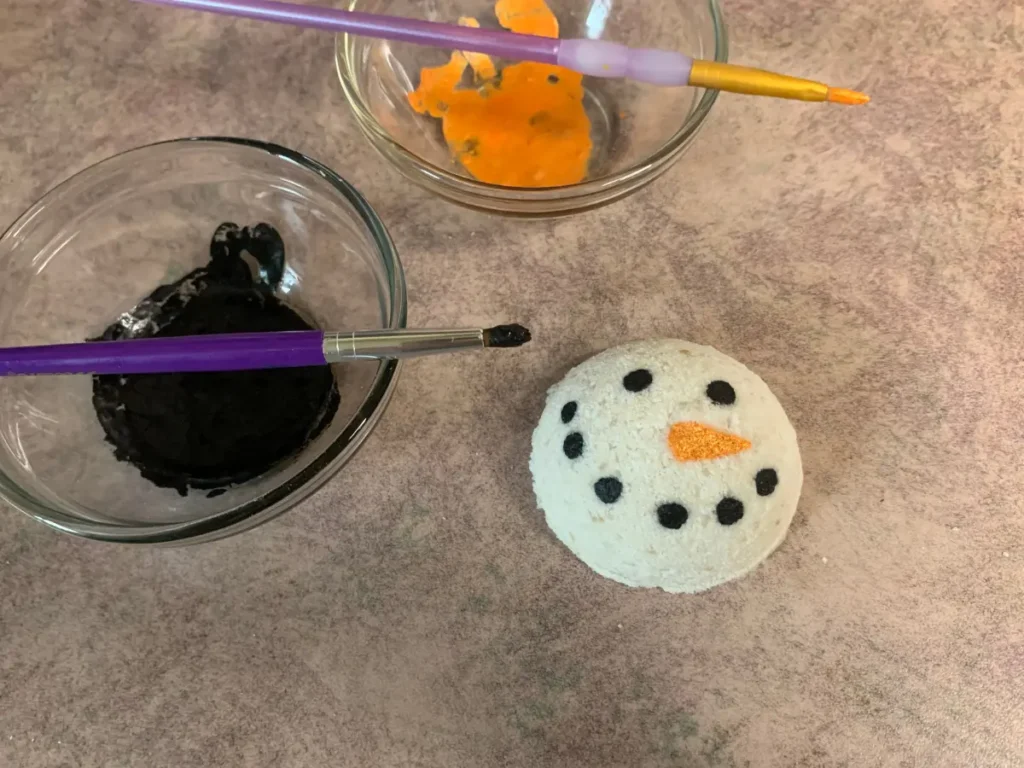
Once your bath bombs are dry, it’s time to give them some personality.
Make the Black Paint
Place a small amount of activated charcoal in a small dish.
Add Witch Hazel
Slowly add witch hazel until the charcoal becomes wet enough to paint.
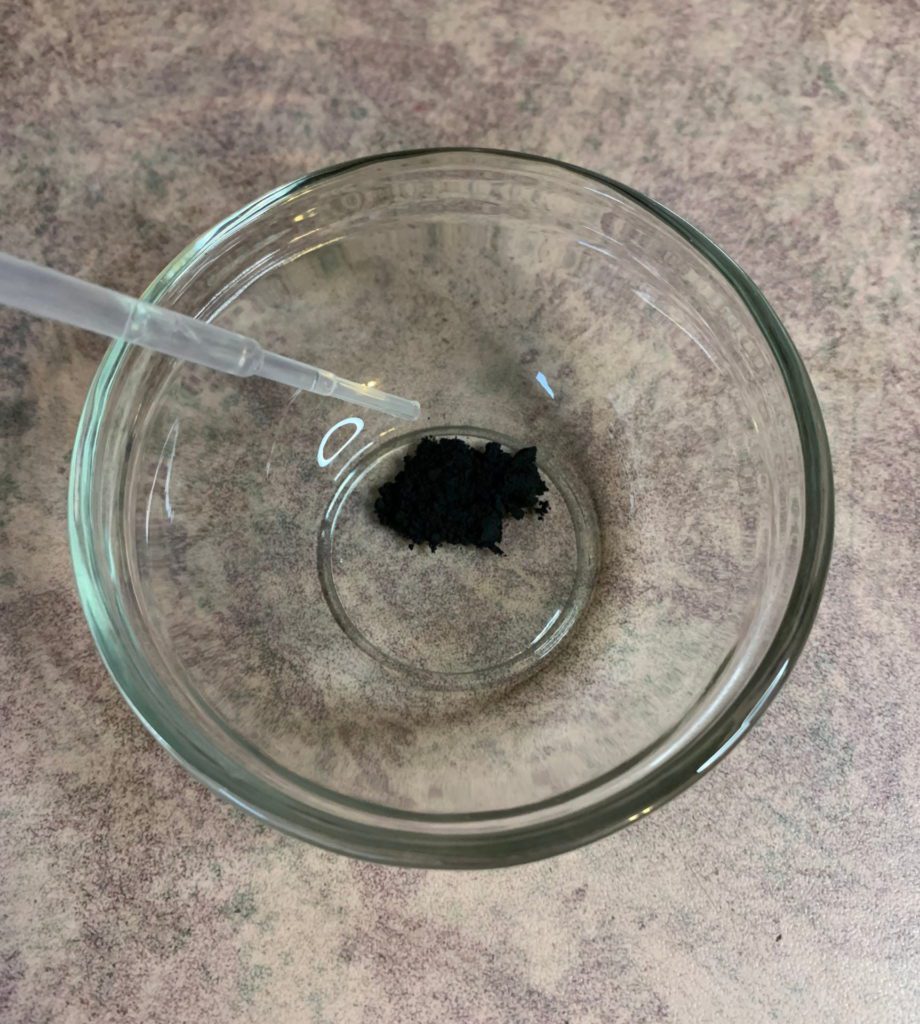
You don’t need much liquid.
Add it a little at a time.
Mix
Mix the charcoal and witch hazel together until you have a paint-like consistency.
Paint the Eyes
Use a small paintbrush to paint two eyes onto the snowman.
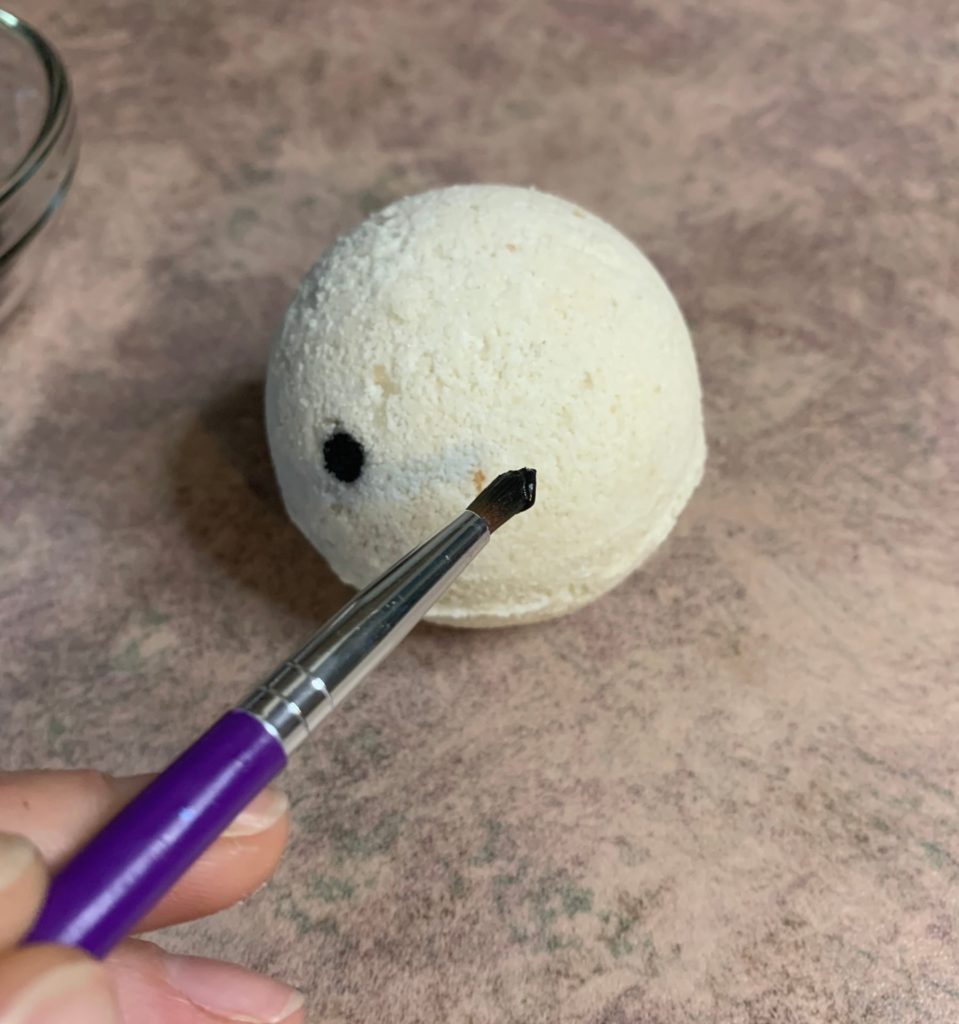
Paint the Mouth
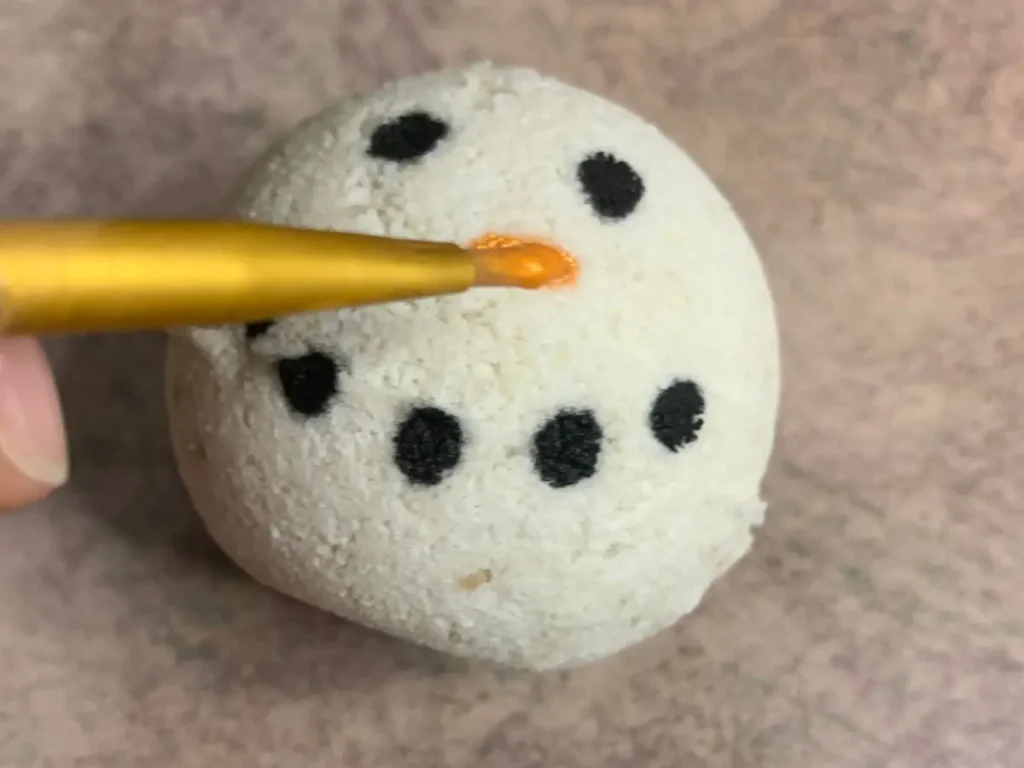
Add small dots or a curved line to create the snowman’s mouth.
Don’t worry about making every snowman identical. A little variation is what makes homemade bath bombs fun.
Make the Orange Paint
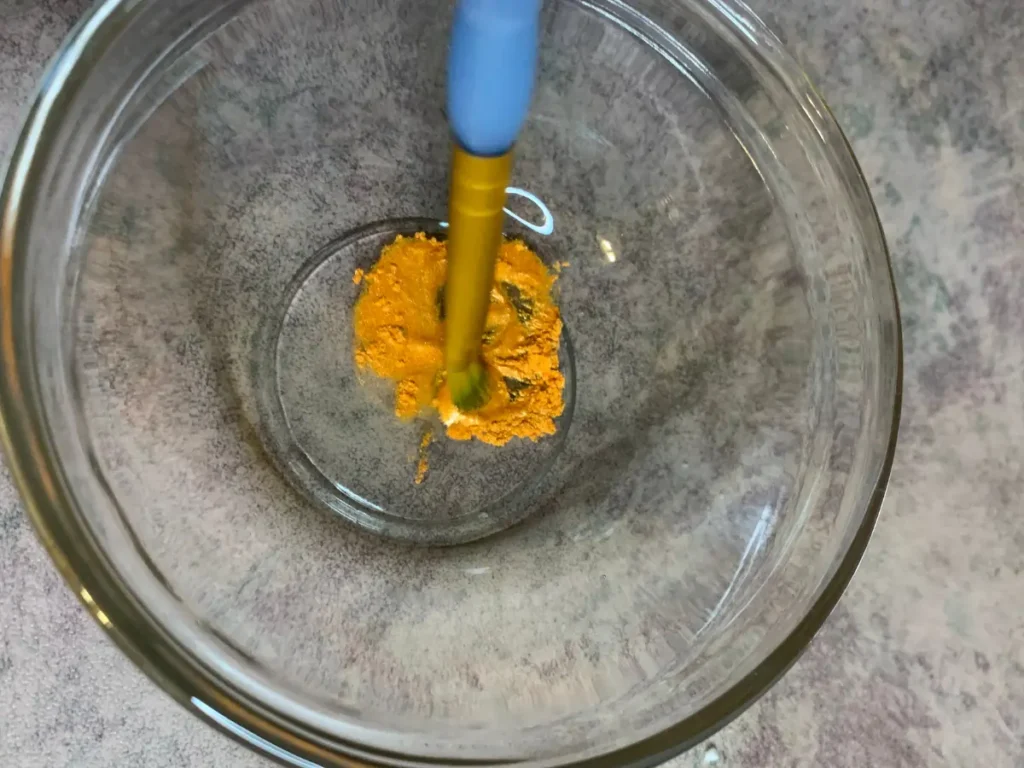
Place a small amount of orange mica into a clean dish.
Add witch hazel a little at a time and mix until it becomes paintable.
Paint the Nose
Use your brush to add the snowman’s carrot-shaped nose.
Let Them Dry
Set the finished snowmen aside and allow the painted details to dry completely.
Once they’re dry, they’re ready to package or enjoy.
How to Store Snowman Bath Bombs
Bath bombs are happiest when they’re kept dry.
Store your finished bath bombs in an airtight container or package them individually to protect them from moisture.
Humidity can cause bath bombs to begin reacting prematurely, so keep them away from water and damp areas.
If you’re making these as gifts, package them only after they are completely dry.
Troubleshooting Snowman Bath Bombs
Why are my bath bombs crumbling?
Your mixture may not contain enough moisture, or it may not have been compressed firmly enough in the mold.
Try adding a very small amount of witch hazel, mix thoroughly, and test the consistency again.
Why are my bath bombs expanding in the mold?
You may have added too much moisture.
The water in witch hazel can start the reaction between the baking soda and citric acid.
Add moisture very slowly and mix continuously.
Humidity can also affect bath bomb making, so environmental conditions matter more than you might expect.
Why did my snowman bath bomb crack when I unmolded it?
It could be too dry, or it may not have been compressed enough.
Try slightly increasing the moisture and pressing the mold together more firmly.
Also, take your time when removing the mold.
Why did my white bath bombs turn brown?
Check the fragrance oil you’re using.
Fragrance oils containing vanillin can cause white bath bombs to discolor over time.
This is especially noticeable with white designs like these snowmen.
Why don’t my bath bombs fizz?
Moisture, ingredient ratios, or storage conditions can all affect how a bath bomb performs.
Make sure your baking soda and citric acid are fresh and that the finished bath bombs have been protected from humidity.
Packaging Bath Bombs
If you’re making these snowman bath bombs as gifts, packaging is what really finishes them off.
Because bath bombs are sensitive to moisture, I like to protect them before putting them into their final gift packaging.
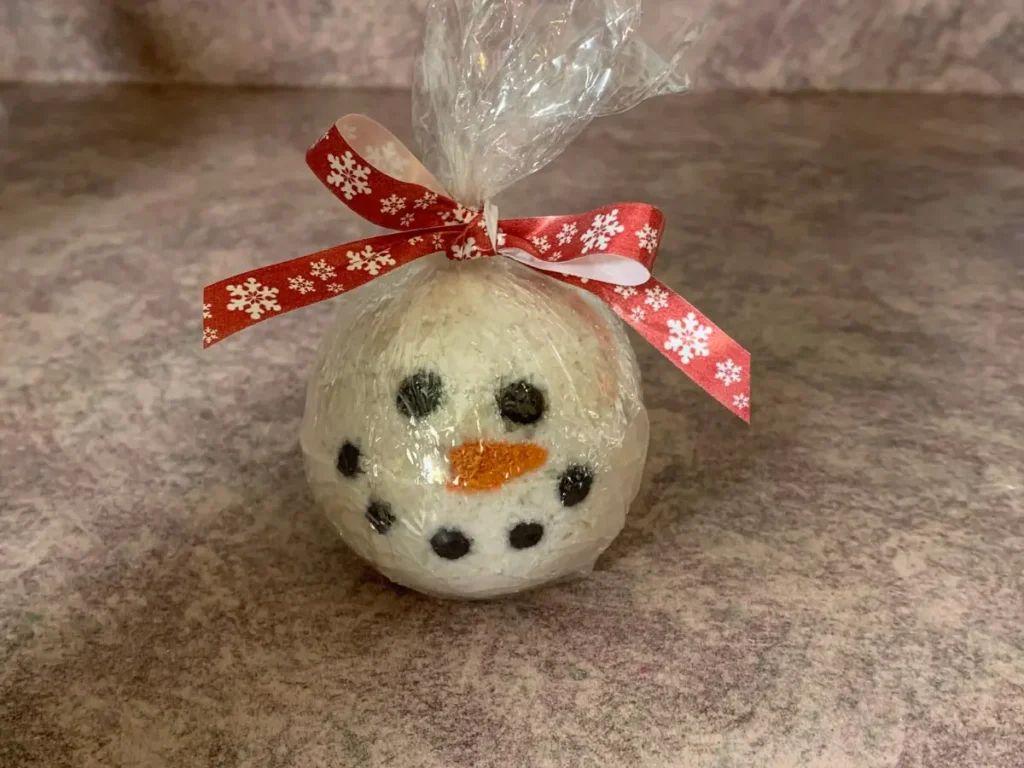
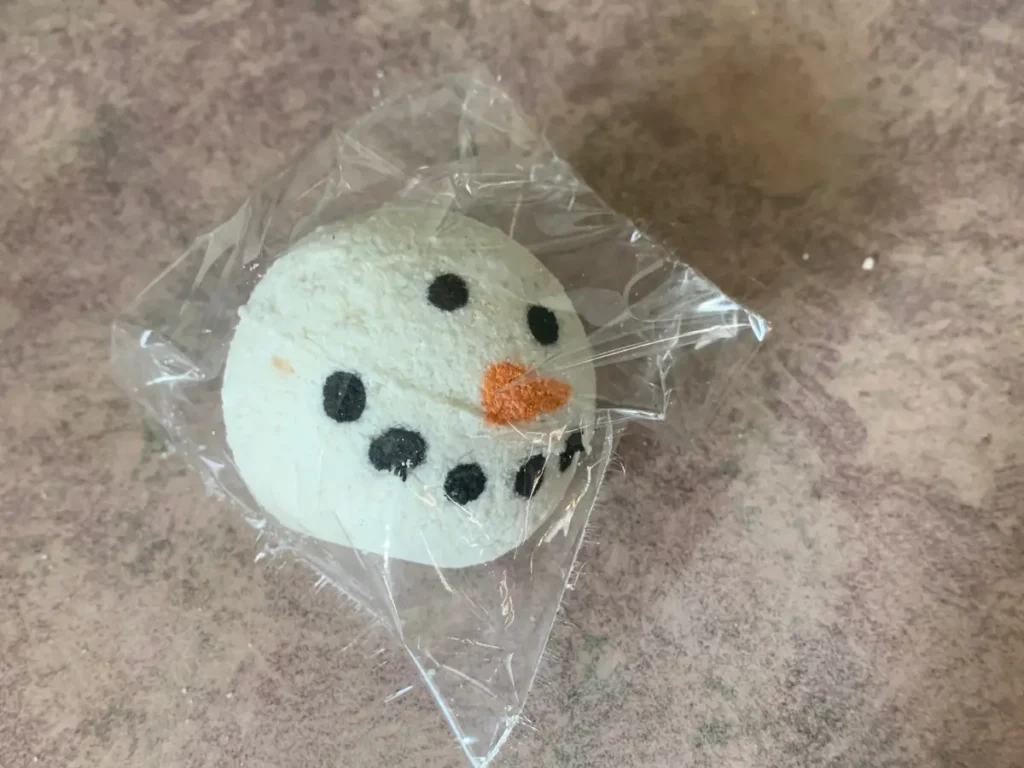
Once the bath bombs were completely dry and the painted faces had dried, I heat sealed each bath bomb individually.
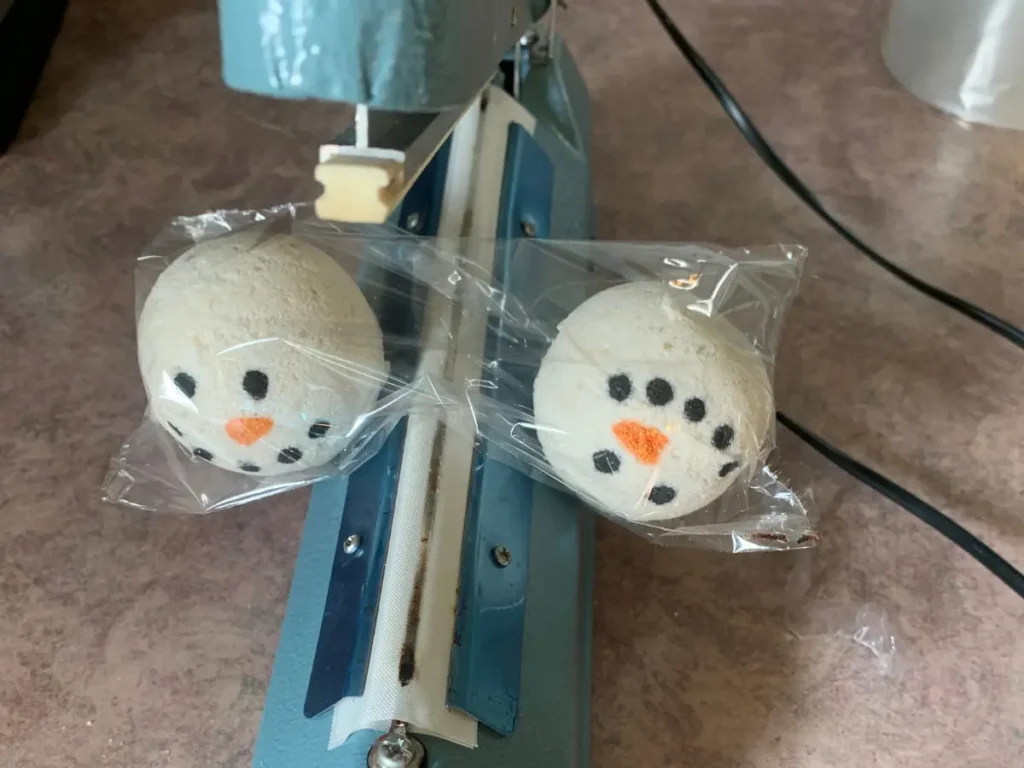
After heat sealing them, I placed each snowman into a small clear plastic bag and tied the top.
This gives you a couple of layers of protection from moisture while also making the snowman bath bombs look ready for gifting.
My Packaging Process
- Make sure the bath bombs are completely dry.
- Allow the painted details to dry completely.
- Heat seal each bath bomb individually.
- Place the sealed bath bomb into a small clear plastic bag.
- Tie the top of the bag with ribbon, twine, or another decorative tie.
- Store the finished bath bombs somewhere cool and dry until you’re ready to use or gift them.
I especially like this method for Christmas gifts because you can see the little snowman through the clear packaging.
You could also add a small gift tag with the fragrance name and simple instructions:
Drop one snowman bath bomb into warm bath water and enjoy!
Why Heat Seal Bath Bombs?
Bath bombs don’t like moisture.
Humidity can cause the baking soda and citric acid to react prematurely, which can leave your bath bombs soft, crumbly, or less fizzy.
Heat sealing gives each bath bomb an extra barrier against moisture before you put it into the decorative bag.
If you’re making these for gifts, I wouldn’t skip this step.
Packaging Ideas
You don’t have to package them exactly the way I did.
For gifts, you could also:
- Tie the bag with Christmas ribbon.
- Add a small gift tag.
- Package several snowmen together in a clear gift bag.
- Put the sealed bath bomb inside a small gift box.
- Add a label with the fragrance and ingredients.
- Make several different holiday bath bomb shapes and package them as a set.
The important thing is to keep the finished bath bombs protected from moisture.
A cute bath bomb is fun. A cute bath bomb that still fizzes when someone gets it into the tub is even better.
Frequently Asked Questions
Are snowman bath bombs hard to make?
They look complicated, but the formula is actually beginner-friendly.
The trickiest part is learning how much witch hazel to add and getting the mixture to the right consistency.
Once you understand what damp bath bomb mixture should feel like, the process becomes much easier.
What makes bath bombs fizz?
Baking soda and citric acid create the fizzing reaction.
When they come into contact with water, they react and produce carbon dioxide gas.
Can I use a different fragrance oil?
Yes, but choose a fragrance that is suitable for bath and body products and follow the supplier’s recommended usage rate.
If you’re making white bath bombs, also check whether the fragrance contains vanillin because it can cause discoloration.
Can I use a different oil?
You can experiment with other carrier oils, but changing an ingredient can affect the texture and performance of the finished bath bomb.
If you change the formula, make a small test batch first.
Why do you use Polysorbate 80 in bath bombs?
Polysorbate 80 helps disperse the oil throughout the bath water.
Without it, the oil can float on the surface of the water and potentially leave an oily ring around the tub.
Can I make these without clay?
You can make bath bombs without kaolin clay, but removing an ingredient changes the overall formula.
The clay contributes to the structure of these particular bath bombs, which is useful because we’re handling them and painting them after they have dried.
Can I use black mica instead of activated charcoal?
Yes. A black cosmetic mica can be used for the eyes and mouth.
Make sure you’re using a cosmetic-grade ingredient intended for the application.
How long do homemade bath bombs last?
The answer depends on the ingredients, fragrance, packaging, storage conditions, and exposure to moisture.
For the best results, keep them tightly packaged in a cool, dry environment and protect them from humidity.
Final Thoughts
I love projects like these because they look much more complicated than they really are.
The bath bomb formula itself is simple. The snowman mold and a little bit of painting are what make them look special.
Once you’ve figured out the consistency of your bath bomb mixture, you can start having fun with different shapes, colors, fragrances, and designs.
And these are especially fun around Christmas.
Make a batch for yourself, package them up as homemade gifts, or let everyone in the family pick their own little snowman.
The best part is that underneath all that cuteness, they’re still just a simple, fizzy bath bomb.
Snowman Bath Bomb Printable Recipe
Equipment
- Scale
- Mixing bowl
- Bath bomb mold
- Wax paper
- Paint brush
- Witch hazel
Ingredients
- 5.4 ounce | 54% Baking Soda
- 2.7 ounce | 27% Citric Acid
- 0.90 ounce | 9% Epsom Salt
- 0.30 ounce | 3% Kaolin Clay
- 0.20 ounce | 2% Avocado Oil
- 0.20 ounce | 2% Polysorbate 80
- 0.30 ounce | 3% Berry Balsam Fragrance Oil
Instructions
Making The Bath Bomb
- Weigh out all the ingredients.
- Prepare a spot to set the finished bath bombs.
- Mix the baking soda, citric acid, epsom salt and kaolin clay together.
- Add the avocado oil, polysorbate 80 and fragrance oil. (You will need to use your hands to get this properly mixed).
- Spray the mixture with witch hazel and mix with your hands. You are going for a consistency of wet sand.
- Scoop a heaping pile of the mixture into each half of your mold.
- Firmly press the mold together until it closes.
- Slowly, take off the top of the mold. I found that gently squeezing the mold helps to release it.
- Turn the mold upside down to release the bath bomb onto your wax paper.
- Allow to cool for 24 hours.
Painting the Snowman
- Scoop a small pile of activated charcoal down.
- Slowly add witch hazel, until the activated charcoal is wet.
- Mix well.
- Paint the two eyes on the snowman bath bomb.
- Paint the mouth.
- Scoop out a small amount of the orange mica powder and mix with witch hazel.
- Paint on the snowman’s nose.
- Allow to dry.