
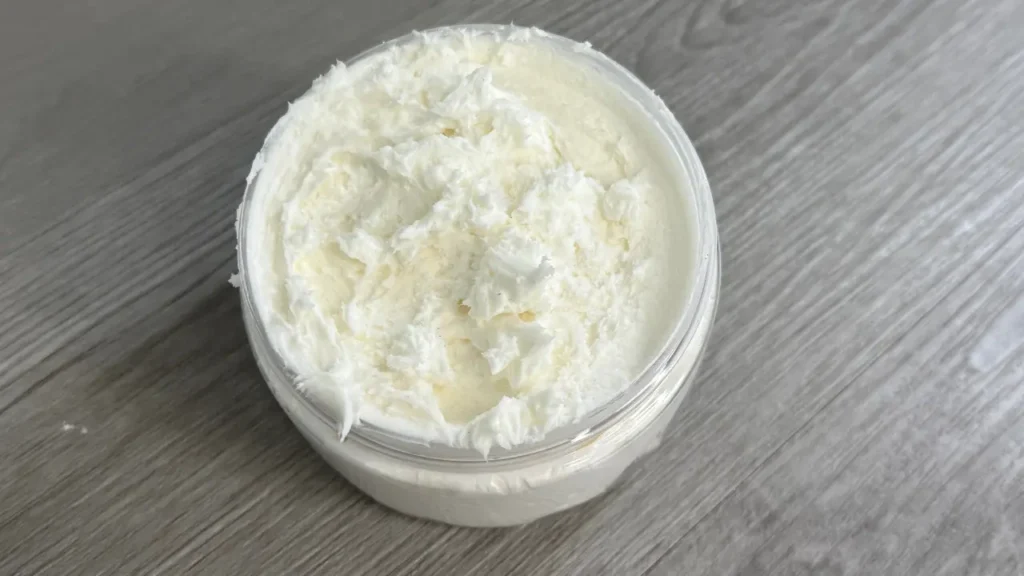
If you’ve ever wanted to make your own whipped body butter at home, this is a great place to start. Homemade body butter is surprisingly easy to make, requires just a handful of ingredients, and can be customized with your favorite plant butters, carrier oils, and fragrances.
Unlike traditional lotions, body butter doesn’t contain water. Instead, it combines nourishing plant butters and oils to create a rich moisturizer that helps soften the skin and reduce moisture loss. Whipping the mixture with a hand mixer gives it a light, fluffy texture that makes it easy to scoop out and apply.
For this recipe, I’m combining shea butter, kokum butter, and hazelnut oil to create a whipped body butter that feels rich without being overly heavy. I’ve also included BTMS-25 to contribute to the texture and skin feel, along with a little tapioca starch to help reduce the oily after-feel. The finished result is a powdery feel rather than a greasy feeling.
Whether you’re new to making homemade skincare or have already experimented with a few DIY recipes, I’ll walk you through the ingredients, explain how the formula works, and show you exactly how to melt, cool, and whip everything together.
What Is Whipped Body Butter?
Whipped body butter is a rich, water-free moisturizer made from plant-based butters and carrier oils. The ingredients are melted together, cooled, and whipped with a hand mixer until they become light and fluffy.
Unlike lotion, which contains water and requires an emulsifier and preservative system, traditional body butter is made entirely from oils, butters, and other oil-soluble ingredients.
Because there is no water in the formula, body butter has a richer consistency than lotion. It helps soften dry skin and leaves behind an emollient layer that helps reduce moisture loss.
Body butter is especially nice for areas that tend to become dry, such as your hands, elbows, knees, legs, and feet.
One of the best things about making your own body butter is that you can customize the ingredients to achieve the texture and skin feel you prefer. You can experiment with different plant butters, carrier oils, and small amounts of starch to create a product that works well for your preferences.
Prefer to Watch How to Make A Body Butter That Leaves A Powdery Finish?
Some links on this website are affiliate links, meaning I may earn a small commission if you click and make a purchase. This comes at no additional cost to you.
Body Butter vs. Lotion: What’s the Difference?
Although body butter and lotion are both used to moisturize the skin, they are formulated quite differently.
The biggest difference is water content.
Traditional body butter is an anhydrous formulation, meaning it does not contain water. Lotion, on the other hand, is an emulsion made by combining water and oils with the help of an emulsifier.
| Feature | Body Butter | Lotion |
|---|---|---|
| Water content | No water | Contains water |
| Texture | Rich and thick | Lightweight to creamy |
| Main ingredients | Plant butters and oils | Water, oils, and emulsifier |
| Preservative | Not traditionally required for a properly made water-free formula | Requires a broad-spectrum preservative |
| Skin feel | Rich, emollient finish | Generally lighter |
| Application | A little goes a long way | Easily spread over larger areas |
Body butter is particularly useful when you want a richer product for dry areas of the skin.
If you prefer something lighter that spreads easily over your entire body, you might enjoy making your own lotion instead.
You can find my tutorial on how to make and customize a basic lotion formula if you’d like to try making an emulsified moisturizer.
Ingredients for Whipped Body Butter
Let’s take a closer look at the ingredients in this recipe and why I chose them.
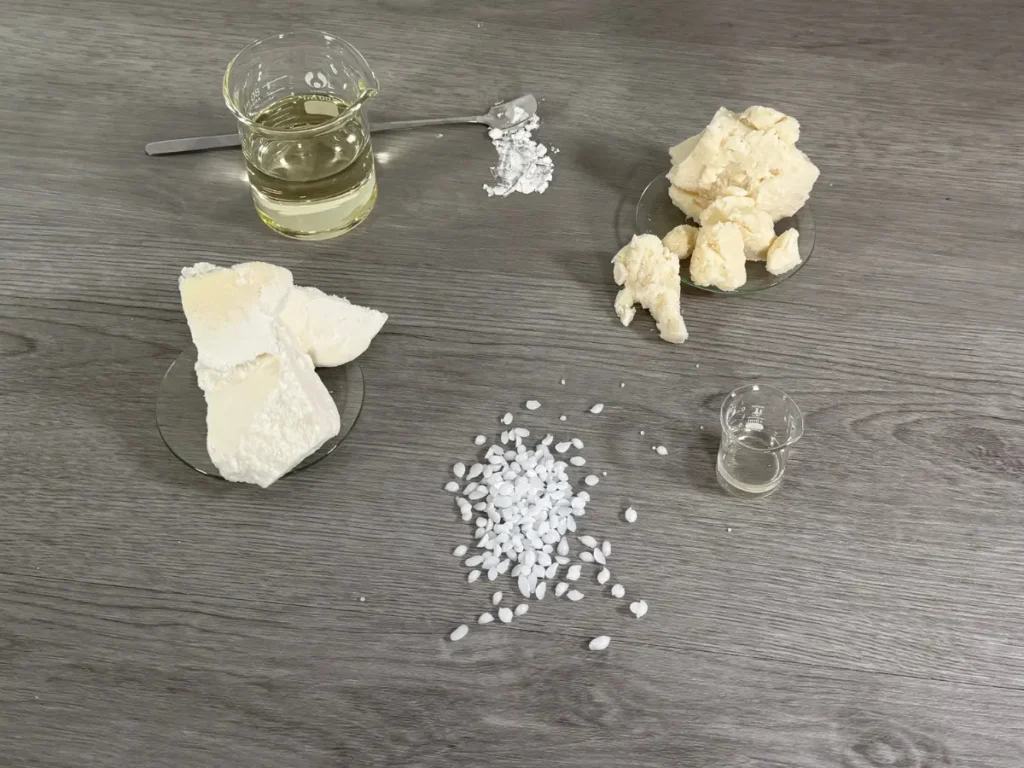
Shea Butter
Shea butter is a popular ingredient in homemade skincare because of its rich, emollient properties.
It contains fatty acids that help soften the skin and contribute to a comfortable, moisturized skin feel.
Shea butter also gives body butter its creamy consistency and helps create a rich, nourishing texture.
I’m using shea butter as the main plant butter in this recipe. It provides a creamy base while working together with the kokum butter to give the finished product structure.
Hazelnut Oil
Hazelnut oil is a lightweight-feeling carrier oil that helps soften the skin and improves the spreadability of body butter.
I chose hazelnut oil because I wanted a body butter that would spread easily without feeling overly heavy. It helps balance the richness of the solid butters and gives the finished product a smoother consistency.
Hazelnut oil makes up 40% of this recipe, so it has a significant influence on the finished texture.
When formulating body butter, the amount of liquid oil you use matters. Increasing the liquid oil generally creates a softer product, while reducing it can make the finished body butter firmer.
Kokum Butter
Kokum butter is a firm plant butter obtained from the seeds of the kokum tree.
Compared with softer butters, kokum butter is quite firm. This makes it particularly useful in body butter formulations because it helps provide structure.
I also chose kokum butter because it leaves behind a dryer feeling. Kokum butter helps create a body butter that is easier to scoop while still spreading nicely when applied.
BTMS-25
BTMS-25 is a cationic emulsifier and conditioning ingredient Unlike traditional nonionic emulsifiers, BTMS-25 has a positive electrical charge. This is important because positively charged conditioning ingredients have an affinity for negatively charged surfaces, including skin and hair.
BTMS-25 is commonly used in hair conditioners and other personal care formulations. It can also contribute to the texture and skin feel of certain cosmetic products.
There are several things to understand about BTMS-25:
- Conditioning properties: Its cationic component is used for conditioning applications.
- Texture: The cetearyl alcohol in the blend contributes thickness and structure.
- Skin feel: It can contribute to the overall feel of a finished formulation.
Fragrance Oil
Fragrance oil gives your body butter its scent. You can choose a fragrance that suits your preferences, whether you prefer something floral, fruity, fresh, or warm.
When choosing a fragrance, make sure it is suitable for leave-on skin products.
Tapioca Starch
Tapioca starch is included to help reduce the oily feeling that can sometimes occur with homemade body butter.
It helps absorb some of the excess surface oil and gives the finished product a softer, more powdery skin feel.
You only need a small amount. Too much starch can affect the texture and make the body butter feel powdery when applied.
For this formula, we’re using just 0.5% tapioca starch.
Make sure you incorporate it thoroughly to prevent dry pockets or little clumps of starch in your finished body butter.
Understanding the Body Butter Formula
Before making your body butter, it’s helpful to understand how the different ingredients work together.
| Ingredient | Percentage | Weight |
|---|---|---|
| Shea butter | 35% | 70 g |
| Hazelnut oil | 40% | 80 g |
| Kokum butter | 21% | 42 g |
| BTMS-25 | 2% | 4 g |
| Cashmere Plum Fragrance Oil | 1.5% | 3 g |
| Tapioca starch | 0.5% | 1 g |
| Total | 100% | 200 g |
The formula is made up primarily of three ingredients: shea butter, hazelnut oil, and kokum butter.
Together, these make up 96% of the recipe.
The shea butter provides the creamy base, the hazelnut oil helps soften the formula and improve spreadability, and the kokum butter provides firmness.
The remaining 4% consists of BTMS-25, fragrance oil, and tapioca starch.
Understanding these proportions is useful if you decide to experiment with your own body butter formulas later.
For example, increasing the percentage of liquid oil while decreasing the solid butters will generally result in a softer product. Increasing the percentage of a firm butter can make the finished body butter harder.
Whenever you change an ingredient, adjust the other ingredients so that your total formula remains at 100%.
How to Make Body Butter Less Greasy
One of the biggest complaints about homemade body butter is that it can feel too oily.
This usually comes down to the combination of butters and oils used, along with the amount of starch added to the formula.
There are a few things you can do to create a body butter that feels lighter on the skin.
Choose the Right Carrier Oil
The carrier oil you choose makes a difference in the finished texture.
Some oils have a heavier, richer skin feel, while others feel lighter and spread more easily.
For this recipe, I’m using hazelnut oil. It provides good spreadability and helps balance the richness of the shea butter.
When developing your own formula, you can experiment with different carrier oils. Just remember that changing the oil can change the finished consistency and skin feel.
Add a Small Amount of Starch
Starches are commonly used in homemade body butter to help reduce the oily after-feel.
I’m using tapioca starch in this recipe. It helps give the finished body butter a softer, less greasy feel.
Arrowroot powder is another popular choice for homemade body butter. Both can help improve the skin feel, although the finished texture can vary depending on the starch and the amount used.
For this formula, we’re using 0.5% tapioca starch.
Balance the Solid Butters and Liquid Oils
The ratio of solid butters to liquid oils has a major influence on the finished body butter.
A formula with a higher percentage of liquid oil will generally be softer, while a formula with more firm butters will have a thicker consistency.
In this recipe, kokum butter helps provide structure to balance the hazelnut oil.
Stearic acid is another ingredient sometimes used to add firmness to body butter. However, it isn’t included in this particular recipe because the kokum butter and BTMS-25 already contribute to the formula’s structure.
Adding stearic acid without adjusting the rest of the ingredients would change the percentages and could make the finished product too firm or waxy.
Equipment Needed
You don’t need a lot of specialized equipment to make whipped body butter.
Here is what I recommend having ready before you begin:
- Digital kitchen scale
- Double boiler
- Heat-safe mixing container
- Silicone spatula
- Hand mixer
- Large bowl for an ice bath
- Container to store it in
A digital scale is especially important because cosmetic formulations are measured by weight. Measuring by tablespoons or cups will not give you the same accuracy.
Make sure all your equipment and containers are clean and completely dry before you start.
Use promo code SUMMERRAIN at Northwood Candle and Craft for $10 off your order.
How to Make Whipped Body Butter
Making whipped body butter involves melting the ingredients, cooling the mixture, and whipping it until it becomes light and fluffy.
The cooling process is particularly important. You want the mixture to cool enough to thicken before whipping, but not become completely solid.
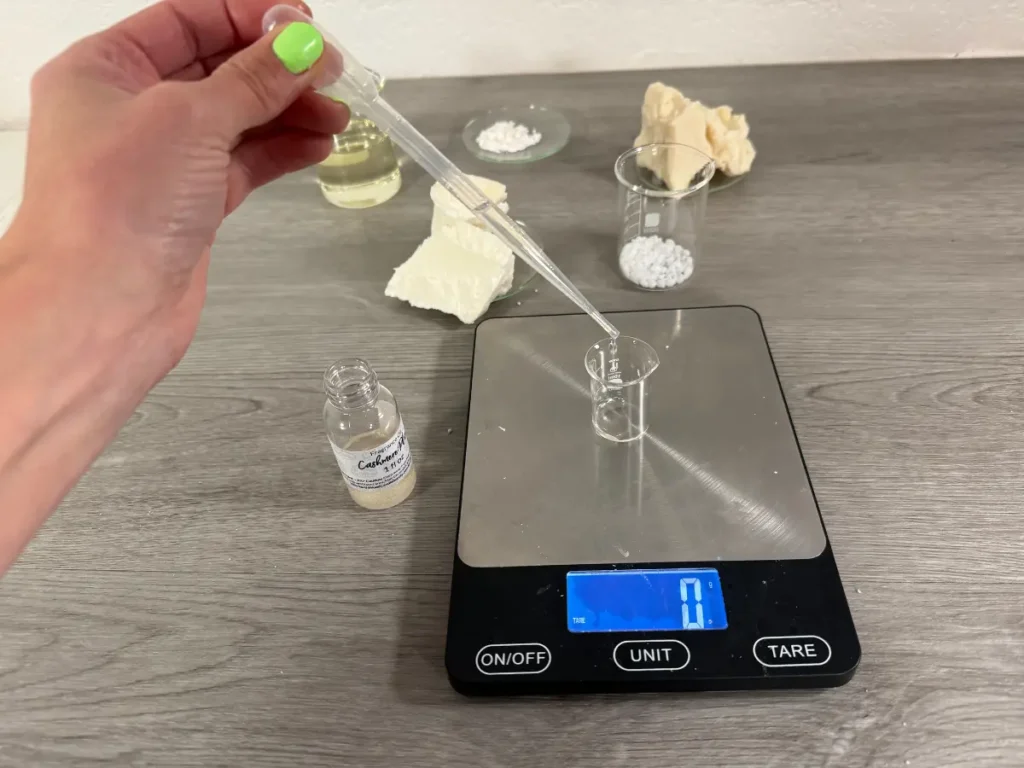
Step 1: Weigh Ingredients
Weigh all of you ingredients separately. I find that weighing them firsts makes it so you dont accidently forget to add and ingredient.
Step 2: Melt Heat Phase Ingredients
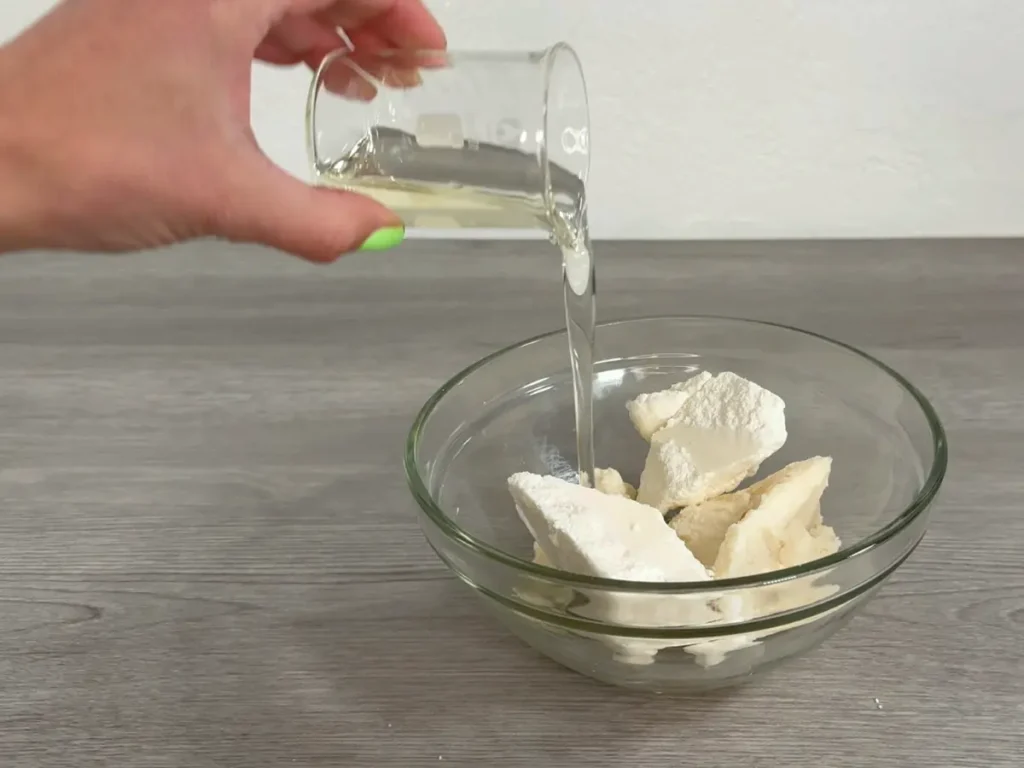
Place the kokum butter, shea butter, hazelnut oil and BTMS-25 into a heat-safe container.
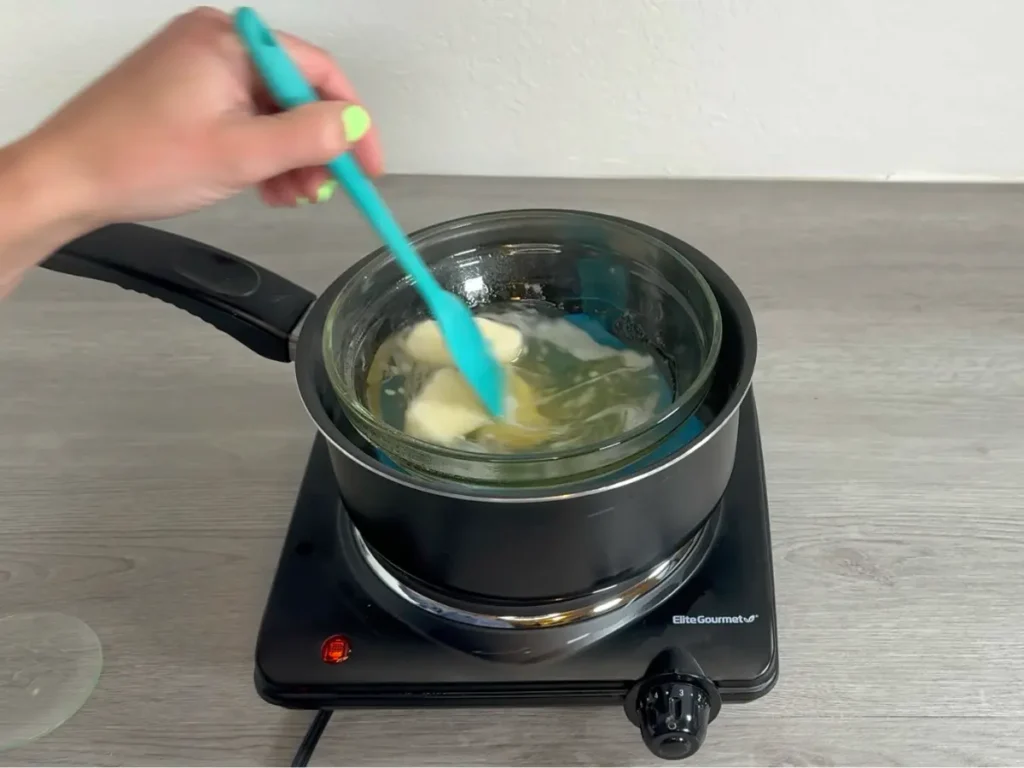
Place the container in a double boiler and gently heat until both ingredients have completely melted.
Stir occasionally to help everything melt evenly.
Avoid overheating the mixture. You only need enough heat to melt the solid ingredients.
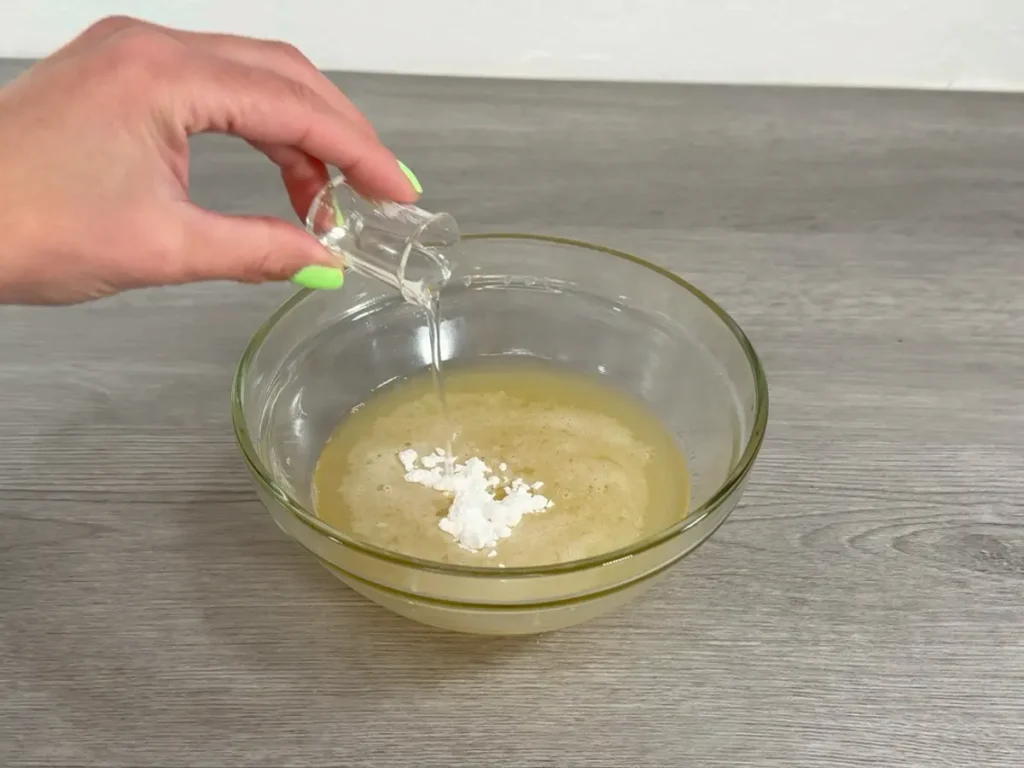
Step 3: Add the Fragrance Oil and Tapioca Starch
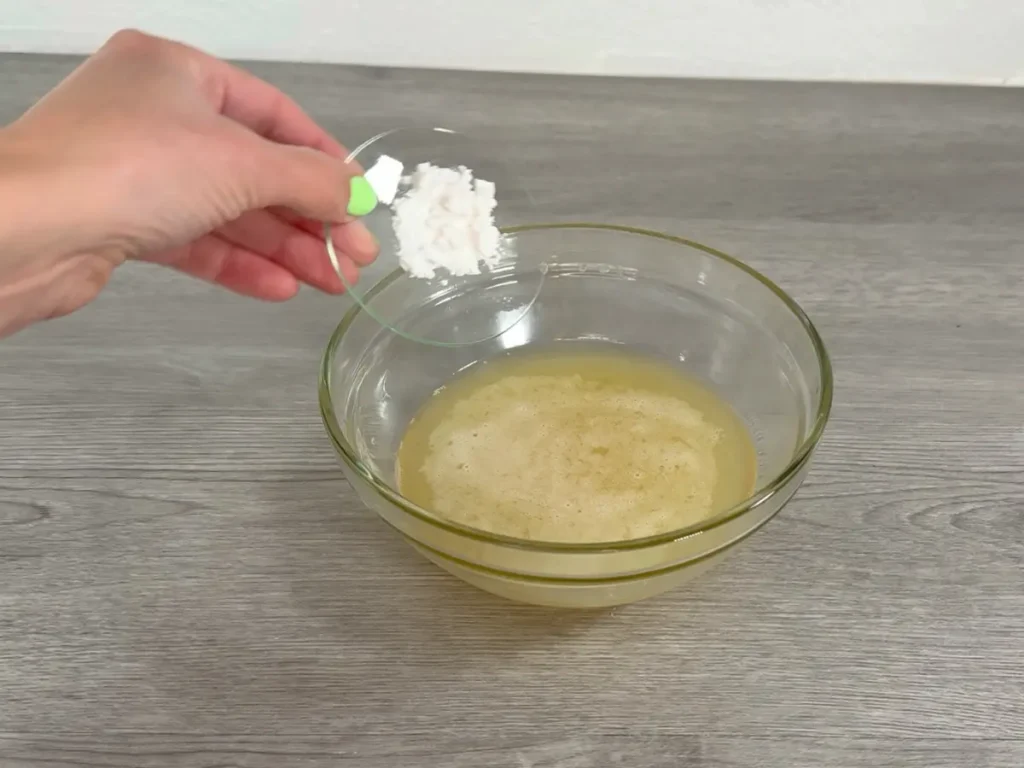
Once the mixture has cooled slightly, add the fragrance oil and tapioca starch.
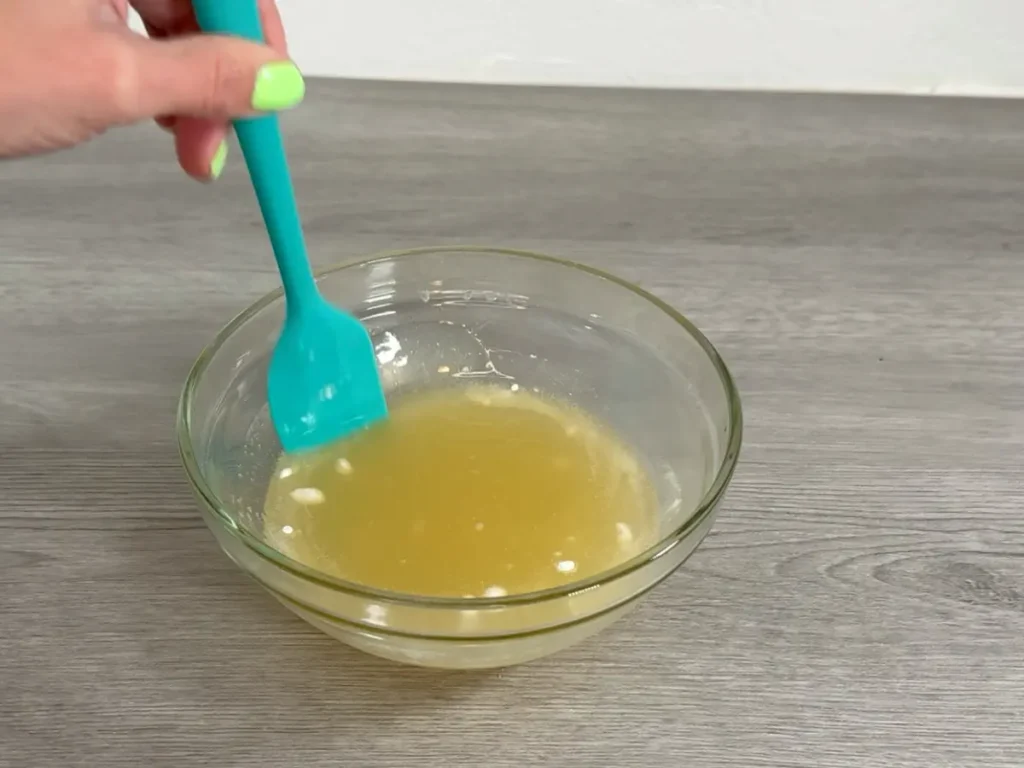
Stir well to distribute the ingredients.
Make sure the starch is incorporated evenly, I found that squishing it on the side of bowl works great.
Step 4: Cool the Mixture in an Ice Bath
This is one of the most important steps when making whipped body butter.
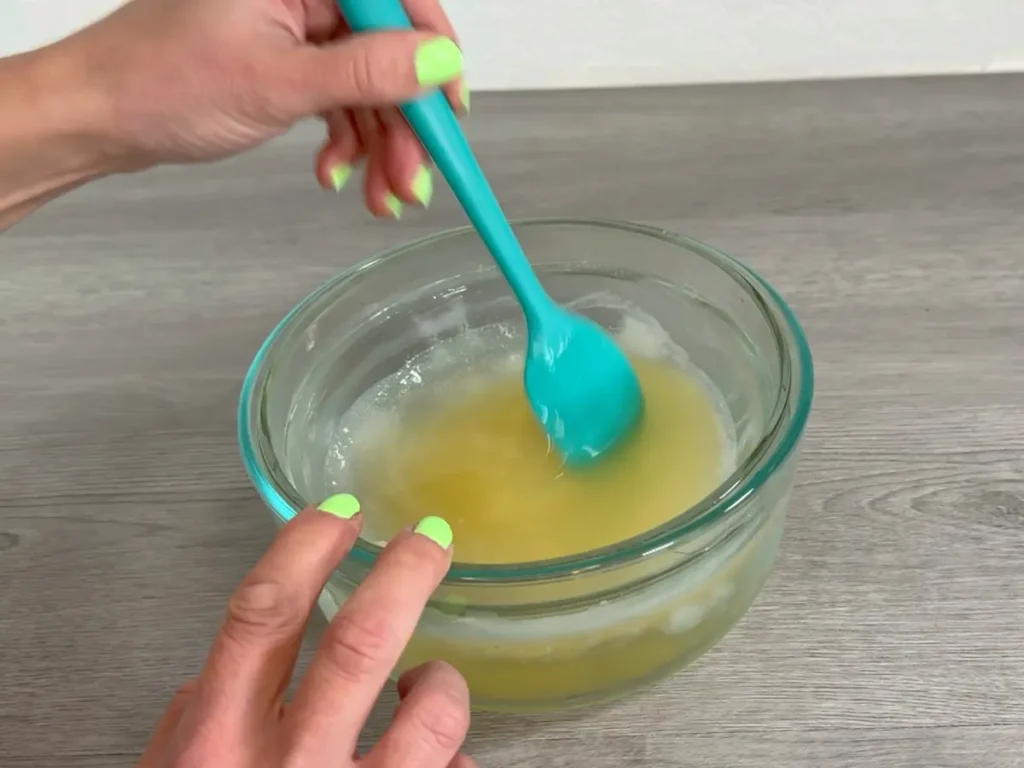
Prepare an ice bath by placing ice and a little cold water in a larger bowl.
Set your container of melted body butter into the ice bath. Make sure water cannot get into your mixture.
Stir it as it cools. Paying attention to the sides of the container, really scrape those.
The ice bath helps speed up the cooling process and helps to prevent the body butter for becoming grainy.
Learn more about Grainy Body Butter in my Guide.
Step 5: Whip the Body Butter
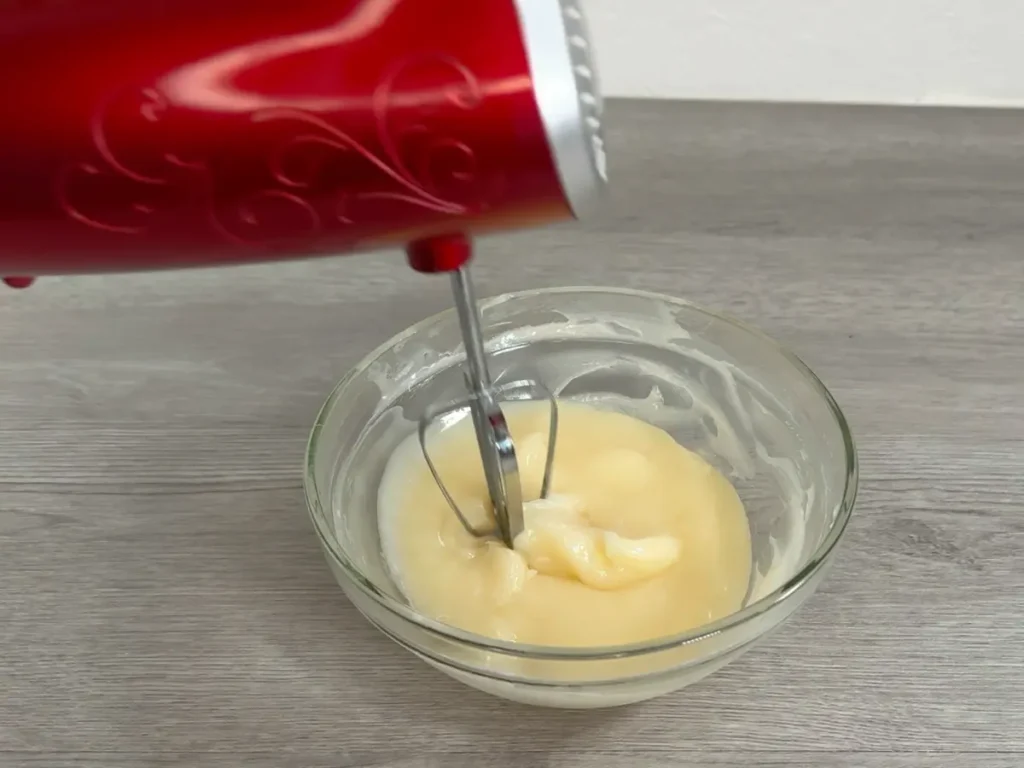
Using a hand mixer, begin whipping the mixture.
Start at a lower speed to prevent splashing, then increase the speed as the mixture begins to thicken.
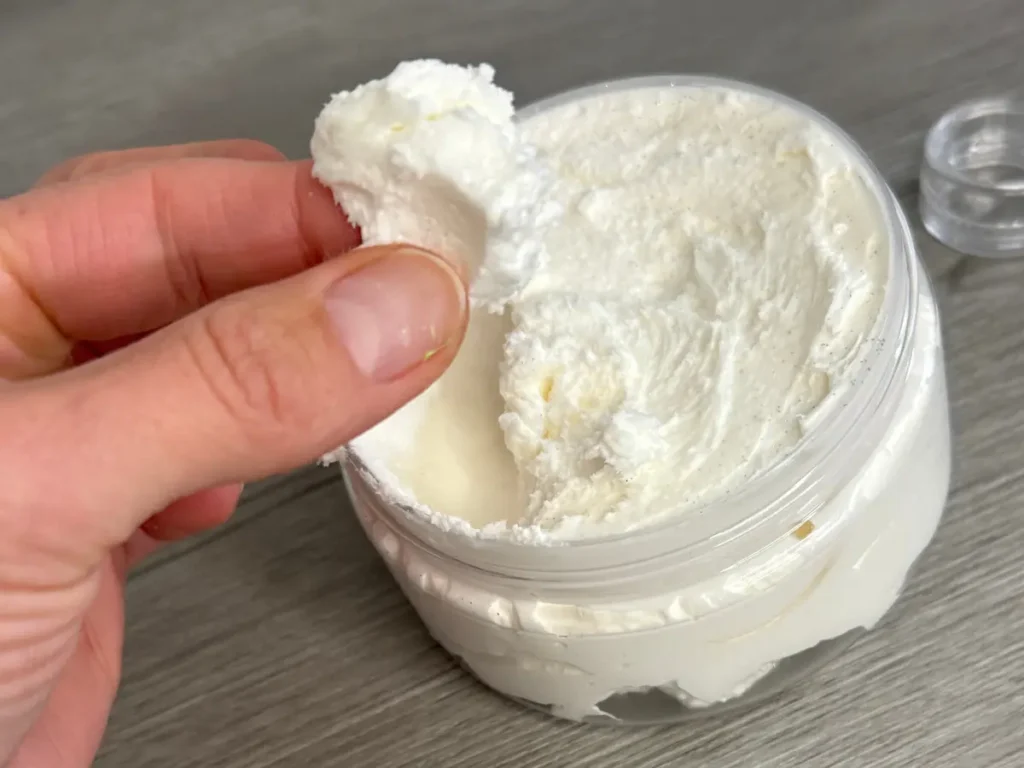
Continue mixing until the body butter becomes light, fluffy, and creamy.
The whipping process incorporates air into the mixture, creating that soft, whipped texture.
The amount of time needed will depend on how cool the mixture is and how quickly it begins to thicken.
If the mixture is still too warm and isn’t holding its shape, return it to the ice bath briefly (or leave it to cool at room temperature for a while), before continuing to whip.
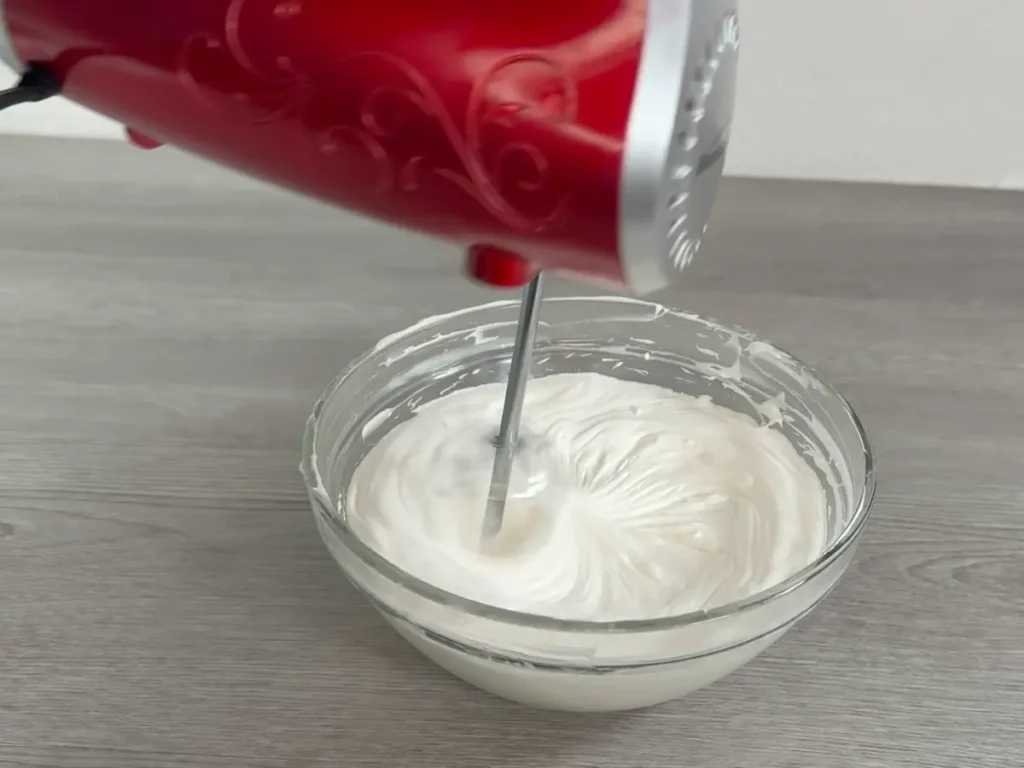
Avoid whipping while the mixture is still warm and completely liquid. It won’t hold its shape properly.
Remember that whipping increases the volume of your body butter by incorporating air. Your finished batch will still weigh 200 g, but it will take up more space than the original melted mixture.
Step 6: Package Your Whipped Body Butter
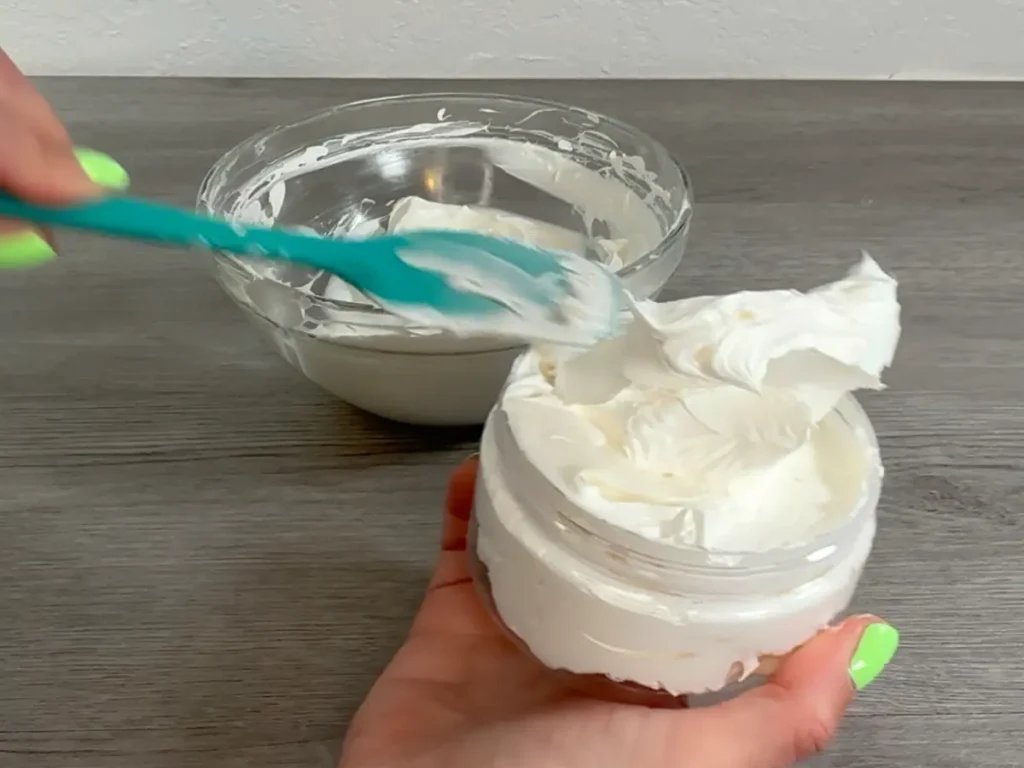
Once your body butter is light and fluffy, it’s ready to package.
Transfer it into a clean, completely dry container with a tight-fitting lid.
You can use a spatula to fill your container or pipe the body butter in if you want a more decorative finish.
Keep the container sealed between uses and avoid introducing water into the product.
Your homemade whipped body butter is ready to enjoy!
Benefits of Whipped Body Butter
One of the reasons I enjoy making body butter is that each ingredient has a purpose. Rather than using a long list of ingredients, this recipe combines a few carefully selected ingredients to create a moisturizing product with a soft, whipped texture.
Here are some of the benefits of making your own.
- Customizable ingredients: You can choose the plant butters, carrier oils, and fragrance that you prefer.
- Rich moisture: Plant butters and oils help soften the skin and reduce moisture loss.
- No added water: This is an anhydrous formula, so there is no water phase to emulsify.
- Easy to make: You don’t need complicated equipment or advanced formulation skills.
- Adjustable texture: The ratio of solid butters to liquid oils influences how firm or soft the finished product will be.
How to Use Whipped Body Butter
Whipped body butter is concentrated, so you generally only need a small amount.
To use:
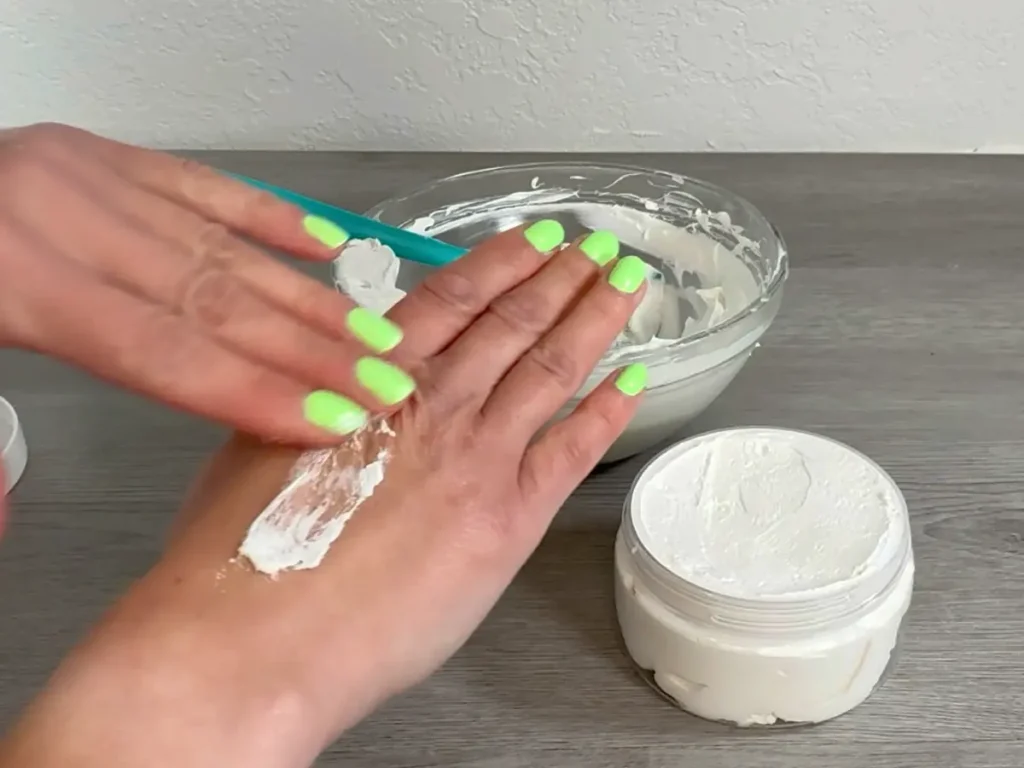
- Scoop a small amount using clean, dry fingers.
- Warm the body butter between your palms for a few seconds.
- Gently massage it into your skin until evenly distributed.
I particularly like using body butter on areas that tend to become dry, such as elbows, knees, hands, and feet.
You can also apply it after bathing or showering when your skin is slightly damp. This can help leave your skin feeling soft and comfortable.
Because body butter is oil-based, start with a small amount and add more if needed. Applying too much can leave your skin feeling oily.
How to Store Homemade Body Butter
Because this recipe doesn’t contain water, it doesn’t require a traditional broad-spectrum preservative as formulated. However, that doesn’t mean it is immune to contamination.
Water can accidentally enter your container through wet hands, damp equipment, or improper storage. Introducing water creates a different preservation concern.
Always use clean, dry equipment and packaging. Avoid getting water into the container, and consider using a small cosmetic spatula instead of dipping wet fingers into the product.
Store your body butter in a cool, dry location away from direct sunlight and heat.
Body butter can soften or melt in warmer temperatures because it is made from plant butters and oils. If it becomes too soft, moving it to a cooler location may help it firm up again.
How Long Does Homemade Body Butter Last?
The shelf life of homemade body butter depends largely on the freshness and stability of the oils and butters used.
For this whipped body butter, I would estimate a shelf life of 6–9 months.
For the best results:
- Use fresh, good-quality ingredients.
- Keep the container tightly sealed.
- Store away from heat and sunlight.
- Avoid introducing water or other contaminants.
- Discard the product if you notice an unusual smell, discoloration, or a change in appearance.
Don’t assume that a water-free product will last indefinitely.
For more information, see my guide on how to determine the shelf life of homemade cosmetics.
Troubleshooting Homemade Body Butter
Even though making whipped body butter is relatively simple, you may run into a few problems along the way.
Here are some common issues and what you can do about them.
Why Won’t My Body Butter Whip?
If your body butter won’t whip, it may not have cooled enough.
The mixture needs to thicken before you begin whipping. If it is still too warm and liquid, it won’t hold air or develop that fluffy consistency.
Place the mixture in an ice bath or leave at room temperature for a little longer, stirring occasionally, until it begins to thicken. Then try whipping again.
Why Is My Body Butter Melting?
Body butter is made primarily from oils and plant butters, which soften when exposed to heat.
If your body butter is melting, the room temperature may simply be too warm. This is especially common during summer months.
You can help by storing your body butter somewhere cool and away from direct sunlight.
Keep in mind that whipped body butter is not designed to remain firm in every temperature. Its consistency will naturally change as the surrounding temperature changes.
How Do I Make Body Butter More Firm?
The firmness of body butter depends on the ratio of solid butters to liquid oils.
In this recipe, kokum butter helps provide structure. If you want a firmer body butter, you can experiment with increasing the amount of hard butter and reducing the liquid oil accordingly.
Remember that changing the percentages will change the formula, so make small test batches before producing a larger amount.
How Do I Make Body Butter Less Greasy?
There are three main things to consider:
- Choose a lighter-feeling carrier oil.
- Include a small amount of starch, such as tapioca or arrowroot powder.
- Adjust the ratio of solid butters to liquid oils.
This recipe uses hazelnut oil and tapioca starch to help create a softer, less greasy skin feel.
Keep in mind that body butter is naturally oil-based, so it will always have a richer feel than a traditional lotion.
Why Is My Body Butter Grainy?
Graininess is a common problem with homemade body butter.
It can happen when some of the fatty components in the butters begin to crystallize as the mixture cools. Changes in temperature and cooling speed can affect the final texture.
If your body butter has developed a grainy texture, see my separate guide on how to fix grainy body butter.
Why Has My Whipped Body Butter Lost Its Fluffy Texture?
Whipped body butter contains air, which gives it its light, fluffy consistency.
Over time, the air can escape and the body butter may settle or become denser. Temperature changes can also cause the mixture to soften.
This doesn’t necessarily mean the product has gone bad. However, if you notice changes in smell, color, or appearance, it’s best to discard it.
Frequently Asked Questions
Can You Make Body Butter Without Shea Butter?
Yes! You can use other plant butters, such as mango butter or cocoa butter, depending on the texture you want.
However, different butters have different melting points and consistencies. Substituting one butter for another may change how firm or soft your finished body butter is.
You can read more about mango butter and its uses in homemade skincare.
Can You Use a Different Carrier Oil?
Absolutely. You can experiment with different carrier oils, such as sweet almond oil, jojoba oil, or fractionated coconut oil.
Each oil has a different fatty acid composition and skin feel, so your finished body butter may feel slightly different.
When changing the carrier oil, keep the overall formula at 100% and make a small test batch first.
Can You Use Essential Oils Instead of Fragrance Oil?
Yes, provided you choose an essential oil that is appropriate for leave-on skin products.
Essential oils are concentrated and need to be used within their recommended dermal limits. Some are unsuitable for certain applications or may cause skin irritation.
Always check the supplier’s safety documentation and use appropriate usage rates.
Does Whipped Body Butter Need a Preservative?
A properly formulated, water-free body butter does not generally require a traditional broad-spectrum preservative because microorganisms need available water to grow.
However, water contamination can introduce microorganisms, so proper manufacturing practices, clean packaging, and dry storage are important.
A preservative is not a substitute for good hygiene.
You can learn more in my article about why preservatives matter in DIY skincare.
Can You Put Whipped Body Butter in a Plastic Container?
Yes. You can use suitable cosmetic-grade plastic containers or glass jars.
Choose a container with a tight-fitting lid that is appropriate for oil-based products.
Remember that whipping increases the volume of the mixture, so choose a container with enough room for the finished product rather than relying only on the weight of the melted ingredients.
Can You Refrigerate Homemade Body Butter?
You can refrigerate body butter if you need to cool it or firm it up, but it isn’t necessary for normal storage.
Repeated temperature changes can affect the texture and may contribute to graininess.
For everyday storage, a cool, dry location away from direct sunlight is generally preferable.
Final Thoughts
Making whipped body butter at home is a simple way to create a rich, customizable moisturizer.
Once you’ve mastered the basic recipe, you can experiment with different fragrances and even turn your finished body butter into something a little more colorful and decorative.
In my next tutorial, I’ll show you how to use this same body butter recipe to make a beautiful swirled unicorn body butter with pink, blue, and yellow colors.
DIY Whipped Body Butter Recipe: Easy, Natural, Non-Greasy
Equipment
- Scale
Ingredients
- 70 grams Shea butter
- 80 grams Hazelnut oil
- 42 grams Kokum butter
- 4 grams BTMS-25
- 3 grams Cashmere Plum Fragrance Oil
- 1 gram Tapioca starch
Instructions
- Melt the shea butter, kokum butter, hazelnut oil and BTMS-25 together using a double boiler over low heat.
- Stir in the fragrance oil and tapioca starch, mixing until evenly incorporated.
- Allow the mixture to cool a bit.
- Place the body butter into an ice bath to ensure it cools rapidly.
- Whip with a hand mixer until light and fluffy.
- Transfer the whipped body butter into a container and enjoy!