
Making your own hair conditioner from scratch sounds much more complicated than it actually is.
If you have ever made a lotion, you already understand many of the basic steps. Homemade conditioner is an emulsion, which means we are combining water and oil with an emulsifier to create a smooth, stable product.
The part that makes hair conditioner a little different from a basic body lotion is the conditioning ingredient we use. In this recipe, that ingredient is BTMS-50. It helps create the creamy texture you expect from conditioner while also giving your hair slip, softness, and easier detangling.
When I first started making conditioner, I was intimidated by the idea of creating a product from scratch. Once you understand what each ingredient is doing, though, the process becomes much less overwhelming.
And that is really the goal here.
Instead of simply giving you a recipe and telling you what to do, I want to walk you through why the ingredients are there, what each phase does, how to make the emulsion, and what to watch for if your conditioner doesn’t turn out the way you expected.
If you’re new to formulation, you may also want to start with my Skincare Formulation for Beginners guide. It explains the basics of emulsions, ingredient functions, preservatives, and formulation in more detail.
Prefer to watch this project instead of reading it?
Some links on this website are affiliate links, meaning I may earn a small commission if you click and make a purchase. This comes at no additional cost to you.
Why Make Your Own Hair Conditioner?
Why bother making conditioner when you can simply buy a bottle at the store?
For me, one of the biggest advantages is being able to control what goes into the formula.
You can choose the oils, fragrance, conditioning ingredients, and other additives based on what you want from your finished product.
Making your own conditioner also teaches you something that a premade product can’t: how a formula actually works.
Once you understand the basic structure of this recipe, you can start experimenting with different ingredients instead of treating every recipe as a completely new project.
This is a great beginner formulation because the ingredient list is relatively short and the process is very similar to making a lotion.
Is Homemade Conditioner Difficult to Make?
Not really.
There are a few things you need to pay attention to, especially when it comes to:
- Measuring ingredients accurately
- Heating the phases properly
- Getting the emulsion established
- Adding your cool-down ingredients at the correct temperature
- Preserving the finished conditioner
- Checking the pH
If you’ve never made an emulsion before, don’t worry. You don’t need a chemistry degree to get started.
If you want to understand the science behind combining oil and water, take a look at What Is an Emulsion in Skincare and Why Does It Matter?.
That same basic concept applies here.
What Makes This a Conditioner Instead of a Lotion?
This is an important question.
At first glance, a conditioner can look a lot like a lotion. Both contain water, oils, an emulsifier, and often a humectant.
The difference is that hair conditioner is formulated specifically for the hair.
The star of this recipe is BTMS-50, a cationic conditioning emulsifier.
Hair has a relatively negative surface charge, and cationic conditioning ingredients are attracted to it. This allows BTMS-50 to deposit onto the hair and improve slip, reduce static, and make the hair easier to comb.
If you’re curious about why cationic ingredients are commonly used in hair care, my guide to Surfactants Explained goes into more detail about the different types of surfactants and why cationic ingredients are particularly useful for conditioning.
Hair Conditioner Ingredient Summary
Here’s the quick version of what each ingredient is doing:
| Ingredient | What It Does |
|---|---|
| Distilled water | Forms the water phase |
| BTMS-50 | Emulsifies and provides conditioning and slip |
| Cetyl alcohol | Adds structure, thickness, and a smooth feel |
| Olive oil | Adds emollience and softness |
| Coconut oil | Adds richness and conditioning |
| Vegetable glycerin | Humectant that helps attract and retain moisture |
| Fragrance | Adds scent |
| Optiphen Plus | Broad-spectrum preservation |
The important thing to remember is that no single ingredient is responsible for the entire product.
The conditioner works because all of these ingredients are doing different jobs within the formula.
How This Hair Conditioner Is Formulated
This recipe is divided into three phases:
- Oil Phase
- Water Phase
- Cool-Down Phase
Why can’t we just throw everything into one container?
Because different ingredients need to be handled differently.
The ingredients in the oil phase need to be heated and melted. The water phase is heated separately so the two phases can be combined at a similar temperature. Ingredients that are more sensitive to heat, such as the preservative and fragrance, are added later during the cool-down phase.
Understanding the purpose of each phase will make this recipe much easier to troubleshoot.
Oil Phase
The oil phase contains the ingredients that need to be melted before we combine them with the water phase.
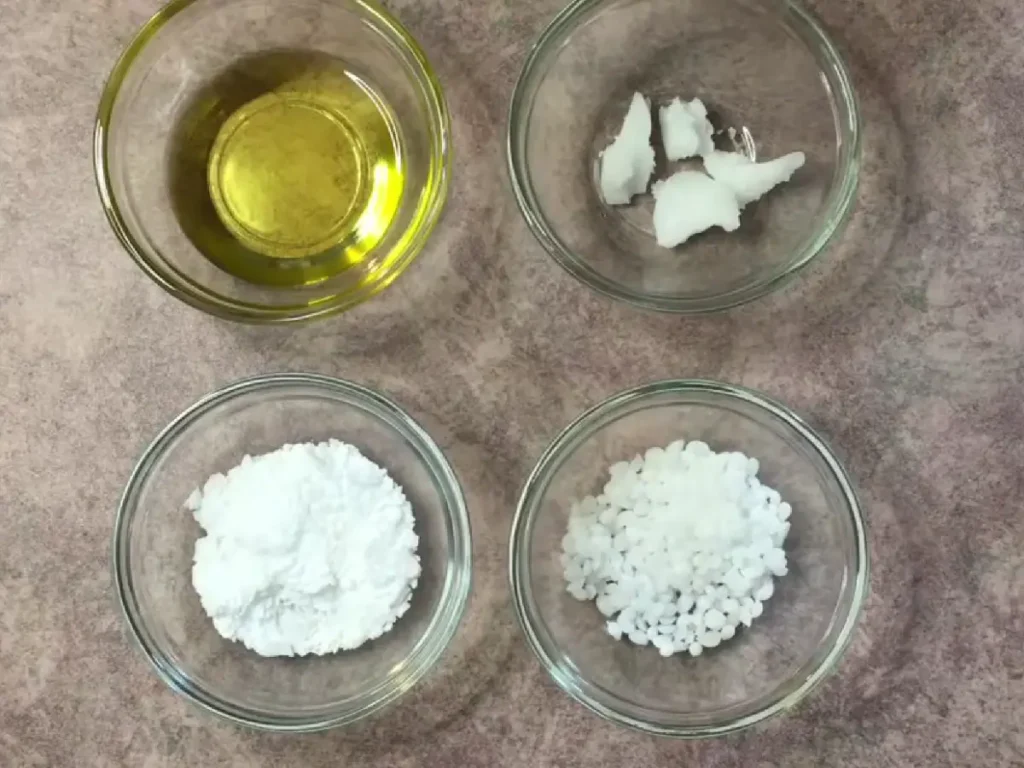
BTMS-50
BTMS-50 is the most important ingredient in this recipe when it comes to conditioning.
It is a cationic emulsifying wax that helps combine the oil and water phases while also providing conditioning benefits.
Unlike a basic emulsifier that is primarily there to create an emulsion, BTMS-50 also contributes to the way the conditioner feels on your hair.
It helps provide:
- Slip
- Easier detangling
- Reduced static
- A smoother feel
- A creamy conditioner texture
BTMS-50 is one of those ingredients that does more than one job, which makes it especially useful in beginner formulas.
You’ll probably notice that BTMS-50 has a somewhat distinctive smell when you first open the package. Don’t let that worry you. At the percentage used in this recipe, that smell shouldn’t carry through to the finished conditioner.
If you want to learn more about how ingredients can perform multiple functions in a formula, check out Double-Duty Ingredients in Skincare Formulation.
Cetyl Alcohol
Cetyl alcohol is a waxy, white ingredient that helps give the conditioner body and a smooth, creamy texture.
It also contributes to the slip of the finished product, which is especially useful in a rinse-out conditioner.
Don’t let the word “alcohol” scare you.
Cetyl alcohol is a fatty alcohol, not the same type of alcohol you might associate with rubbing alcohol or drying ingredients in some personal-care products.
In this formula, it helps improve the texture and feel of the conditioner.
Coconut Oil
We add Coconut oil as it is one of the emollients in this formula.
Coconut oil is particularly interesting in hair care because its fatty acid composition allows it to interact with the hair shaft differently from some larger oils.
It also adds richness and conditioning to the finished product.
However, more oil isn’t automatically better.
If you have fine or easily weighed-down hair, you may eventually find that you prefer a lighter formula. That is one of the advantages of learning formulation: once you understand the purpose of each ingredient, you can start making informed changes.
Olive Oil
Olive oil is another emollient that contributes softness and slip to the conditioner.
It also gives the formula some richness without requiring a large amount of oil.
I like having a combination of oils rather than relying on one oil for the entire oil phase because different oils can change the way a finished product feels.
Water Phase
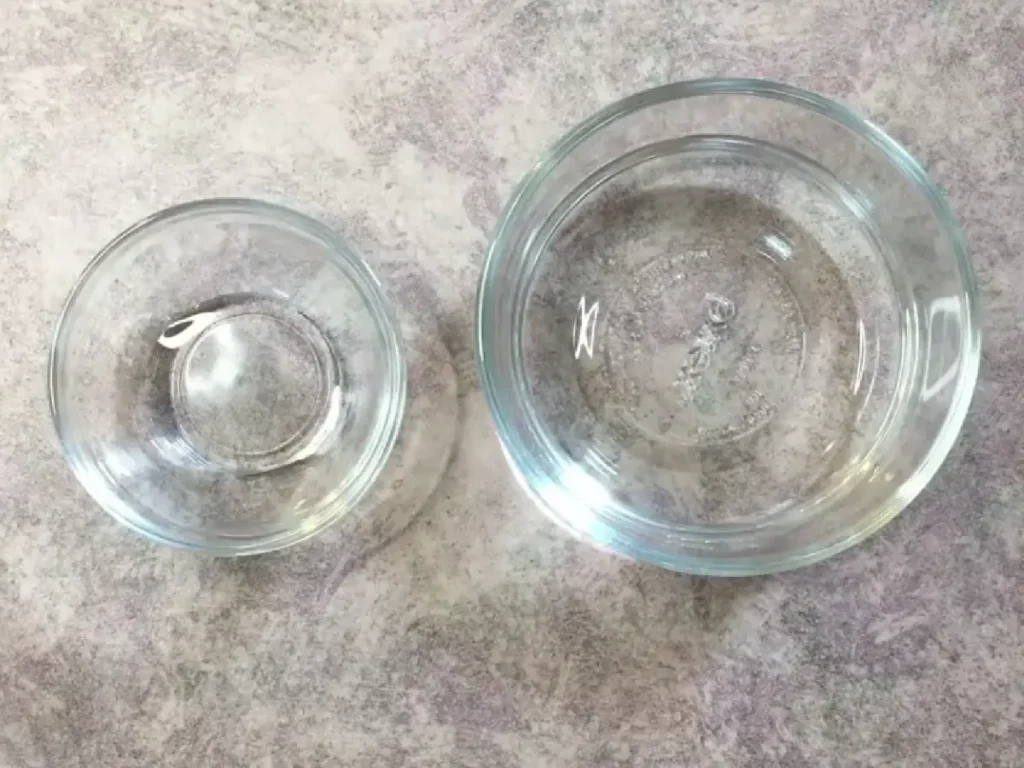
The water phase makes up most of this conditioner.
That may seem surprising when you’re making a product designed to condition hair, but water is actually doing a lot of the work here.
Distilled Water
Distilled water makes up the largest portion of the formula.
Why distilled water instead of tap water?
Tap water contains minerals and other components that can vary from one location to another. Using distilled water gives you a much more consistent starting point when formulating.
This is especially helpful when you’re learning because it removes one variable from the formula.
If your product doesn’t turn out correctly, you don’t have to wonder whether the mineral content of your water played a role.
And because this is a water-based product, we also need to think seriously about preservation.
Vegetable Glycerin
Vegetable glycerin is a humectant.
Humectants help attract and hold water, making them useful in moisturizing formulas.
Glycerin is a common ingredient in both skincare and hair care because it can contribute to hydration without requiring a large amount of oil.
If you’re unfamiliar with humectants, take a look at my guide to Humectants, Occlusives and Emollients Explained.
Understanding these three categories makes it much easier to understand why different ingredients are included in your formulas.
Cool-Down Phase
Once the emulsion has cooled enough, we can add the ingredients that don’t need to be heated.
This is where we add the fragrance and preservative.
Optiphen Plus
Because this conditioner contains water, it needs a broad-spectrum preservative.
The original version of this recipe uses Optiphen Plus.
Optiphen Plus is a preservative blend containing phenoxyethanol, caprylyl glycol, and sorbic acid. It is commonly used in water-containing cosmetic products and is recommended for use at 0.75–1.5%, depending on the formulation. It works particularly well in formulas with a pH below 6.
For this recipe, we’re using it at 1%.
A preservative isn’t optional in a water-based conditioner.
Water-containing products can support the growth of bacteria, yeast, and mold. Contamination isn’t necessarily something you’ll be able to see or smell.
If you’re new to preservatives, I highly recommend reading Why Preservatives Matter in DIY Skincare before making water-based products.
Fragrance Oil
Fragrance oil is completely optional.
If you want a scented conditioner, use a fragrance specifically approved for the intended cosmetic application and follow the supplier’s recommended usage rate.
You can also leave the fragrance out entirely.
If you omit the fragrance, replace that percentage with distilled water so the formula still totals 100%.
You can also use an appropriate essential oil, but remember that “natural” doesn’t automatically mean risk-free. Essential oils still need to be used at appropriate rates for the product and intended use.
Beginner Hair Conditioner Recipe
Oil Phase
| Ingredient | Percentage | Amount |
|---|---|---|
| BTMS-50 | 5% | 0.40 oz |
| Cetyl Alcohol | 5% | 0.40 oz |
| Coconut Oil | 2% | 0.16 oz |
| Olive Oil | 8% | 0.64 oz |
Water Phase
| Ingredient | Percentage | Amount |
|---|---|---|
| Distilled Water | 74% | 5.92 oz |
| Vegetable Glycerin | 3% | 0.24 oz |
Cool-Down Phase
| Ingredient | Percentage | Amount |
|---|---|---|
| Fragrance Oil | 2% | 0.16 oz |
| Optiphen Plus | 1% | 0.08 oz |
Total batch size: 8 oz
How to Make Hair Conditioner From Scratch
Step 1: Prepare Your Equipment
Now that you know what the ingredients are doing, let’s make the conditioner.
Before you begin, gather:
- Digital scale
- Heat-safe containers
- Double boiler
- Infrared thermometer
- Immersion blender
- Spatula
- pH meter or appropriate pH strips
- Finished container
Because this is a water-based product, clean and sanitize your equipment and containers before you begin.
Step 2: Weigh the Water Phase
A digital scale is particularly important here.
Don’t measure this recipe using teaspoons or tablespoons. Small differences in the amount of emulsifier or preservative can affect your finished product.
If you’re new to weighing cosmetic ingredients, my guide to Percentages vs. Grams in Skincare Formulation explains why formulas are written in percentages and why weighing ingredients is more accurate.
Add the distilled water and vegetable glycerin to a heat-safe container.
Set this aside while you prepare the oil phase.
Step 3: Weigh the Oil Phase
In a second heat-safe container, weigh:
- BTMS-50
- Cetyl alcohol
- Coconut oil
- Olive oil
Step 4: Heat Both Phases
Place both containers into a double boiler.
I like to heat the two phases at the same time so they reach approximately the same temperature.
Heat until the oil-phase ingredients have completely melted.
Stir as needed to help everything melt evenly.
You don’t want to see solid pieces of BTMS-50 or cetyl alcohol remaining in the oil phase before you combine it with the water phase.
Step 5: Combine the Oil and Water Phases
Once the oil phase is completely melted, combine the two phases in your mixing container.
Now the emulsification process begins.
At this point, the mixture may look thin or somewhat cloudy. Don’t panic.
It hasn’t finished developing its final texture yet.
Step 6: Emulsify
Use an immersion blender to mix the conditioner.
Blend in short bursts rather than running the blender continuously.
This helps incorporate the phases while also allowing you to monitor the temperature.
Continue mixing until the mixture begins to look uniform.
As the conditioner cools, it will continue to thicken.
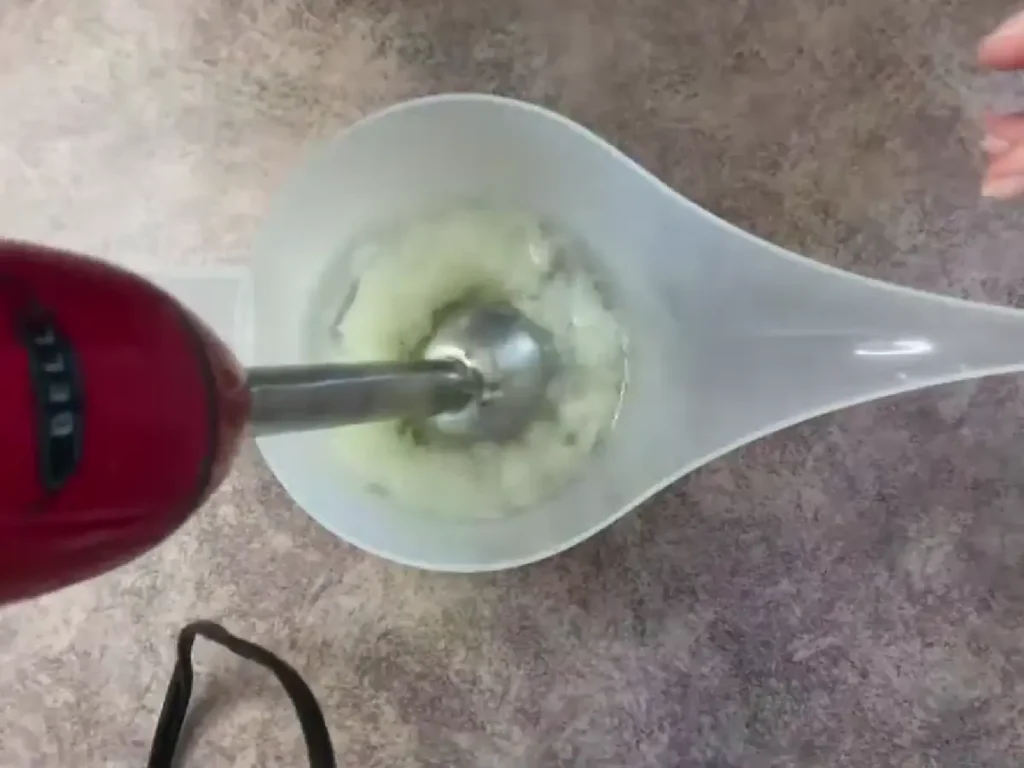
Step 7: Cool to 120°F
Continue mixing in bursts while the conditioner cools.
Once the mixture reaches approximately 120°F, you can move on to the cool-down phase.
This temperature is important because you don’t want to add your cool-down ingredients while the mixture is unnecessarily hot.
Step 8: Add the Preservative and Fragrance
Add the Liquid Germall Plus and fragrance oil.
Mix thoroughly with the immersion blender or spatula until everything is completely incorporated.
Remember that the preservative should be used according to the manufacturer’s current recommended usage rate.
Step 9: Check the pH
Once the conditioner is thoroughly mixed, check the pH.
If an adjustment is needed, make small changes and test again rather than trying to correct the entire batch at once.
This is one of those steps that becomes much easier with practice.
Step 10: Package Your Conditioner
Transfer the conditioner into your clean container.
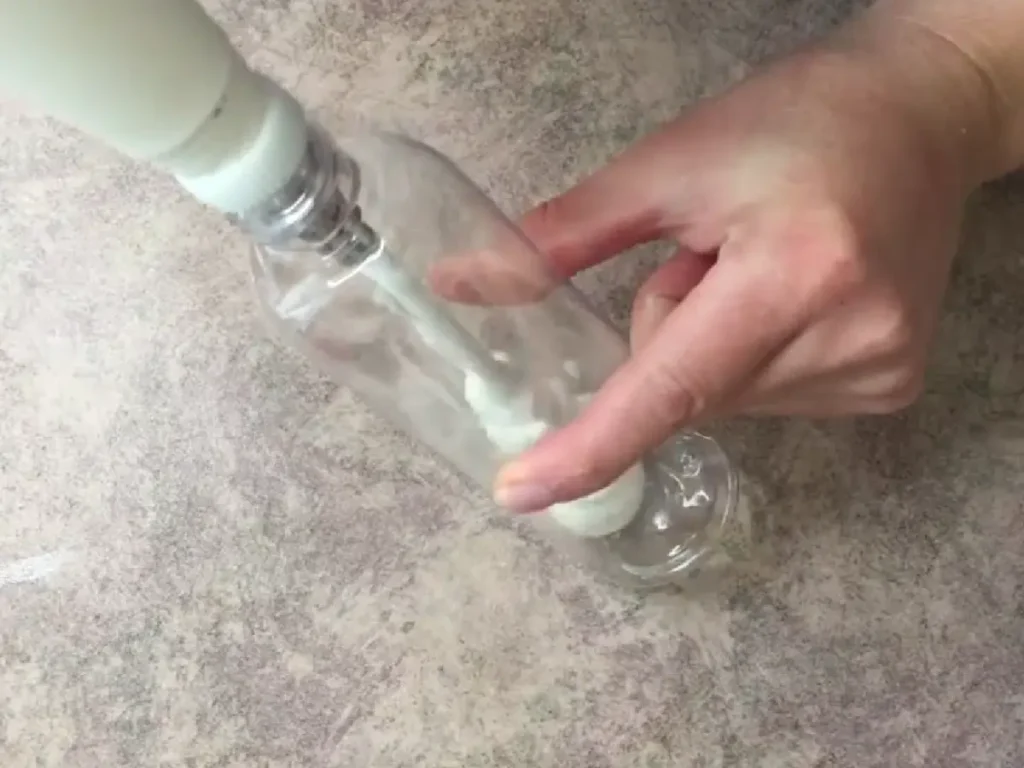
If your conditioner is too thick to pour easily, you can use a piping method.
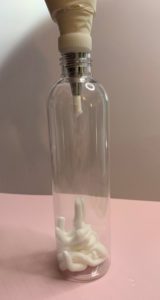
Place the conditioner into a clean disposable piping bag or plastic bag, cut a small opening in one corner, and squeeze the conditioner into the container.
This can be much less messy than trying to pour a thick conditioner directly into a narrow bottle.
Why Do I Need to Heat Both Phases?
This is one of the most common questions when someone first makes an emulsion.
Why not melt the BTMS-50 and then pour in room-temperature water?
Heating both phases helps ensure that the oil-phase ingredients are completely melted and allows the emulsifier to work properly when the two phases are combined.
You don’t need to obsess over having the exact same temperature down to the degree, but you do want the phases to be reasonably close in temperature when you combine them.
This is one of the same principles you’ll see when making natural body lotion.
What Container Should I Use for Homemade Conditioner?
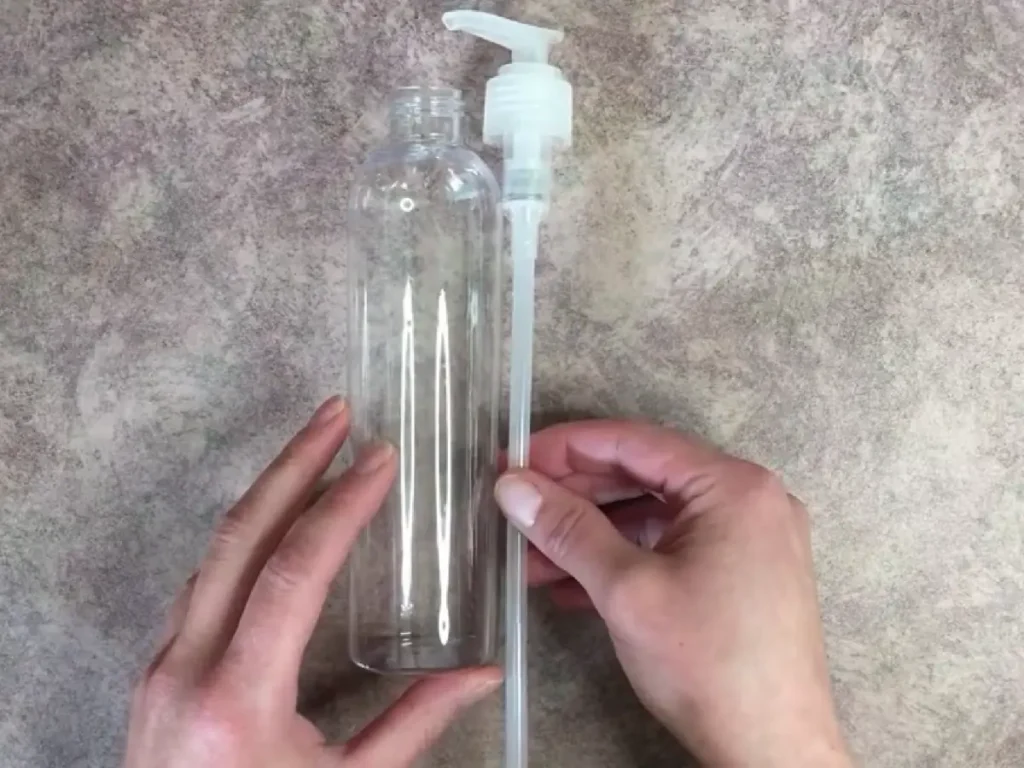
The container you choose depends on the final consistency of your conditioner.
A pump bottle works well for a conditioner that is thick but still pumpable.
A wide-mouth jar can work for a thicker conditioner, although you need to consider how the product will be exposed to water and repeated handling in the shower.
For a beginner, I generally prefer a pump container because it makes dispensing easier and limits how often you have to put wet hands into the product.
How Do I Size the Pump Tube?
If you’re using a pump lid and the tube is too long for your bottle, you can trim it.
Place the pump beside the container and mark approximately where the bottom of the container meets the tube.
Because the oil and water phases need to be brought together under controlled conditions.
Cut the tube slightly longer than you think you’ll need.
You can always trim more.
It’s much easier to shorten a tube than to make one longer!
Why Is My Conditioner Too Thin?
Don’t immediately assume that something went wrong.
Conditioner can become thicker as it cools.
If your conditioner is still very thin after it has completely cooled, there are several things worth looking at:
- Were the phases heated properly?
- Was the BTMS-50 completely melted?
- Were the ingredients weighed accurately?
- Was the emulsion blended thoroughly?
- Did the formula actually reach a stable emulsion?
Remember that emulsification is more than simply stirring oil and water together.
If you want to understand why emulsions sometimes fail, read What Is an Emulsion in Skincare and Why Does It Matter?
Do I Need to Check the pH?
Yes.
This is an important step that is easy to overlook when you’re first learning to make hair products.
Hair and scalp products are generally formulated within an acidic-to-mildly acidic range rather than at the high pH associated with traditional soap.
Rather than guessing at the pH, check your finished conditioner with a pH meter or appropriate pH strips.
For a beginner-friendly explanation of pH and formulation, I recommend starting with my Skincare Formulation for Beginners guide.
If you need to make a pH adjustment, do so with an appropriate diluted acid solution and make small adjustments rather than adding a large amount all at once.
Why Is My Conditioner Separating?
Separation is one of the most frustrating problems when you’re learning to make emulsions.
If your conditioner separates, possible causes include:
- The phases weren’t heated sufficiently
- The oil phase wasn’t completely melted
- The phases were combined at an inappropriate temperature
- The emulsion wasn’t mixed thoroughly enough
- The formula itself needs adjustment
This is exactly why understanding formulation is more useful than simply memorizing recipes.
Once you know what the emulsifier is doing, you can start figuring out why something went wrong instead of throwing the batch away and starting over without knowing what happened.
Can I Change the Oils?
Eventually, yes—but I wouldn’t recommend changing several ingredients at once when you’re first learning.
Every oil has different characteristics, and changing the oil phase can change:
- Texture
- Thickness
- Slip
- Weight on the hair
- Emulsion stability
- Overall feel
Start with the recipe as written.
Once you know what the finished conditioner feels like, change one thing at a time.
That gives you a much better idea of what each change actually did.
This is one of the most useful habits you can develop as a beginner formulator.
Can I Add Other Ingredients?
Absolutely.
Once you’re comfortable making the basic conditioner, you can begin experimenting with ingredients designed for hair care.
For example, you might eventually explore:
- Panthenol
- Hydrolyzed proteins
- Aloe
- Different carrier oils
- Botanical extracts
- Different conditioning agents
But don’t fall into the trap of thinking that adding more ingredients automatically creates a better conditioner.
It doesn’t.
A well-balanced formula with a handful of ingredients can perform beautifully.
The goal isn’t to see how many ingredients you can fit into one bottle. The goal is to understand what each ingredient contributes and why you’re using it.
My What Each Ingredient Does in Skincare Formulation guide is a useful next step if you’re ready to start thinking about formulations instead of individual recipes.
How Do I Use Homemade Hair Conditioner?
Use this as you would a traditional rinse-out conditioner.
After shampooing, apply a small amount of conditioner to the lengths and ends of your hair.
Work it through your hair, concentrating on areas that tend to tangle or feel dry.
Allow it to sit for a few minutes, then rinse thoroughly.
You may need to experiment with the amount you use depending on your hair type.
Fine hair may need less product, while thick, dry, or coarse hair may tolerate more.
Can I Use This Conditioner on My Scalp?
This is a rinse-out conditioner, so I generally recommend concentrating it on the lengths and ends of the hair rather than applying a large amount directly to the scalp.
Everyone’s hair and scalp are different.
If your scalp is sensitive or prone to irritation, keep your formula simple and be particularly careful with fragrance and essential oils.
How Should I Store Homemade Conditioner?
Store your finished conditioner in a clean, suitable container away from excessive heat and moisture.
Because this is a water-based product, proper preservation and clean handling are extremely important.
Don’t add water to the bottle in the shower to thin out the conditioner.
And don’t assume that a product is safe simply because it looks and smells normal.
Microbial contamination isn’t always visible.
If you want to understand this better, read Why Preservatives Matter in DIY Skincare.
Can I Make a Larger Batch?
Yes.
This is one of the reasons I recommend learning to work with percentages.
Once a formula is written in percentages, you can calculate the amount needed for a different batch size.
For example, if you wanted to make a 500 gram batch, you would multiply each percentage by 500.
The math is simple:
Percentage × batch size = ingredient weight
So 5% BTMS-50 in a 500 gram batch would be:
0.05 × 500 = 25 grams
If you’re new to this, my guide to Percentages vs. Grams in Skincare Formulation walks through the process step by step.
What Should I Make Next?
Once you’ve successfully made your first conditioner, you have a few directions you can go.
If you want to stay with hair care, try making a DIY Hair Mask.
You can also explore a DIY Syndet Shampoo Bar if you’re ready to learn how surfactants work in hair cleansing products.
Or, if you want to stay focused on liquid formulations, my Natural Body Lotion is another great way to practice creating a stable emulsion.
And if formulation is what really interests you, start with Skincare Formulation for Beginners. That is where you’ll start learning how to build formulas rather than simply follow them.
Final Thoughts
Making hair conditioner from scratch is one of those projects that looks intimidating until you understand what is happening inside the bottle.
You have a water phase, an oil phase, a conditioning emulsifier, and a few supporting ingredients. Heat the appropriate ingredients, bring the phases together, emulsify them, cool the mixture, add your preservative and fragrance, check the pH, and package your finished conditioner.
That’s really the foundation.
Once you understand those steps, you aren’t limited to this one recipe anymore.
You can begin experimenting with different oils, conditioning ingredients, humectants, and hair-care additives while understanding why you’re making each change.
And that is where making your own products gets really fun.
Printable Hair Conditioner Recipe
limitations, and other instructions.
If you are just starting out with DIY formulation, don’t worry about making the perfect conditioner on your first try. Focus on understanding the process. Once you know what each ingredient does and why each step matters, you’ll have the foundation you need to start creating your own formulas.
Beginner Hair Conditioner Recipe
Equipment
- Spatula
- Double boiler
- Infrared thermometer
- Stick (immersion) blender
- Ph meter or sticks
- Container for mixing
Ingredients
Oil Phase
- 0.40 ounce | 5% BTMS 50
- 0.40 ounce | 5% Cetyl Alcohol
- 0.16 ounce | 2% Coconut Oil
- 0.64 ounce | 8% Olive Oil
Water Phase
- 5.92 ounce | 74% Distilled Water
- 0.24 ounce | 3% Vegetable Glycerin
Cool Down Phase
- 0.16 ounce | 2% Fragrance Oil
- 0.08 ounce | 1% Optiphen Plus
Instructions
- Weight the water phase ingredients into a heat safe container.
- In another heat safe container, weight your oil phase ingredients.
- Heat both in a double boiler until the oil phase ingredients are melted. I will normally heat both the water and the oil phase at the same time, in a pan with a silicone mat on the bottom. This way, the two phases are heated to about the same temperature.
- After the oil phase is melted, pour both the water and the oil phase ingredients into a mixing container.
- Mix well with the stick blender. You will want to keep mixing in bursts, until the temperature drops to 120°F.
- Add your fragrance oil and preservative. Then stick blend to combine.
- Place the conditioner into containers. This can be done by placing the mixture into a plastic baggie and cutting one corner. Then you can easily pipe it into the container.
I have a client who is allergic to Coconut Oil. What would you substitute the Coconut Oil in this recipe?
Try mango butter
instead of BTMS 50 what can be used?
You could try BTMC and cetearyl alcohol.