
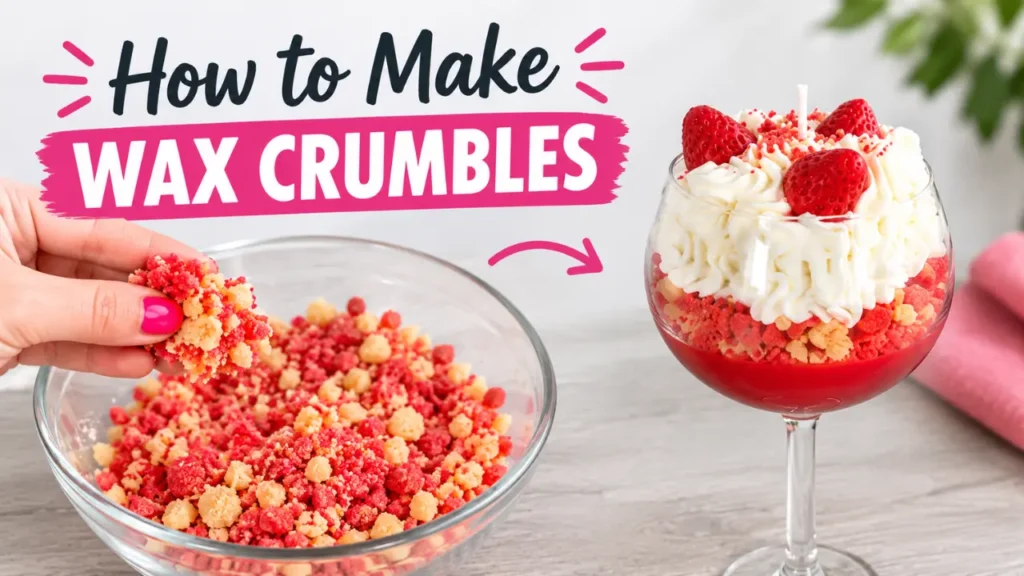
Wax crumbles are one of those candle-making techniques that looks much more complicated than it actually is.
You don’t need a special mold, perfectly shaped pieces, or even a perfect wax pour. In fact, the goal is to make the wax irregular.
Wax crumbles can add color and texture to decorative candles and are especially fun for creating dessert-inspired designs. You can make them in almost any color combination and use them underneath whipped wax, around embeds, or anywhere you want to add a little more detail to a candle.
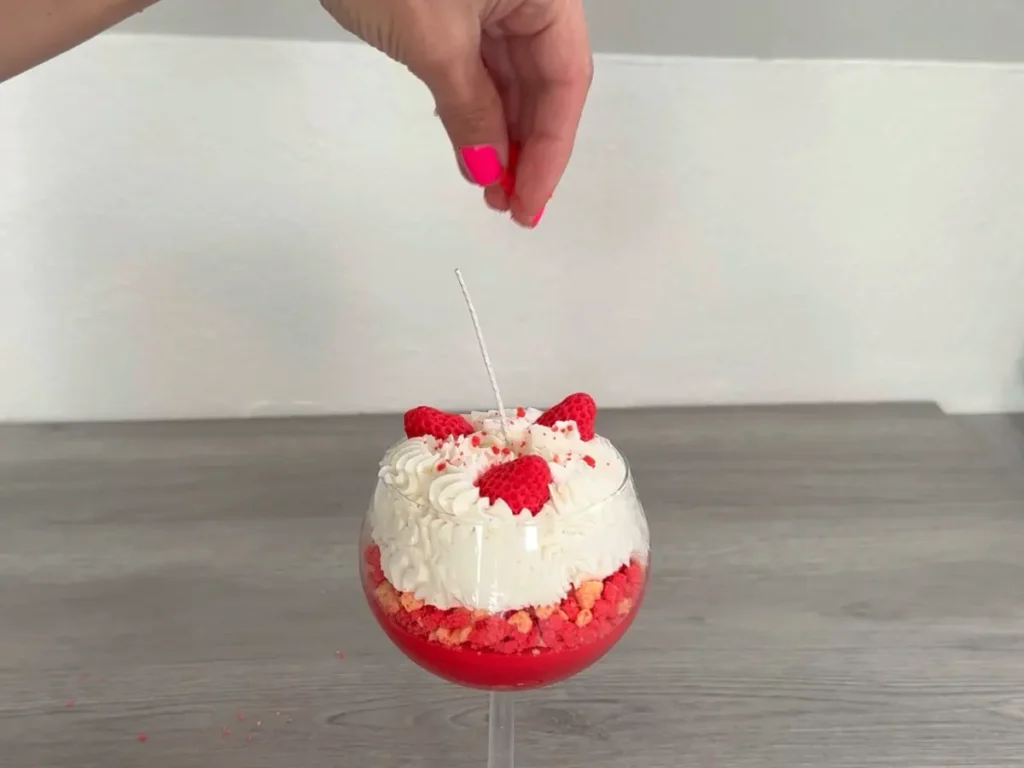
For this project, I made red and golden-brown wax crumbles using Golden Wax 415 soy wax and Sugared Strawberry fragrance oil. I used the finished crumbles to create a strawberry-inspired dessert candle.
And there’s another reason I love this project: it’s a great way to use leftover colored candle wax.
Once you make a batch, you can save the crumbles and use them in another candle later.
Watch the Full Wax Crumbles Tutorial
If you’d rather see the process than read through it, I’ve filmed the entire process from melting and coloring the wax to cutting and mixing the finished crumbles.
The video shows exactly what I mean when I say to cut, jostle, cut again, and rough up the edges.
Affiliate Disclosure: This post may contain affiliate links. If you purchase something through one of my links, I may earn a small commission at no additional cost to you. I only recommend products and supplies that I personally use, trust, or believe would be helpful for your project. These commissions help support Summer Rain DIY and allow me to continue creating free tutorials and recipes.
What Are Wax Crumbles?
Wax crumbles are small, irregular pieces of candle wax that are used as decorative elements in candles.
They’re different from traditional wax embeds because you’re not trying to create a recognizable shape.
Instead, you’re creating pieces of different sizes and shapes.
That irregular texture is what makes them useful for things like:
- Dessert-inspired candles
- Strawberry and berry candles
- Cookie or cake designs
- Cereal-inspired candles
- Decorative candle toppings
- Layered candle designs
- Textured candle surfaces
- Filling spaces around wax embeds
- Using underneath whipped wax
You can make them in one color or combine several colors.
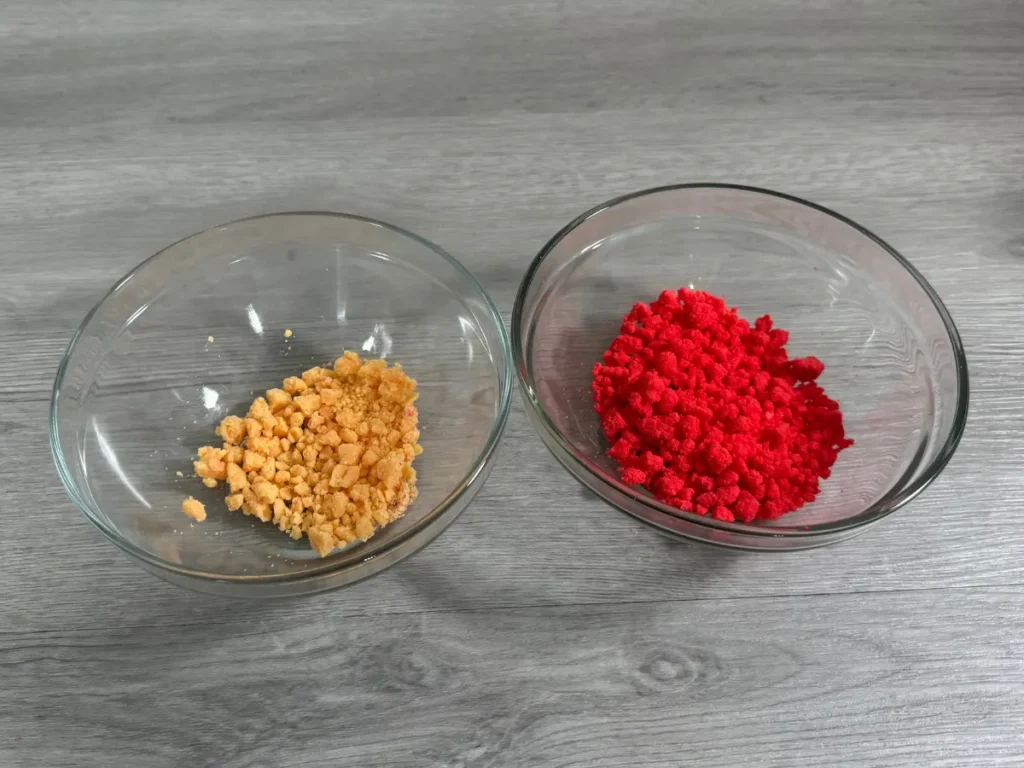
For this project, I combined red with a warm golden-brown color to give the finished candle a strawberry-and-crumb appearance.
Wax Crumbles Formula
I made two separate batches for this project.
The red batch contains 50 grams of soy wax, while the golden-brown batch contains 25 grams.
| Ingredient | Red Crumbles | Golden-Brown Crumbles |
|---|---|---|
| Golden Wax 415 Soy Wax | 50 g (100%) | 25 g (100%) |
| Sugared Strawberry Fragrance Oil | 4 g (8%) | 2 g (8%) |
| Candle Dye | As needed | As needed |
What You’ll Need
Want to make your own wax crumbles?
Ingredients
- Golden Wax 415 soy wax
- Candle-safe fragrance oil
- Candle-safe candle dye
- Silicone cupcake liner or another mold
Equipment
- Digital scale
- Double boiler
- Heat-safe pouring container
- Silicone spatula or stirring utensil
- Knife or scraper
- Paper towel for testing candle color
Candle-making equipment should be kept separate from anything used for food preparation.
Choosing a Mold for Wax Crumbles
You really don’t need a special mold for this project.
I used a silicone cupcake liner because I already had one, but you can use pretty much any mold that makes it easy to remove the wax.
A silicone mold, silicone tray, cupcake liner, or shallow container can all work.
The shape doesn’t matter because we’re going to cut the wax into pieces anyway.
This is one of those projects where I wouldn’t buy a special supply just for the technique.
Use what you already have.
How to Make Wax Crumbles
Step 1: Weigh the Soy Wax
Start by weighing 50 grams of Golden Wax 415 soy wax.
I recommend weighing your wax rather than measuring it by volume because it makes calculating your fragrance oil much easier.
Step 2: Melt the Wax
Place the wax into a heat-safe pouring container and melt it using a double boiler.
Heat the wax until it is completely melted.
Once the wax is completely melted, remove it from the heat.
Step 3: Add Your Candle Color
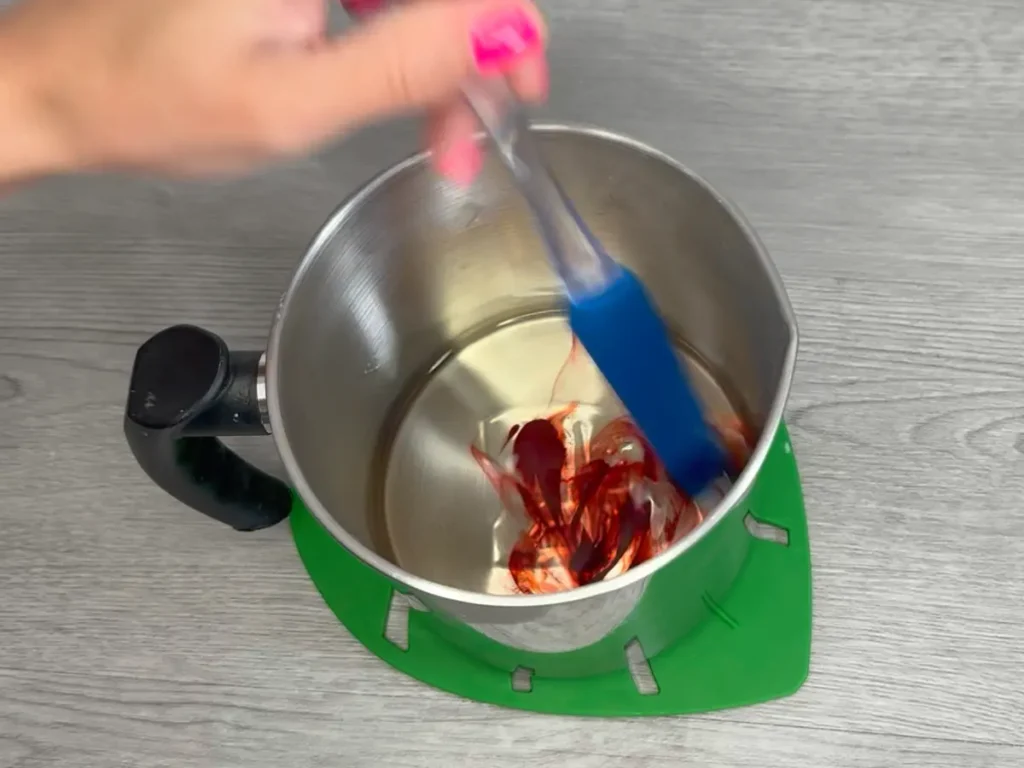
For my first batch, I wanted a really vibrant red.
I used quite a bit of red candle colorant to get the bright color I wanted.
The amount of candle dye you’ll need depends on the particular colorant you’re using, so I wouldn’t recommend copying a specific number of drops from someone else’s project.
Instead, add your color gradually until you get the shade you’re looking for.
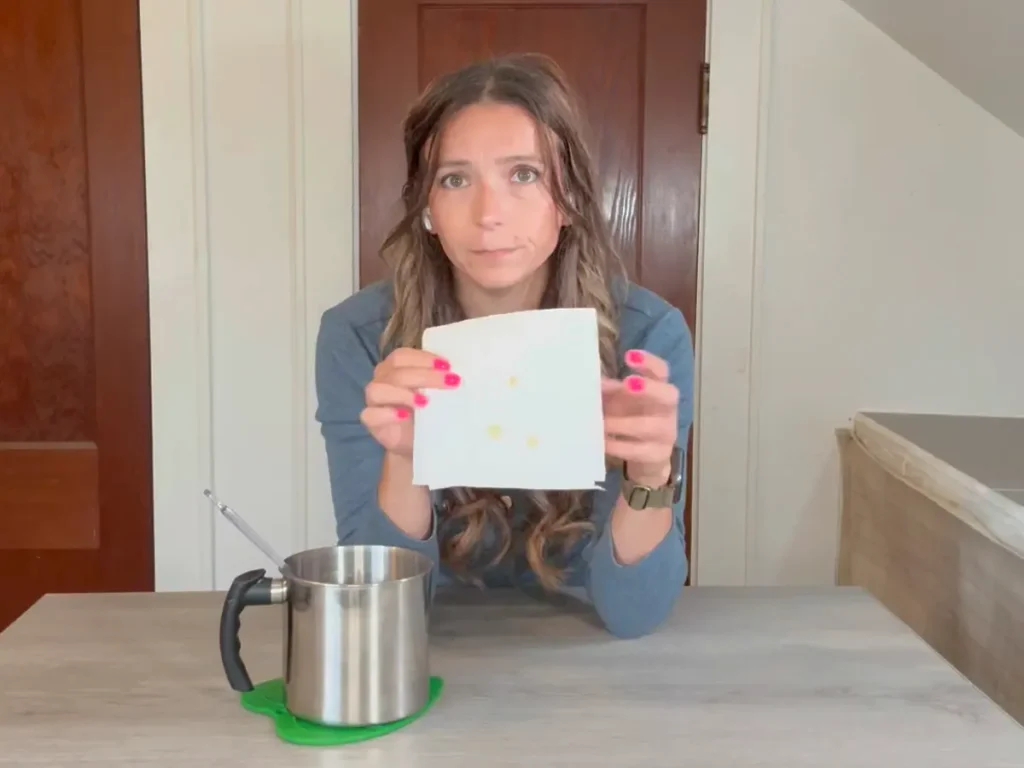
My favorite way to check candle color
If you’re unsure what your color will look like once the wax hardens, put a small amount of the colored wax onto a paper towel.
This gives you a much better idea of what the finished color will look like than trying to judge the color while the wax is completely melted.
I use this trick whenever I’m working with a new candle color.
Step 4: Add the Fragrance Oil
Add 4 grams of Sugared Strawberry fragrance oil
That’s an 8% fragrance load based on the wax weight.
Stir the fragrance oil thoroughly into the melted wax. I like to stir for at least 2 minutes to make sure it is fully combined.
Step 5: Pour the Wax Into Your Mold
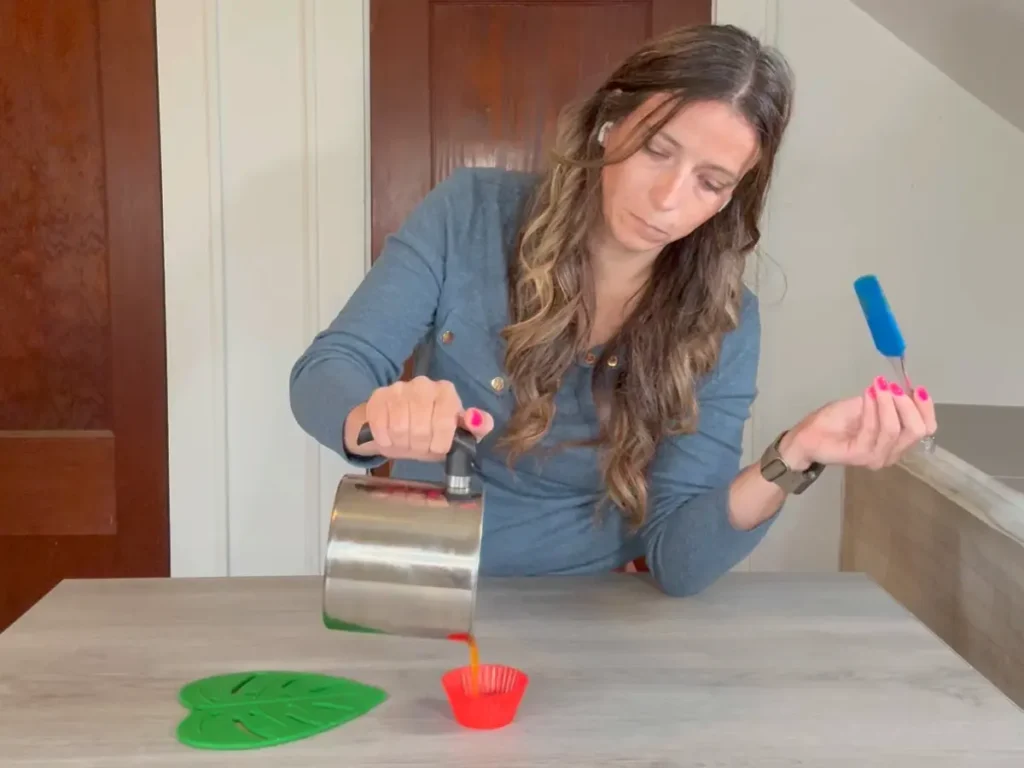
Pour the colored, scented wax into your silicone cupcake liner or other mold.
Here’s where this project is different from making a regular candle. You don’t need to worry about achieving a precise pouring temperature for the finished crumble.
You still want to follow the appropriate heating and fragrance-addition recommendations for your wax and fragrance oil.
But once the wax is prepared, you’re not trying to create a perfectly smooth candle surface.
We’re going to destroy the shape anyway.
Pour the wax into the mold and let it begin to cool.
The Trick to Getting Good Wax Crumbles
This is probably the most important part of the whole process.
Don’t let the wax become completely cold and hard before you start cutting it.
You want it to be solid enough to remove from the mold but still warm enough that you can easily cut it.
You want to watch the wax rather than relying only on a timer.
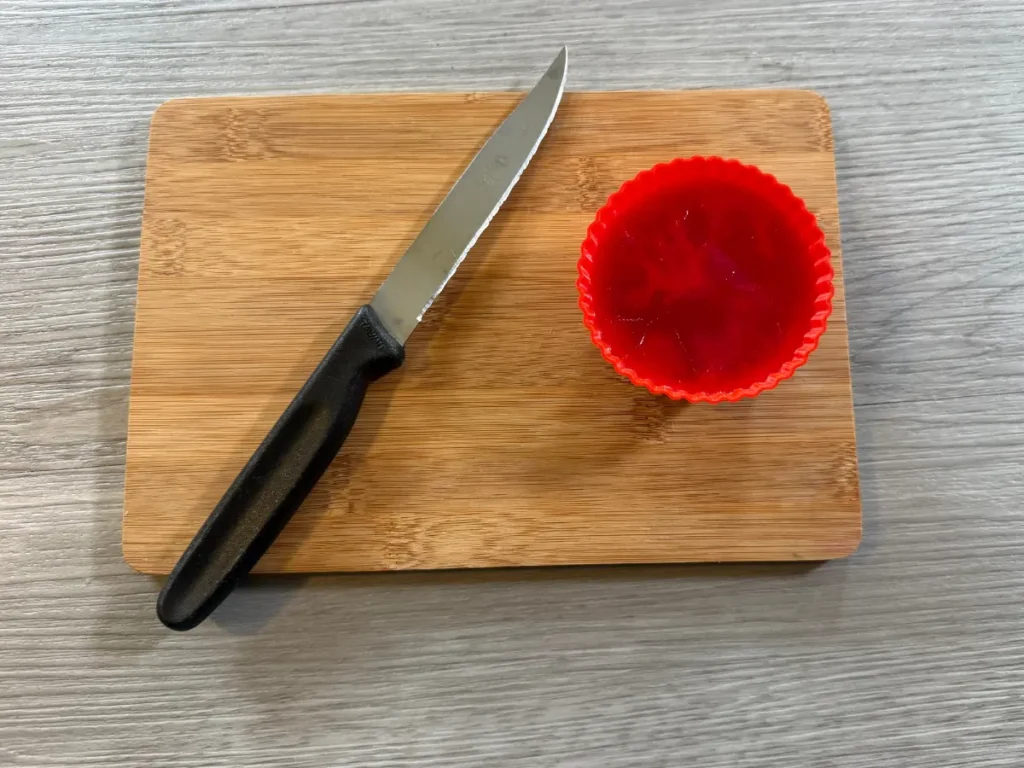
Once it has solidified enough to hold its shape, you’re ready to remove it from the mold. You will notice the mold will still be warm to the touch.
Step 6: Remove the Wax While It’s Still Warm
Once the wax is solid but still slightly warm, carefully remove it from the mold.
Now we’re ready to turn that smooth piece of wax into crumbles.
Step 7: Cut the Wax Into Chunks
Use a knife to cut the wax into chunks.
You can also use a scraper if you’d rather.
Don’t worry about making perfect pieces.
That’s not what we’re looking for.
Cut the wax.
Move the pieces around.
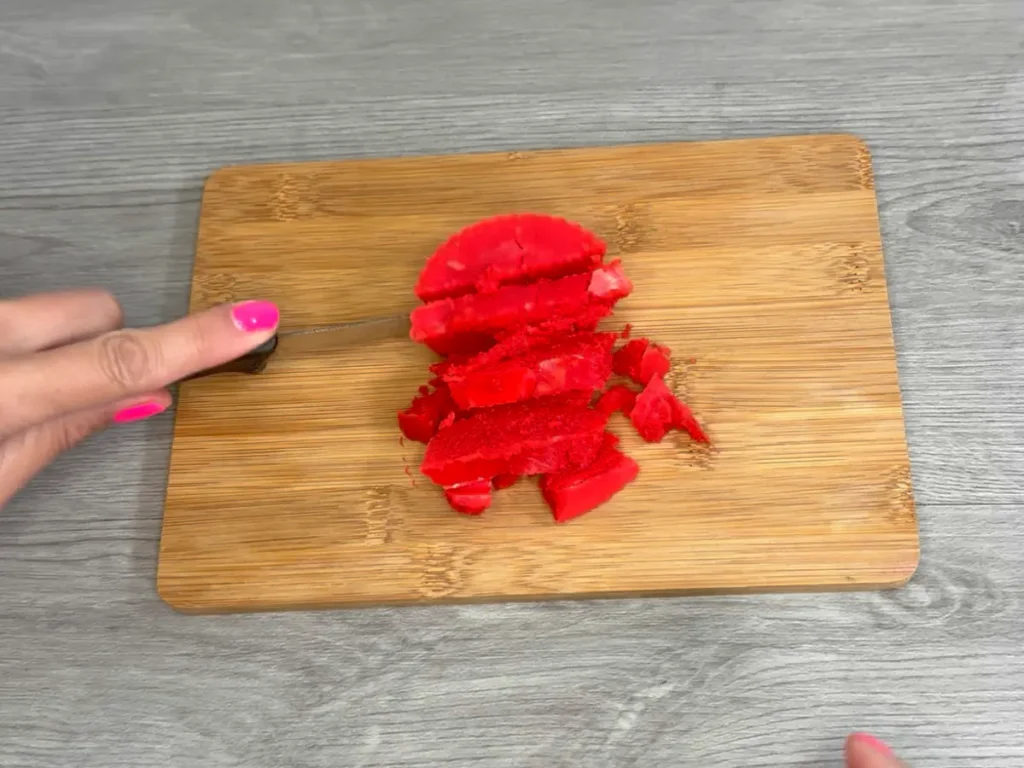
Jostle them together.
Cut again.
As you continue working with the wax, you’ll start getting a mixture of irregular pieces.
Some will be larger.
and some will be smaller.
Some will be more crumb-like.
That’s exactly what we want.
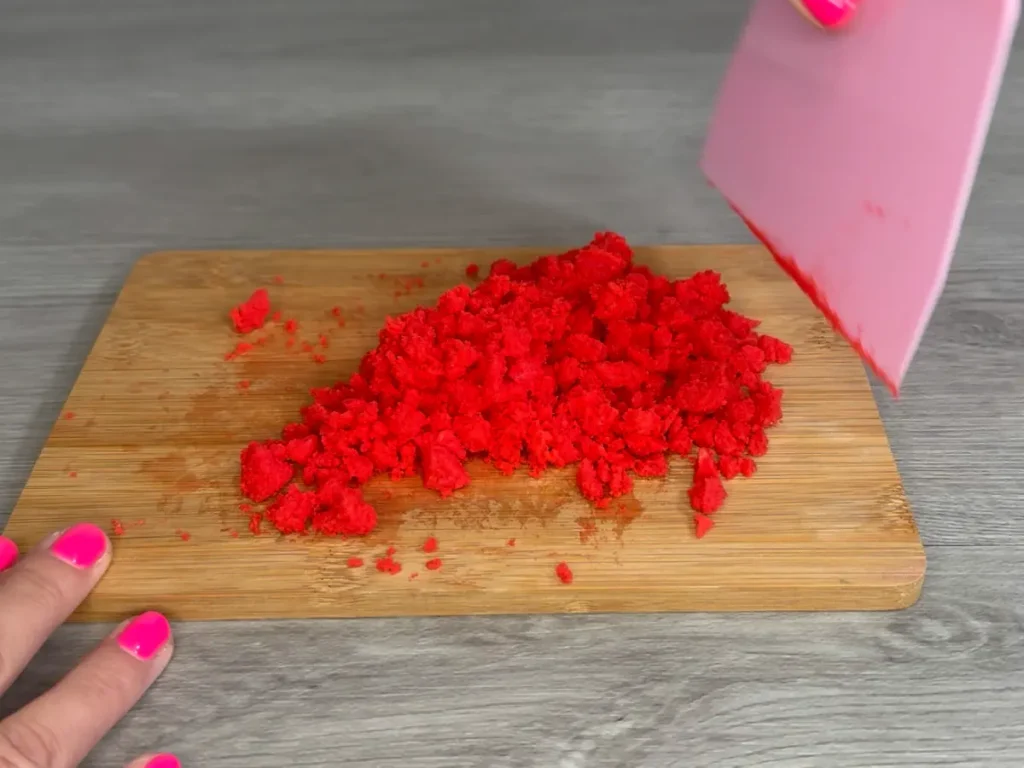
Don’t make the pieces too small.
This is one mistake that’s easy to make.
You may think that smaller is better because you’re making “crumbles,” but you don’t want everything to turn into dust. Unless if that is what you are going for!
The larger pieces help give the finished candle dimension.
A mixture of larger chunks and smaller crumbs looks much more interesting than a container full of tiny pieces.
Step 8: Rough Up Any Smooth Edges
Because I used a cupcake liner, some of my pieces had smooth or slightly ridged edges from the mold.
I didn’t want those pieces to look like they had simply been popped out of a mold.
So I went back and roughened up any edges that looked too smooth or uniform.
You can do this with your knife or scraper.
Then toss the pieces around again.
The goal isn’t perfection.
The more irregular they are, the better they work as crumbles.
Step 9: Make the Golden-Brown Wax Crumbles
For the second color, I used 25 grams of Golden Wax 415 soy wax.
I wanted a warm golden-brown color to mix with the red.
The process is exactly the same.
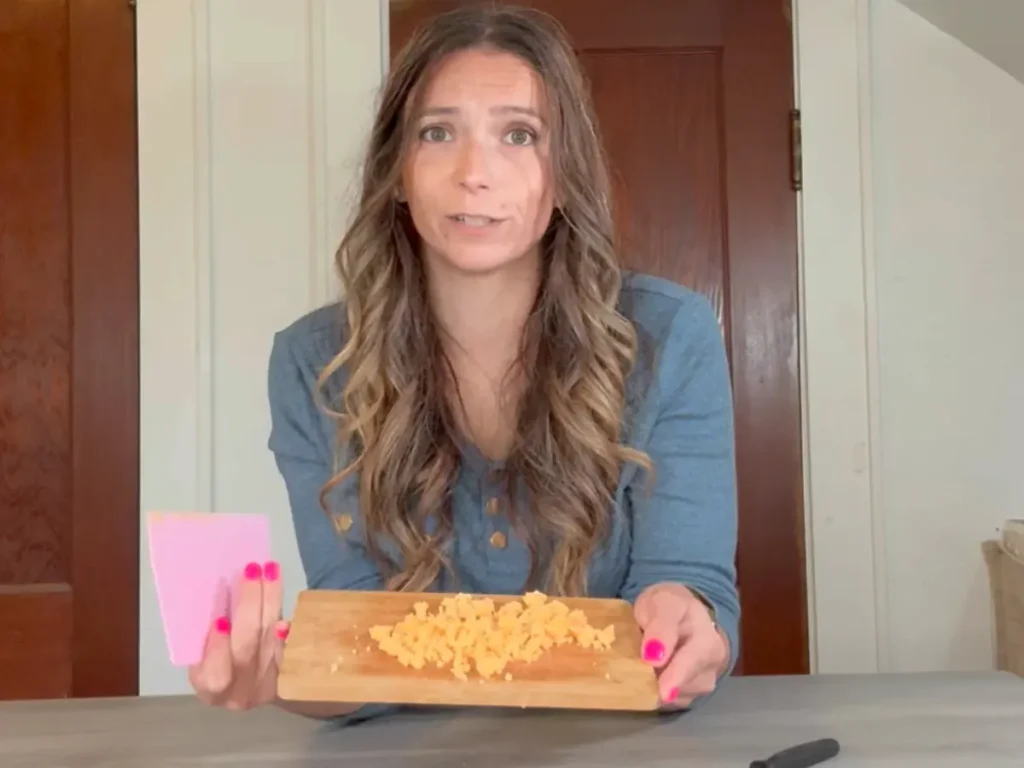
Step 10: Mix the Wax Crumbles
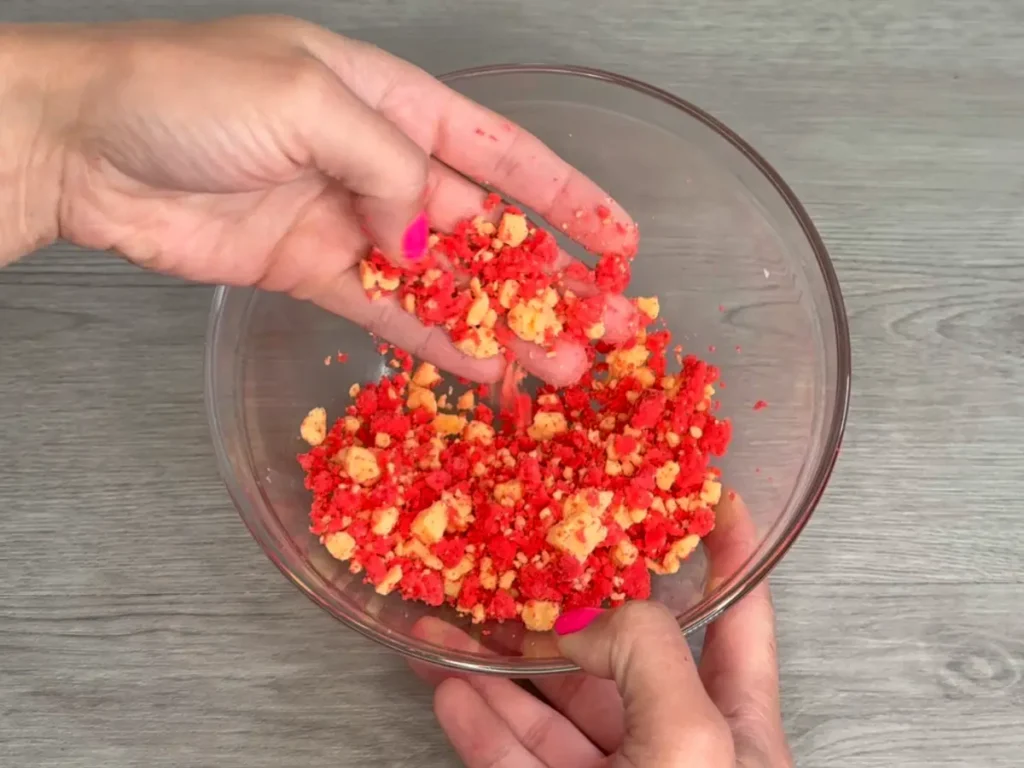
Once both colors have cooled completely, mix them together.
I simply combined the red and golden-brown pieces until I liked the balance between the two colors.
You don’t need an exact ratio.
In fact, I like having some areas with more red and others with more golden-brown.
The variation makes the finished crumbles look much more natural.
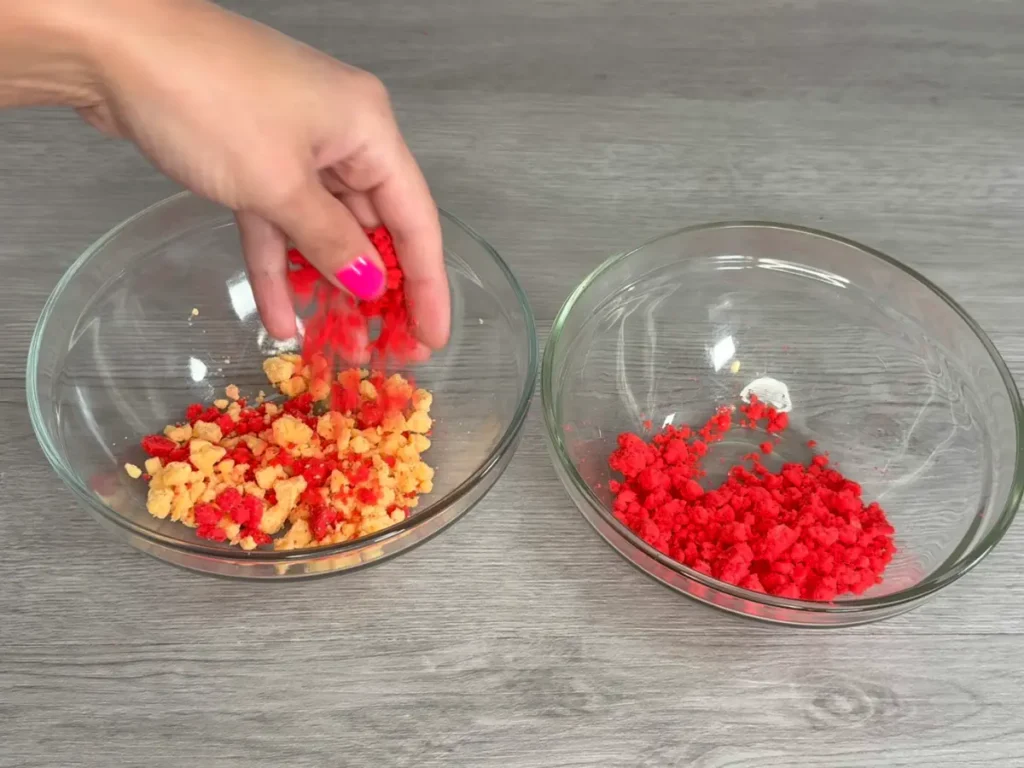
And don’t worry if you don’t use every piece.
I actually had some red crumbles left over from this project.
I’m saving them for another candle.
That’s one of the reasons I like making wax crumbles—they’re easy to keep on hand for future projects.
What Makes Wax Crumbles Look Good?
There are three things that make a big difference in the finished appearance.
Use Different Sizes
Don’t make every piece the same size.
Larger chunks mixed with smaller crumbs create more dimension.
Use Irregular Shapes
The more random the shapes are, the more natural they look when they’re added to a candle.
Rough Up Smooth Edges
If your wax has obvious lines or smooth edges from the mold, break those up.
You want the finished pieces to look like they were naturally crumbled rather than molded into shape.
Use Multiple Colors
When you use multiple colors, it adds some dimension to the crumbles.
What Can You Make With Wax Crumbles?
This is where wax crumbles get really fun.
You can use them in so many different candle designs.
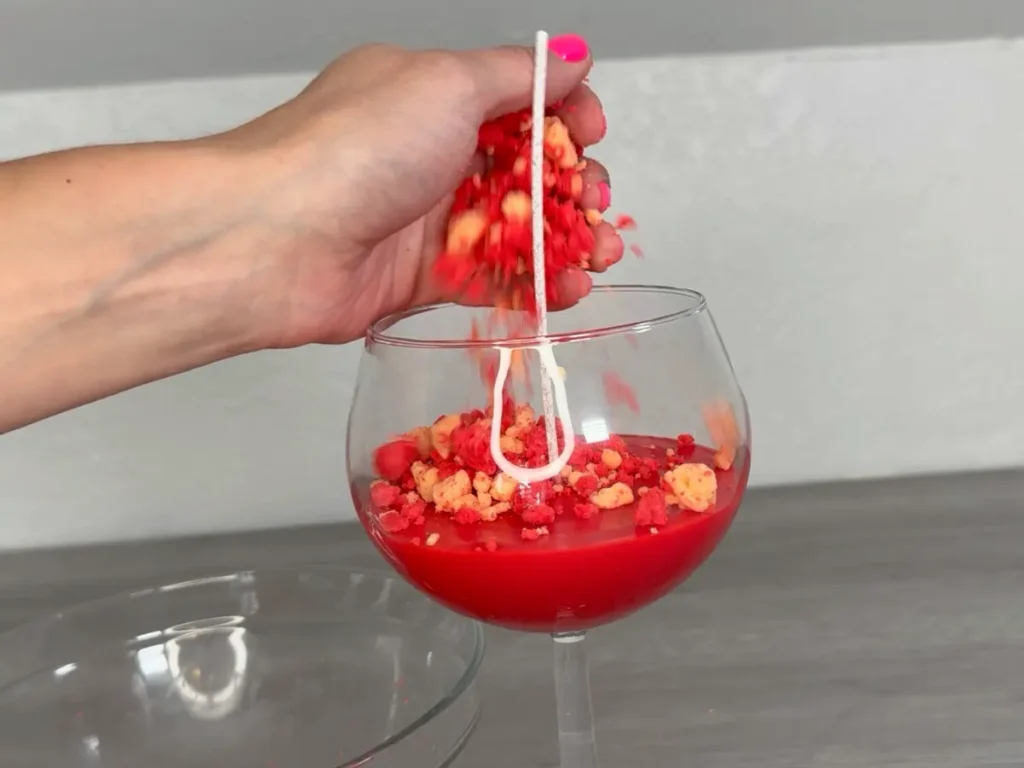
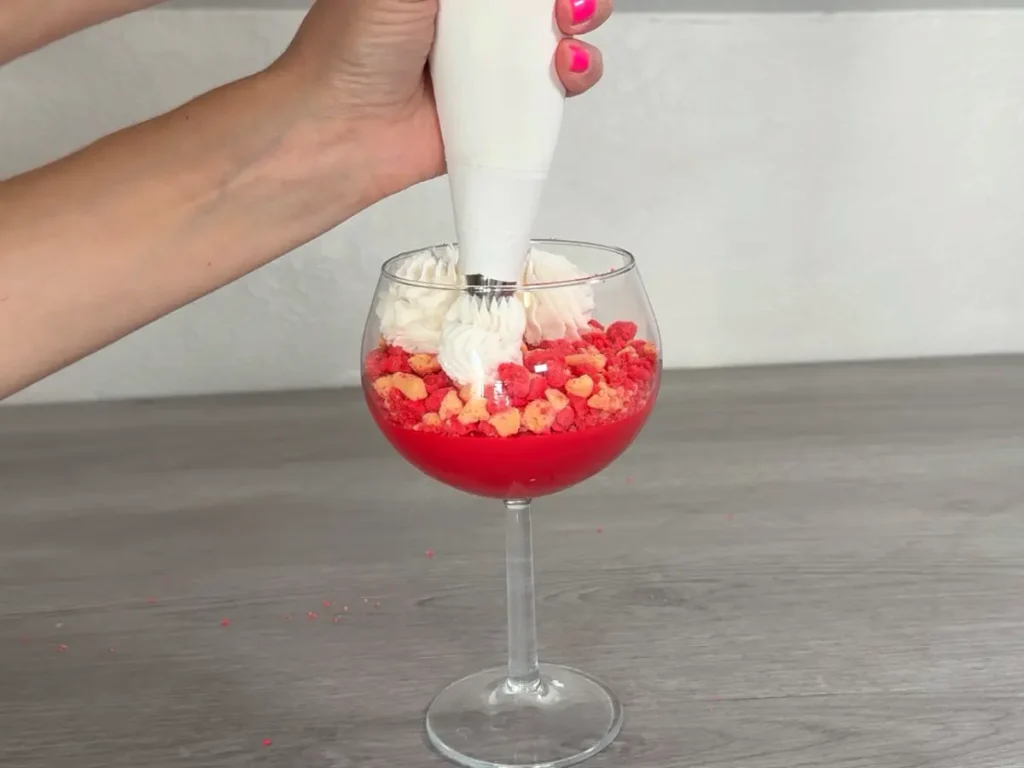
For this project, I used my red and golden-brown crumbles to create a strawberry dessert-inspired candle.
The crumbles created a textured layer underneath the whipped wax topping.
If you want to recreate that type of candle, my How to Make Whipped Soy Wax Candles tutorial walks through making a soy candle with a whipped wax topping and decorative embeds.
You can also learn the actual whipping technique in my How to Whip Candle Wax – Whipped Candle Frosting.
Once you know how to make the crumbles, you can experiment with different colors and themes.
Try:
- Red and pink for strawberry candles
- Brown and cream for chocolate or cookie candles
- Yellow and orange for cereal-inspired candles
- Green and red for Christmas candles
- Purple and pink for berry-inspired candles
- Orange and brown for fall candles
- White and brown for cookie or vanilla designs
The possibilities are really only limited by the candle you’re trying to create.
Can You Use Leftover Candle Wax?
Absolutely.
This may actually be one of my favorite uses for wax crumbles.
If you have leftover colored wax from another candle project, you can save it and turn it into crumbles later.
You don’t need very much wax to make a useful amount.
Just remember to keep track of what’s already in the wax.
Tips for Making Better Wax Crumbles
Don’t wait until the wax is completely cold.
Slightly warm, solid wax is much easier to cut than fully hardened wax.
Don’t make every piece tiny.
A combination of larger chunks and smaller crumbs looks better.
Don’t worry about perfect shapes.
The irregular pieces are the whole point.
Rough up molded edges.
If you can clearly see the shape of your mold, break those edges up.
Test your colors.
A small amount of wax on a white paper towel can help you see the cooled color before you commit to the whole batch.
Keep your leftover crumbles.
You don’t have to use everything in one project.
Save extra pieces for your next candle.
Keep notes.
If you make a color combination you love, write down the wax amount, colorant, fragrance, and any other details.
That way you can recreate it later.
Wax Crumble Troubleshooting
My wax is too hard to cut. What should I do?
If the wax has become completely hard, it may be difficult to cut cleanly.
Warm it up slightly before trying again.
For the next batch, remove it from the mold while it is solid but still slightly warm.
My crumbles are too small.
Stop cutting!
If you’ve already made a batch that’s too small, you can mix those tiny pieces with larger pieces from another batch.
You can also save the smaller pieces for a project where you want a finer texture.
My pieces still look like they came from the mold.
Look for smooth or ridged edges created by your mold.
Use your knife or scraper to break those edges up, then toss the pieces together again.
My candle dye doesn’t look like the color I wanted.
Don’t judge the final color entirely by looking at melted wax.
Try the paper towel test.
Place a small amount of colored wax onto a white paper towel and let it cool.
This gives you a much better idea of the finished color.
Can I use a different type of wax?
You can experiment with other candle waxes, but expect the process to change.
Different waxes have different hardness and cooling characteristics.
Some may be softer and easier to cut, while others may become harder and more difficult to break apart.
If you’re using a different wax, start with a small batch so you can see how it behaves.
Using Wax Crumbles in a Candle
Wax crumbles are decorative wax, but once you incorporate them into a candle that will actually be burned, they become part of the finished candle.
That means you can’t assume a candle will burn properly just because the individual components are made from candle wax.
The finished candle still needs to be tested.
The wax, fragrance oil, fragrance load, colorant, container, wick, amount of decorative wax, and placement of those elements can all affect how the candle performs.
If you’re making these candles to sell or give as gifts, test the complete finished candle rather than relying on how the individual components behave on their own.
If you’re new to candle testing, my Candle Making Supplies for Beginners section is a good place to explore the basics and other candle-making tutorials.
Frequently Asked Questions
What are wax crumbles used for?
Wax crumbles are primarily used as decorative elements in candles. They can add color, texture, and dimension to dessert-inspired candles, layered designs, and candles with whipped wax toppings.
Do I need a special mold to make wax crumbles?
No. You can use a silicone cupcake liner or another suitable mold. Since the wax will be cut and broken apart, the shape of the original mold doesn’t matter very much.
How big should wax crumbles be?
There isn’t one exact size they need to be. I recommend making a mixture of sizes rather than cutting everything into tiny pieces.
Larger chunks mixed with smaller crumbs give the finished candle more texture.
Do wax crumbles need to be scented?
No. You can make them scented or unscented.
Can I make wax crumbles from leftover wax?
Yes. Wax crumbles are a great way to use small amounts of leftover colored wax.
Can I use wax crumbles in any candle?
You can experiment with them in different candle designs, but the complete finished candle should be properly tested if you intend to burn it.
Can I make wax crumbles in different colors?
Definitely.
You can make them in virtually any candle-safe color combination. Try coordinating your crumbles with the fragrance, season, holiday, or overall candle design.
Why shouldn’t I make the crumbles too small?
Very small pieces can lose the chunky texture that makes wax crumbles interesting.
A mixture of larger chunks and smaller pieces usually gives you a more dimensional finished design.
More Candle-Making Projects
Once you start experimenting with decorative candle techniques, there are a lot of directions you can take this.
Want to make whipped wax?
Learn How to Whip Candle Wax and Make Whipped Candle Frosting.
Want to make a full whipped soy candle?
Try How to Make Whipped Soy Wax Candles.
Love realistic dessert candles?
Check out my DIY Coffee Latte Candle, which uses whipped wax and decorative details to create a realistic coffee-inspired candle.
Want to experiment with candle color?
My How to Make an Ombre Layered Candle tutorial shows how to create multiple shades of color using Soy Wax 415.
You can also browse the DIY Candle Making collection for more candle recipes and techniques.
Final Thoughts
I really like wax crumbles because they take something that doesn’t need to be perfect and turn it into a useful candle-making technique.
You don’t need a special mold.
You don’t need perfectly shaped pieces.
And you don’t need to worry about making the wax surface flawless.
You simply melt the wax, add your color and fragrance, pour it into a mold, let it become solid but still slightly warm, and start cutting.
The key is to keep the pieces irregular and use a mixture of sizes.
Printable Wax Crumble Recipe

How to Make Wax Crumbles
Ingredients
Red Wax Crumble
- 50 grams Golden Wax 415 Soy Wax
- 4 grams Sugared Strawberry Fragrance Oil
Golden-Brown Wax Crumble
- 25 grams Golden Wax 415 Soy Wax
- 2 grams Sugared Strawberry Fragrance Oil
Instructions
- Weigh the Soy WaxStart by weighing 50 grams of Golden Wax 415 soy wax.
- Melt the WaxPlace the wax into a heat-safe pouring container and melt it using a double boiler.Heat the wax until it is completely melted. Once the wax is completely melted, remove it from the heat.
- Add Your Candle ColorAdd your color gradually until you get the shade you're looking for.
- Add the Fragrance OilAdd 4 grams of Sugared Strawberry fragrance oil
- Pour the Wax Into Your MoldPour the colored, scented wax into your silicone cupcake liner or other mold.
- Remove the Wax While It's Still WarmOnce the wax is solid but still slightly warm, carefully remove it from the mold.
- Cut the Wax Into ChunksUse a knife to cut the wax into chunks.
- Make the Golden-Brown Wax CrumblesFor the second color, I used 25 grams of Golden Wax 415 soy wax and 2 g Fragrance Oil.
- Mix the Wax CrumblesOnce both colors have cooled completely, mix them together.